Loading ...
Loading ...
Loading ...
PREPARATIONS ➤ a Installation En 18
• The SPM-K30 may not be available in some countries or regions.
• When the unit will be installed using the wall mount bracket, all installation work should be performed by a
qualified contractor or experienced retail staff. The customer should not attempt to install the unit
themselves. Improper installation may cause the unit to fall, resulting in personal injury.
• Installation must be secure enough to bear the weight of the unit and the wall mount bracket, possibly for
years to come, and must also be secure enough to withstand vibrations, such as those caused by
earthquakes. Improper installation may cause the unit to fall, resulting in personal injury.
• To prevent the unit from falling, attach it to a wall constructed of drywall (plasterboard).
• Be sure to use screws capable of supporting the weight of the wall mount bracket and the unit (with steps 2
and 7). Using items other than the specified screws, such as shorter screws, nails, or double-sided tape,
may cause the unit to fall, resulting in personal injury.
• To ensure safety, all screws must be tightened securely. Loose screws may cause the unit to fall, resulting
in personal injury.
• Be sure to leave adequate space for ventilation around the unit so that heat generated by the unit is allowed
to dissipate. Failure to provide adequate space around the unit may cause the unit to overheat internally,
resulting in a fire.
• Do not lean on the unit or apply excessive force to the top of the unit. Doing so may cause the unit to fall,
resulting in personal injury.
• Fix cables in place so that they will not become loose. If a foot or hand becomes accidentally entangled in,
or catches on, a loose cable, the unit may fall, resulting in personal injury.
• Once the unit is installed, safety checks should be conducted on a regular basis. When the unit is used
over an extended period of time, screws can become loose and the installation can weaken due to the
passage of time, vibrations, etc.
• Note that Yamaha cannot be held liable for accidents, including falling of the unit, resulting from improper
installation of the unit, or for damage to walls.
1
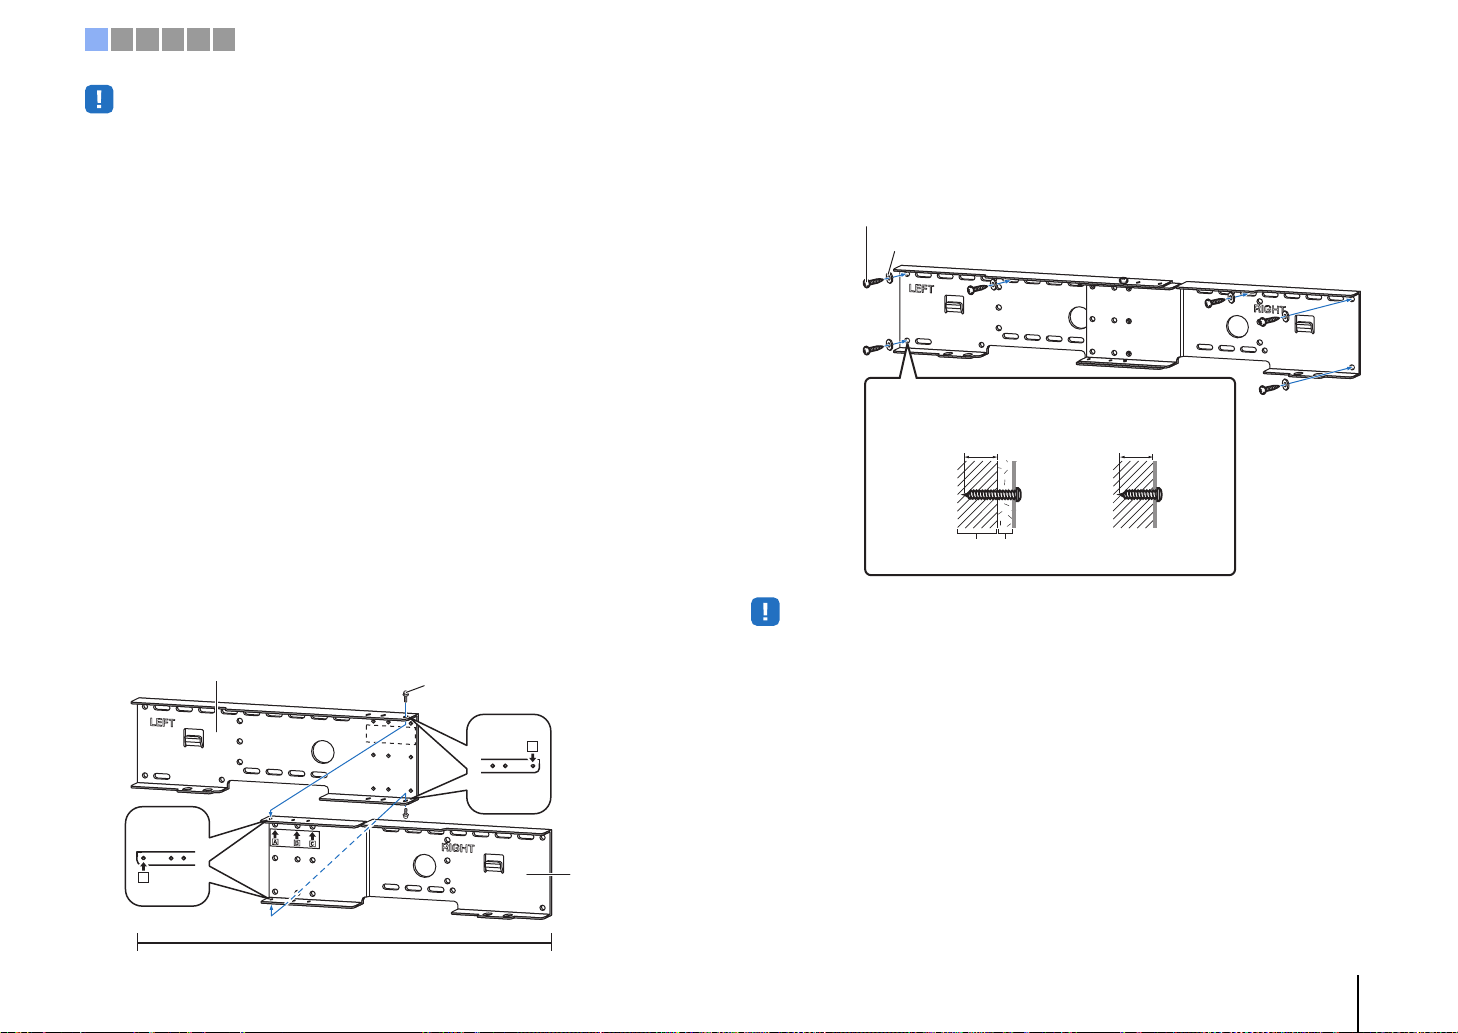
Assemble the large wall mount bracket.
Align the screw holes A on the left bracket with those on the right bracket, and
tighten the screws.
2
Attach the wall mount bracket assembled in step 1 to the wall.
In order to secure the unit to the wall, the bracket must first be attached to the
wall in a manner suited to the structure and quality of the wall.
• In order to secure the unit to the wall, drive six (or more) tapping screws from the outside through the holes
in the wall mount bracket.
A
A
730 mm
Large wall mount bracket (left)
Large wall mount
bracket (right)
Screw (M4; supplied with the SPM-K30)
4mm self-tapping screws (available from third-party manufacturers)
Washers (available from third-party manufacturers)
Installing into a
dray wall
Installing directly
into a wall, etc.
25 mm or more
Dry wall
25 mm or more
Beam, etc.
1 2 3 4 5 6
Loading ...
Loading ...
Loading ...