Loading ...
Loading ...
Loading ...
PREPARATIONS ➤ a Installation En 16
This unit’s AUTO SETUP (p. 30) can be used to automatically adjust sound beams to
achieve the optimal surround playback environment according to the listening room
setup. In addition to using AUTO SETUP, sound beams can be adjusted manually to
achieve surround sound effects best suited to the listening room setup when the unit is
installed as described below.
Installing the unit near a corner of the room
When installing the unit near a corner of the room as shown in the illustration below,
front channel sound may seem to come from an unnatural direction if beam settings are
configured using AUTO SETUP.
Should this occur, adjust the left and right front channels using “Image Location” (p. 72)
in the setup menu to achieve more natural sound.
Installing the unit in an irregularly shaped room
When the unit is installed in a room that is not rectangular, sound beams may not be
properly reflected off the walls as shown in the illustration below.
Should this occur, perform AUTO SETUP, and then adjust the angle of beam from the
channel from which sound is not properly heard using “Horizontal Angle” (p. 70) in the
setup menu to achieve even distribution of sound.
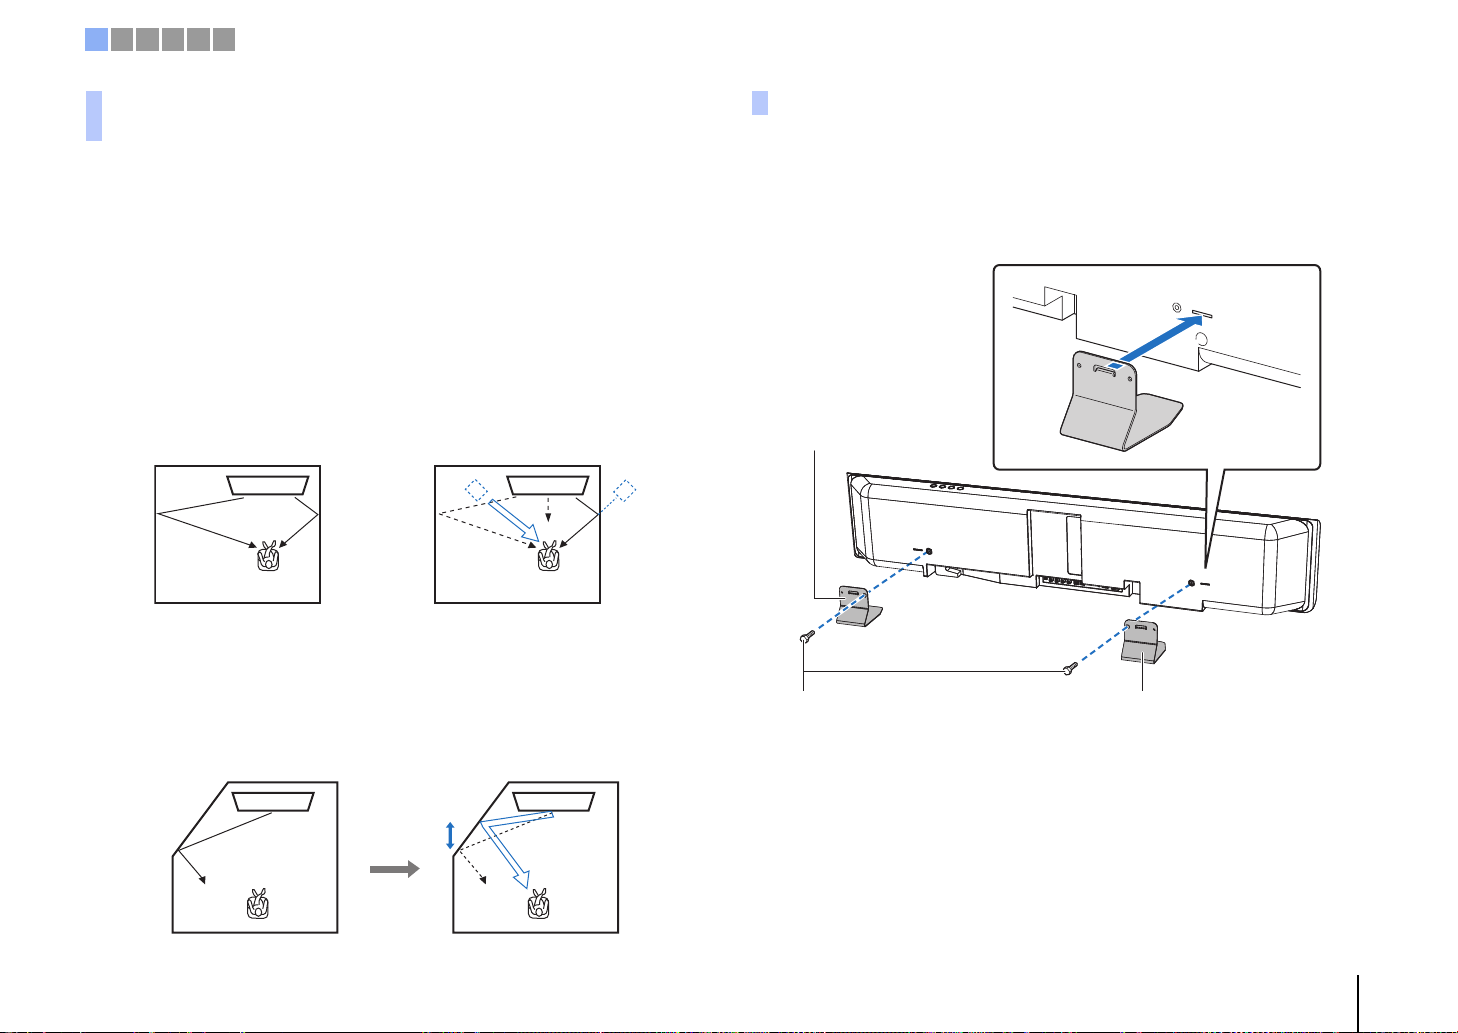
Install the stands (supplied) on the bottom of the unit. Align and insert the protrusion on
the stands into the holes on the rear panel of the unit as shown in the illustration, and
then tighten the screws (supplied) to lock the stands in place. The stands need not be
installed when the unit is mounted on a wall using the optional Wall Mount Bracket
SPM-K30.
Adjusting sound beams to achieve optimal surround
sound effects
Left front channel adjusted
When left front channel sound is
unnatural
Installing the stands
Stand (supplied)
Screws (supplied) Stand (supplied)
1 2 3 4 5 6
Loading ...
Loading ...
Loading ...