Loading ...
Loading ...
Loading ...
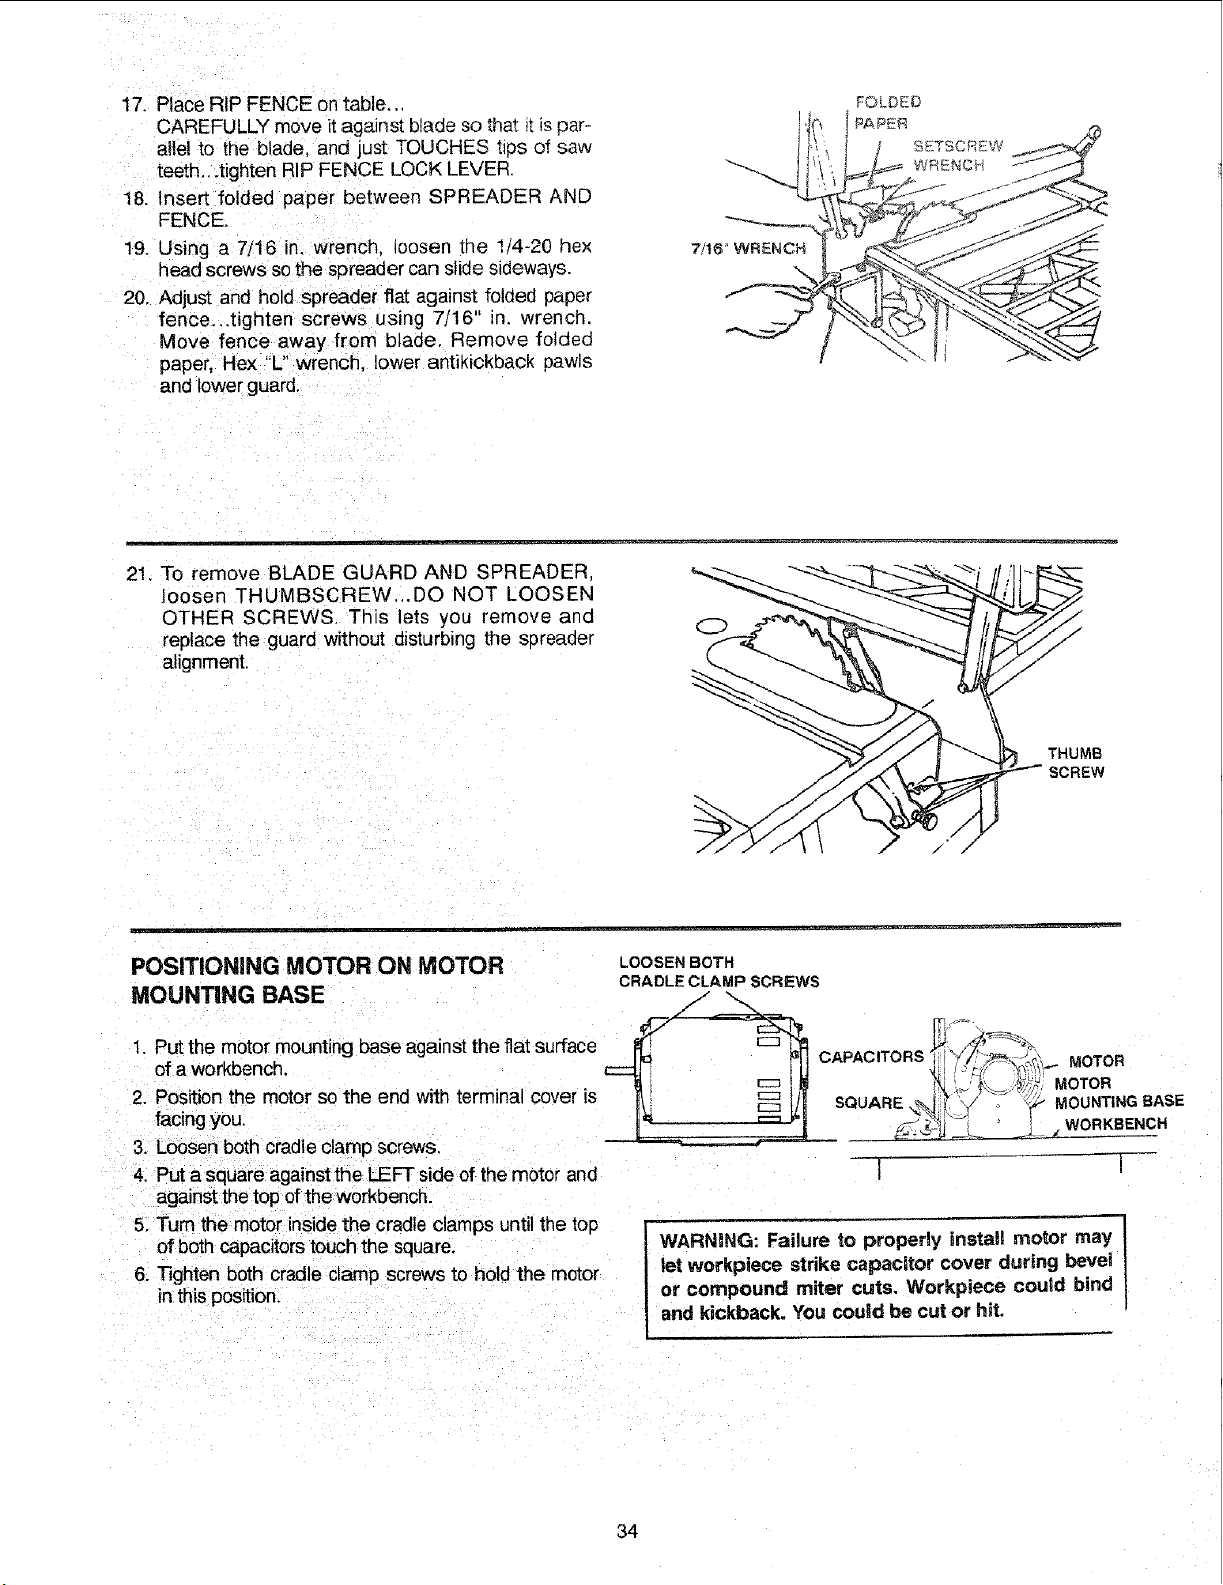
17.PlaceRIPFENCEontable.,,
CAREFULLYmoveitagainstbladesothat_tispar-
alle!to theblade,andjustTOUCHEStipsof saw
teeth...tightenRIPFENCELOCKLEVER.
18.InsertfoldedpaperbetweenSPREADERAND
FENCE.
19.Usinga 7/16in.wrench._oosenthe 1/4-20hex
headscrewssothespreadercanslidesideways.
20.Adjustandholdspreaderflatagainstfoldedpaper
fence...tightenscrewsusing7/16"in. wrench.
Movefenceawayfromblade.Removefolded
paper,He)("L" wrench, lower antikickback pawls
and lower guard.
7/16 WRENCH
\
FOLDED
21. To remove BLADE GUARD AND SPREADER,
loosen THUMBSCREW_.DO NOT LOOSEN
OTHER SCREWS. This lets you remove and
replace the guard without disturbing the s_)reader
alignment.
THUMB
SCREW
POSITIONING MOTOR ON MOTOR
MOUNTING BASE
1, Put the motor mounting base against the fiat surface
of a workbench.
2. Position the motor so the end with terminal cover is
facing you.
3. Loosen both cradle clamp screws,
4. Put a square against the LEFT side of the motor and
against the top of the workbench.
5. Turn the motor inside the cradle clamps until the top
of both capacitors touch the square.
6. Tighten both cradle clamp screws to hold the motor
in this position.
LOOSEN BOTH
CRADLE CLAMP SCREWS
CAPACWORS t l I/"L._,-_,,_,,_%_. MOTOR
_-];4-_, _ k---Z- WORKBENCH
1 !
WARNING: Failure to properly install motor may ]
let werkpiece strike capacitor cover during bevet |
or compound miter cuts. Workpiece could bind l
and kickback. You could be cut or hit.
34
Loading ...
Loading ...
Loading ...