Loading ...
Loading ...
Loading ...
iNSTALLiNG TABLE EXTENSION
BRACKETS
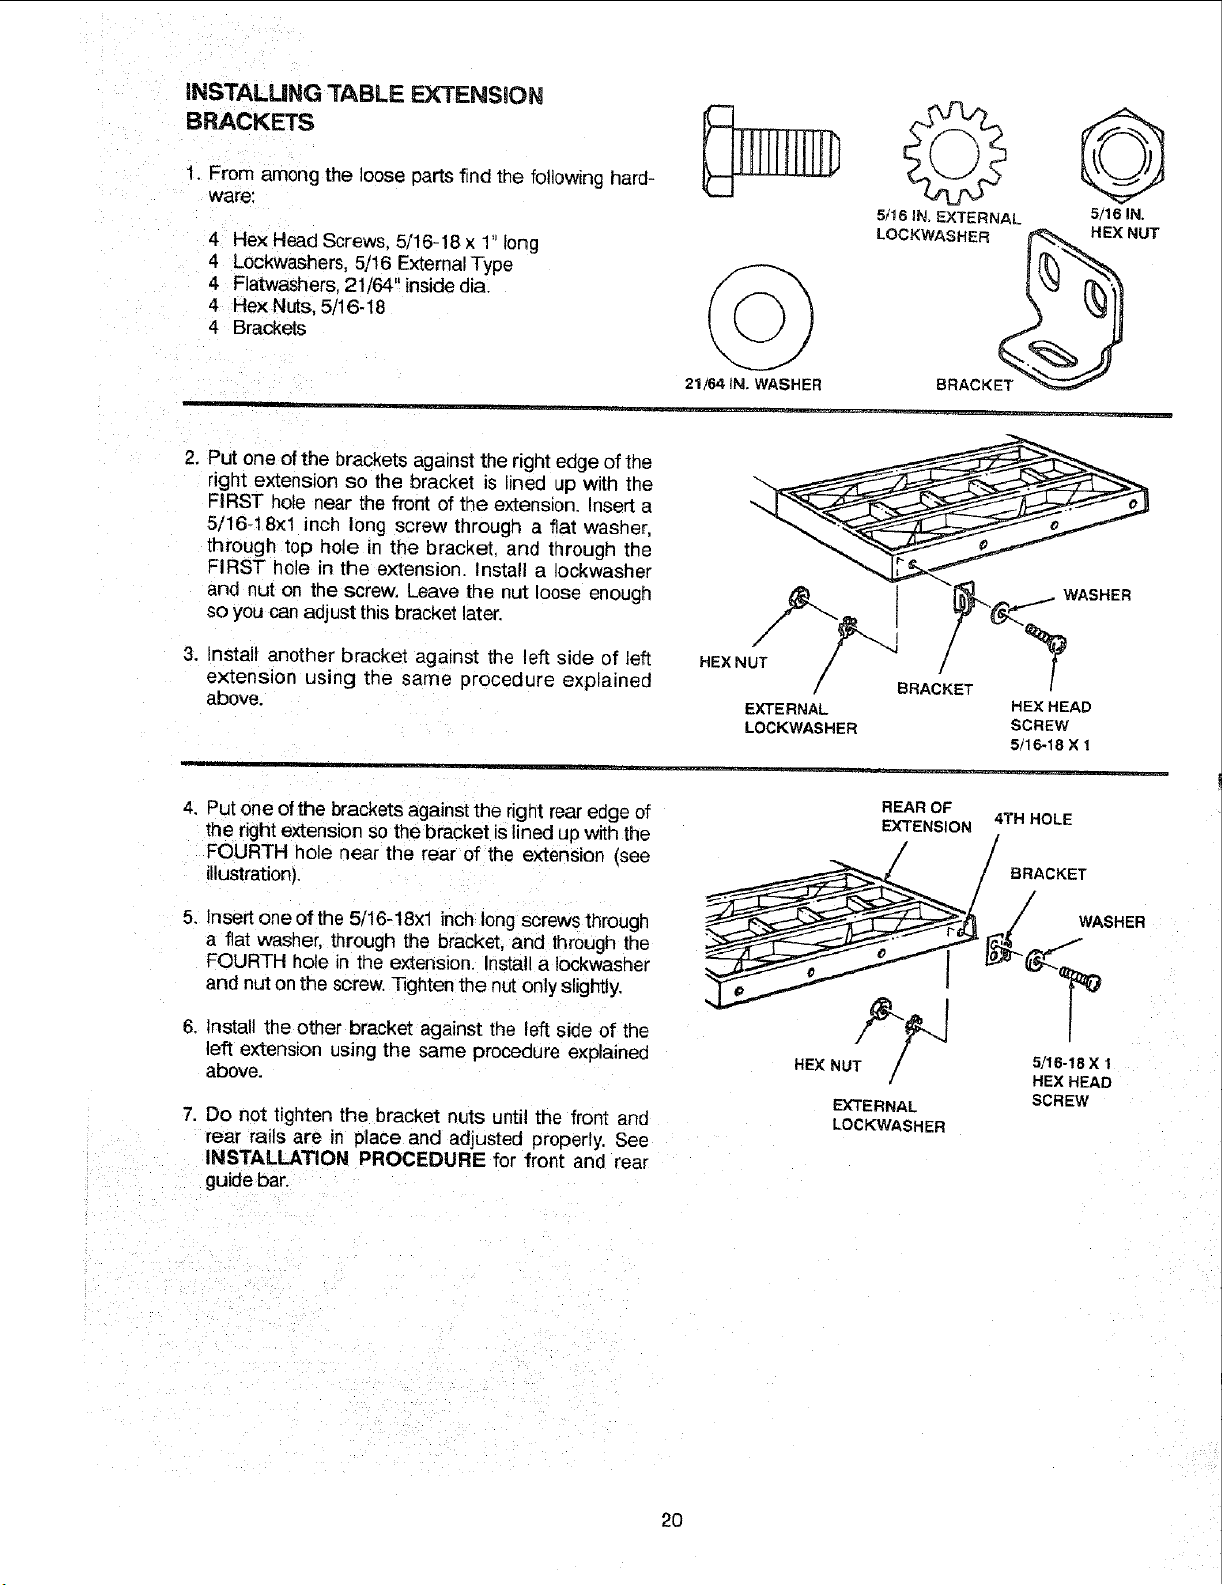
1. From among the loose parts find the following hard-
ware:
4 Hex Head Screws. 5/16-18x 1" long
4 Lockwashers, 5/16 External Type
4 Flatwashers. 21/64" inside dia.
4 Hex Nuts, 5/16-18
4 Brackets
21/64 IN. WASHER
5/16 IN, EXTERNAL 5/16 IN.
2. Put one of the brackets against the right edge of the
right extension so the bracket is lined up with the
FIRST hole near the front of the extensior Insert a
5/16-18xl inct_ long screw through a fiat washer,
through top hole in the bracket, and through the
FIRST hole in the extension. Install a Iockwasher
and nut on the screw. Leave the nut loose enough
so you can adjust this bracket later.
3. tnstalt another bracket against the left side of left
extension using the same procedure explained
above.
HEX NUT /
/ BRACKET
EXTERNAL HEX HEAD
LOCKWASHER SCREW
5tl 6-18 X 1
4. Put one of the brackets against the right rear edge of
the right extension so the bracket is lined up with the
FOURTH hole near the rear of the extension (see
illustration).
REAR OF
EXTENSION 4TH HOLE
BRACKET
5. Insert one of the 5/16-18xl inch long screws through
a fiat washer, through the bracket, and through the
FOURTH hole in the extension. Install a Iockwasher
and nut on the screw. Tighten the nut only slightly.
6. Install the other bracket against the left side of the
left extension using the same procedure explained
above.
7. Do not tighten the bracket nuts until the front and
rear rails are in place and adjusted properly. See
INSTALLATION PROCEDURE for front and rear
guide bar.
HEX NUT_/_
EXTERNAL
LOCKWASHER
WASHER
5/16-18 X 1
HEX HEAD
SCREW
2O
Loading ...
Loading ...
Loading ...