Loading ...
Loading ...
Loading ...
ATTACHmNG AND ASSEMBUNG
TABLE EXTENSmONS
WARNING: Stock table extensions must be
installed. They hetp support the fence rail. An
unsupported rail can twist. Twisted rail can mis-
aiign fence. A misaligned fence can cause bind-
ing or kickback. You could be hit or cut.
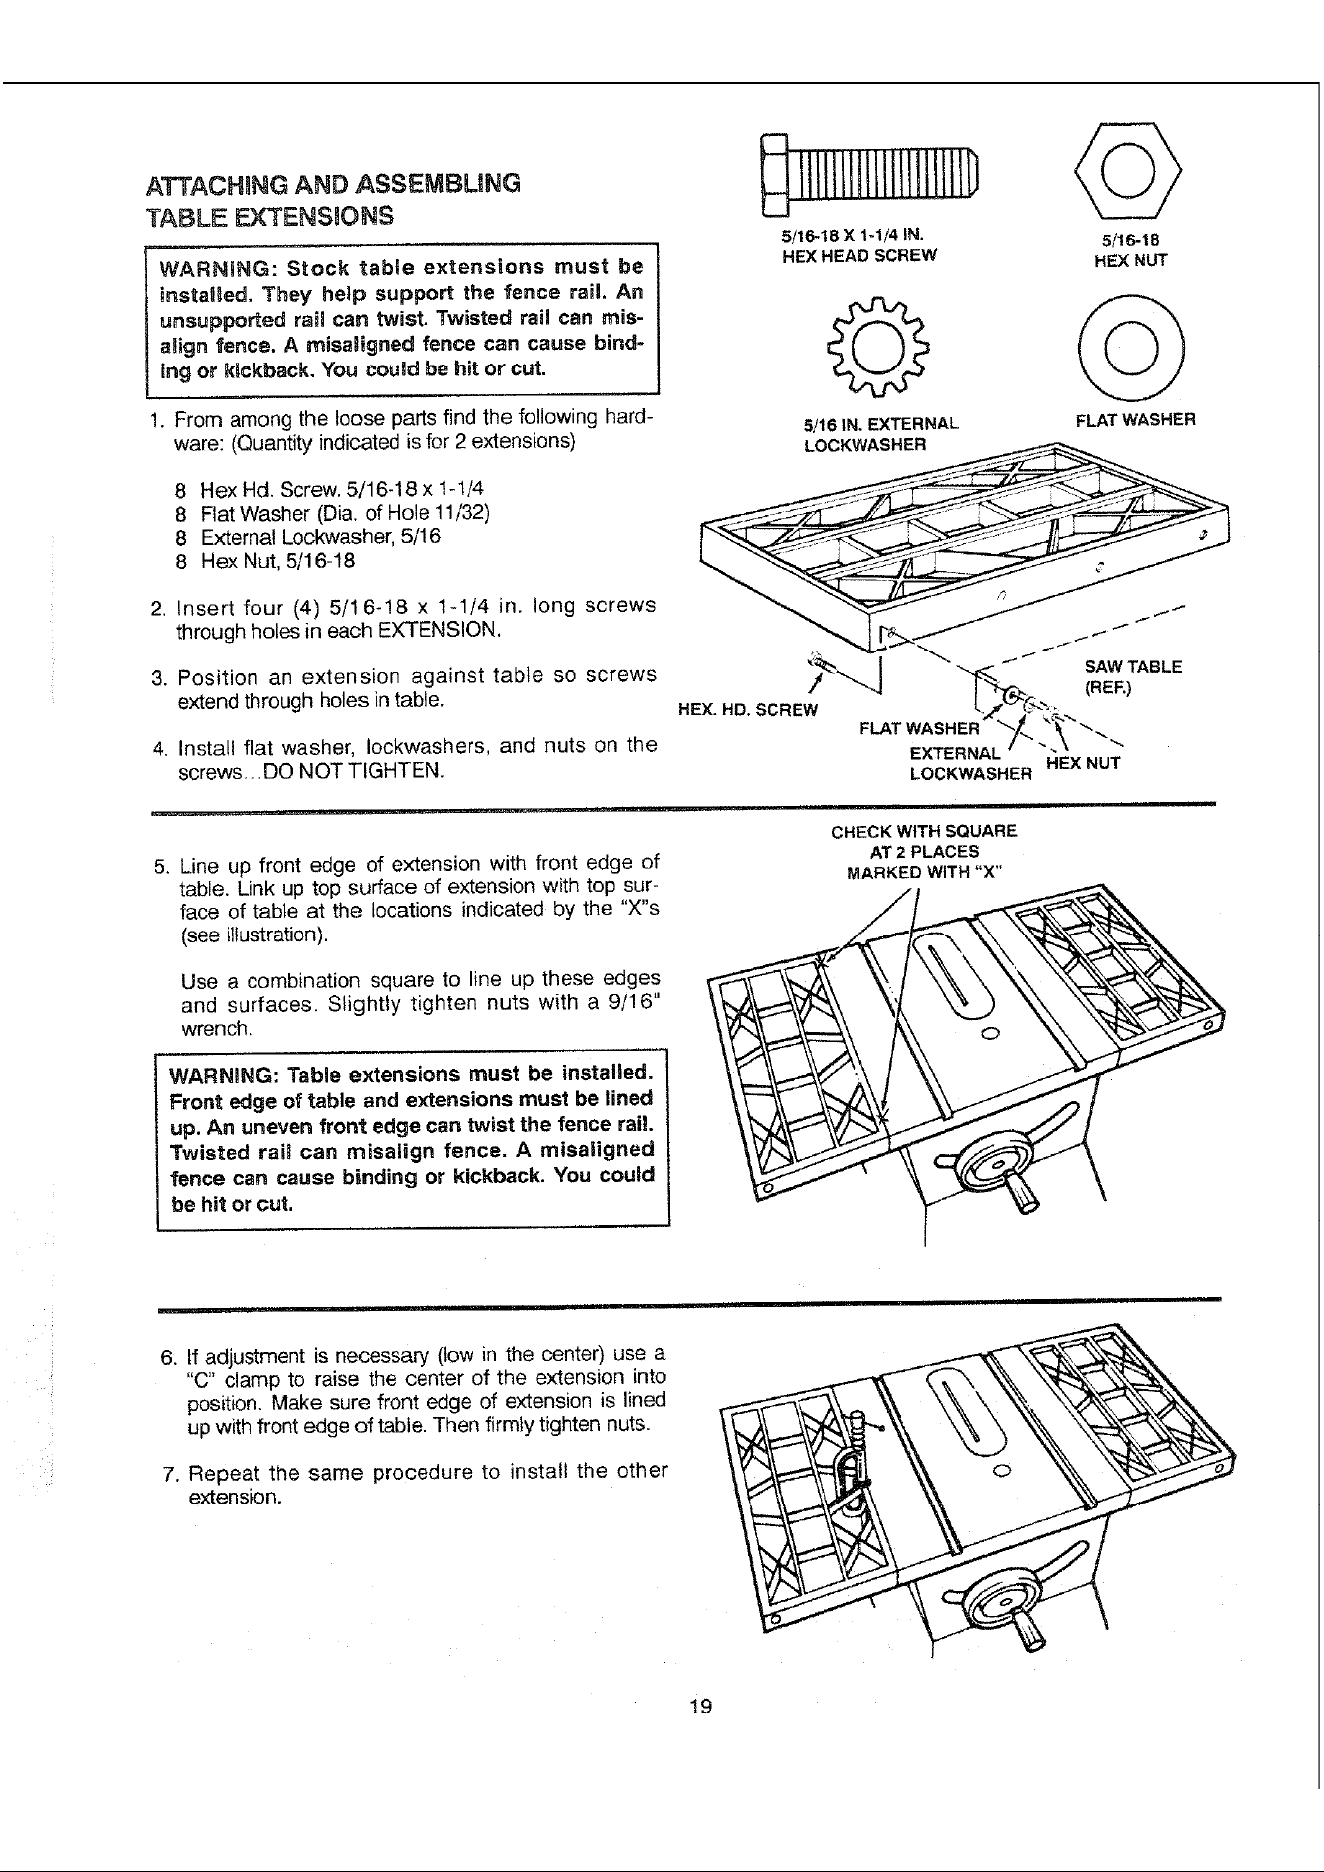
1. From among the loose parts find the following hard-
ware: (Quantity indicated is for 2 extensions)
8 Hex Hd. Screw. 5/16-18 x 1-!/4
8 Flat Washer (Dia. of Hole 11/32)
8 External Lockwasher, 5/16
8 Hex Nut, 5/16-18
2. Insert four (4) 5/16-18 x 1-1/4 in. long screws
through holes in each EXTENSION.
3. Position an extension against table so screws
extend through holes in table.
4. Install flat washer, Iockwashers, and nuts on the
screws... DO NOT TIGHTEN.
1111111111111i!111111)
5/16-18 X 1-1/4 IN.
HEX HEAD SCREW
5/16-18
HEX NUT
Q
5/16 IN. EXTERNAL
FLAT WASHER
.
Line up front edge of extension with front edge of
table. Link up top surface of extension with top sur-
face of table at the locations indicated by the "X"s
(see illustration).
Use a combination square to line up these edges
and surfaces. Slightly tighten nuts with a 9/16"
wrench.
WARNING: Table extensions must be installed.
Front edge of table and extensions must be lined
up. An uneven front edge can twist the fence rail.
Twisted rail can misaiign fence. A misaligned
fence can cause binding or kickback. You could
be hit or cut.
CHECK WITH SQUARE
AT 2 PLACES
MARKED WITH "X"
6: If adjustment is necessary (tow in the center) use a
"C" clamp to raise the center of the extension into
position. Make sure front edge of extension is lined
up with front edge of table. Then firmly tighten nuts.
7. Repeat the same procedure to insta!l the other
extension.
19
Loading ...
Loading ...
Loading ...