Loading ...
Loading ...
Loading ...
109
Playback
Menus
Table of Contents Index
Changing the Index Screen
Clips and photos are sorted into different index screens depending on the type of recording. You can easily
switch between the index screens to play back a desired recording.
1 Touch the index screen button.
2 Select the desired index screen.
Summary of index s creens
IMPORTANT
• Observe the following precautions while the ACCESS indicator is on or flashing in red. Failure to do so may
result in permanent data loss.
- Do not disconnect the power source or turn off the camcorder.
- Do not open the recording media slot cover.
Operating modes:
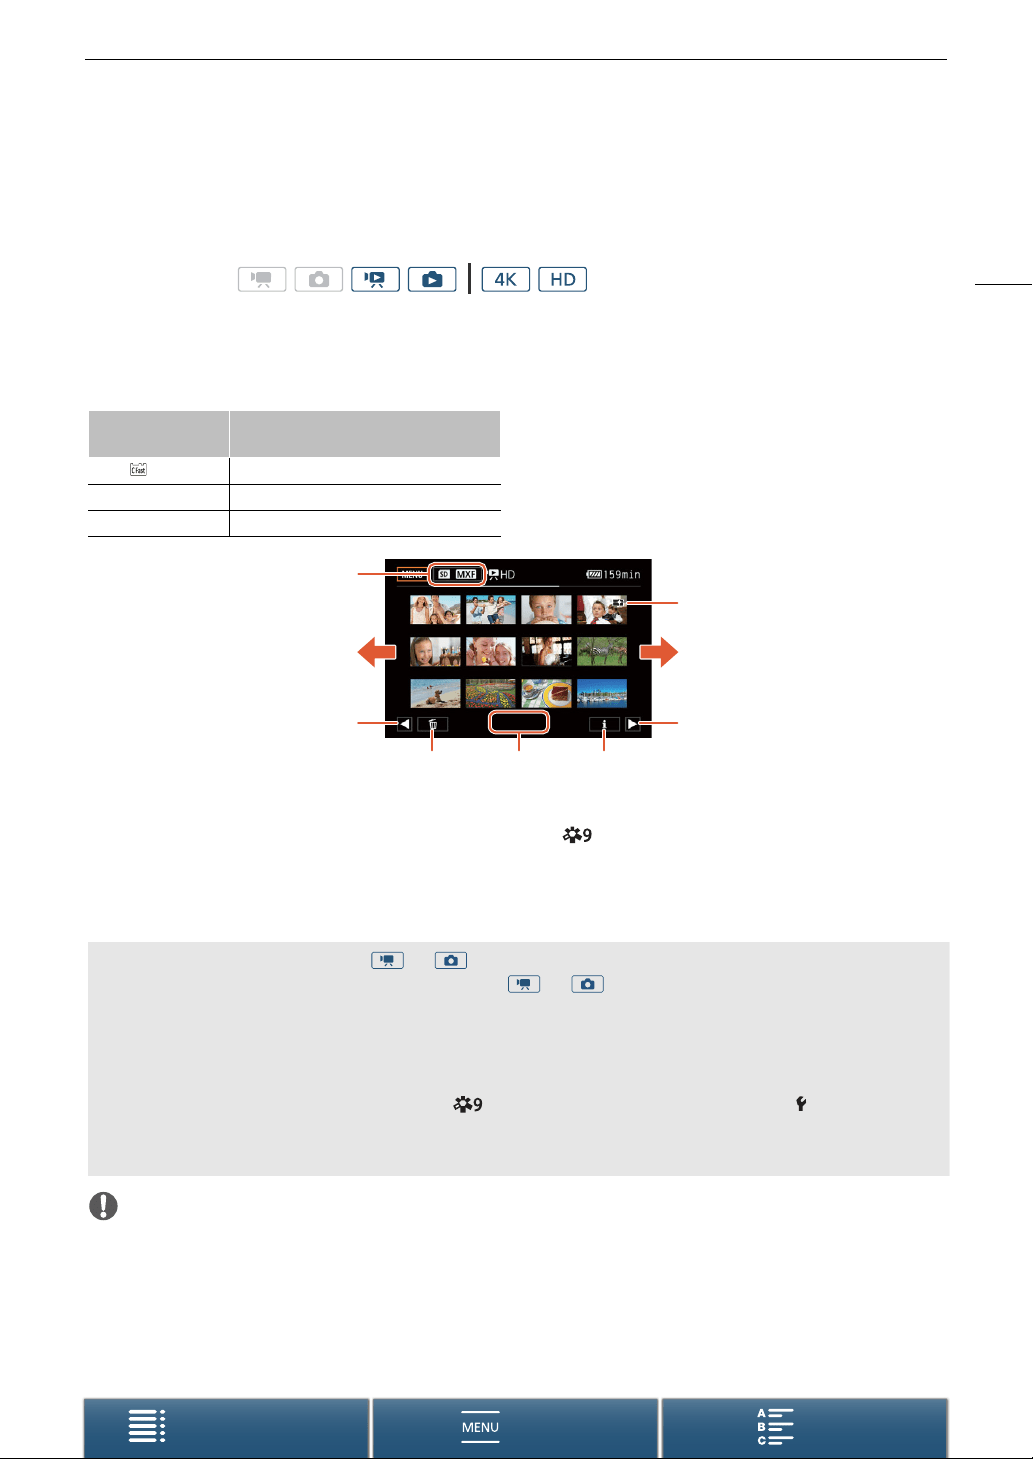
Index screen button
Type of recording and
recording media
[ ¹] 4K clips recorded on the CFast card.
[8 ¹] HD clips recorded on the SD card.
[8] Photos recorded on the SD card.
1
22
3
4
3
567
1 Index screen button. Touch to change the index
screen.
2 Drag your finger left/right for the next/previous
index page.
3 Display the next/previous index page.
4 Icon indicating a clip recorded using the
[ – Highlight Priority] look (A 71).
5 Delete recordings (A 116).
6 Folder number (for photos; A 142).
7 Clip information (for clips; A 113).
Switching to Playback Mode from or Mode
When you hold the ^ button pressed down during or mode, the camcorder will switch to
playback mode and display the last clip or photo recorded, depending on the position of the movie/photo
switch. For clips, touch [Ð] to start playback. The playback controls are the same as when playing back a
recording from the index screen.
Playing Back Clips Recorded Using the [Highlight Priority] Look
When playing back a clip recorded using the [ – Highlight Priority] look, you can set [ System Setup]
> [1] > [– View Assistance] to [i On] to display a more accurate looking image on the screen. When
playing back such a clip on an external monitor, we recommend increasing the monitor’s overall brightness.
Loading ...
Loading ...
Loading ...