Loading ...
Loading ...
Loading ...
En
14
Basic operation
! Connect the AC adapter after all connections are completed.
Before connecting to the device or changing the connection, turn off
the power and unplug the AC adapter from the outlet.
! Only use the AC adapter included with this unit.
! Power is supplied by the AC adapter.
! Connect the unit and PC/Mac directly using the included USB cable.
! A USB hub cannot be used.
! Please also refer to the instruction manual of the device to be
connected.
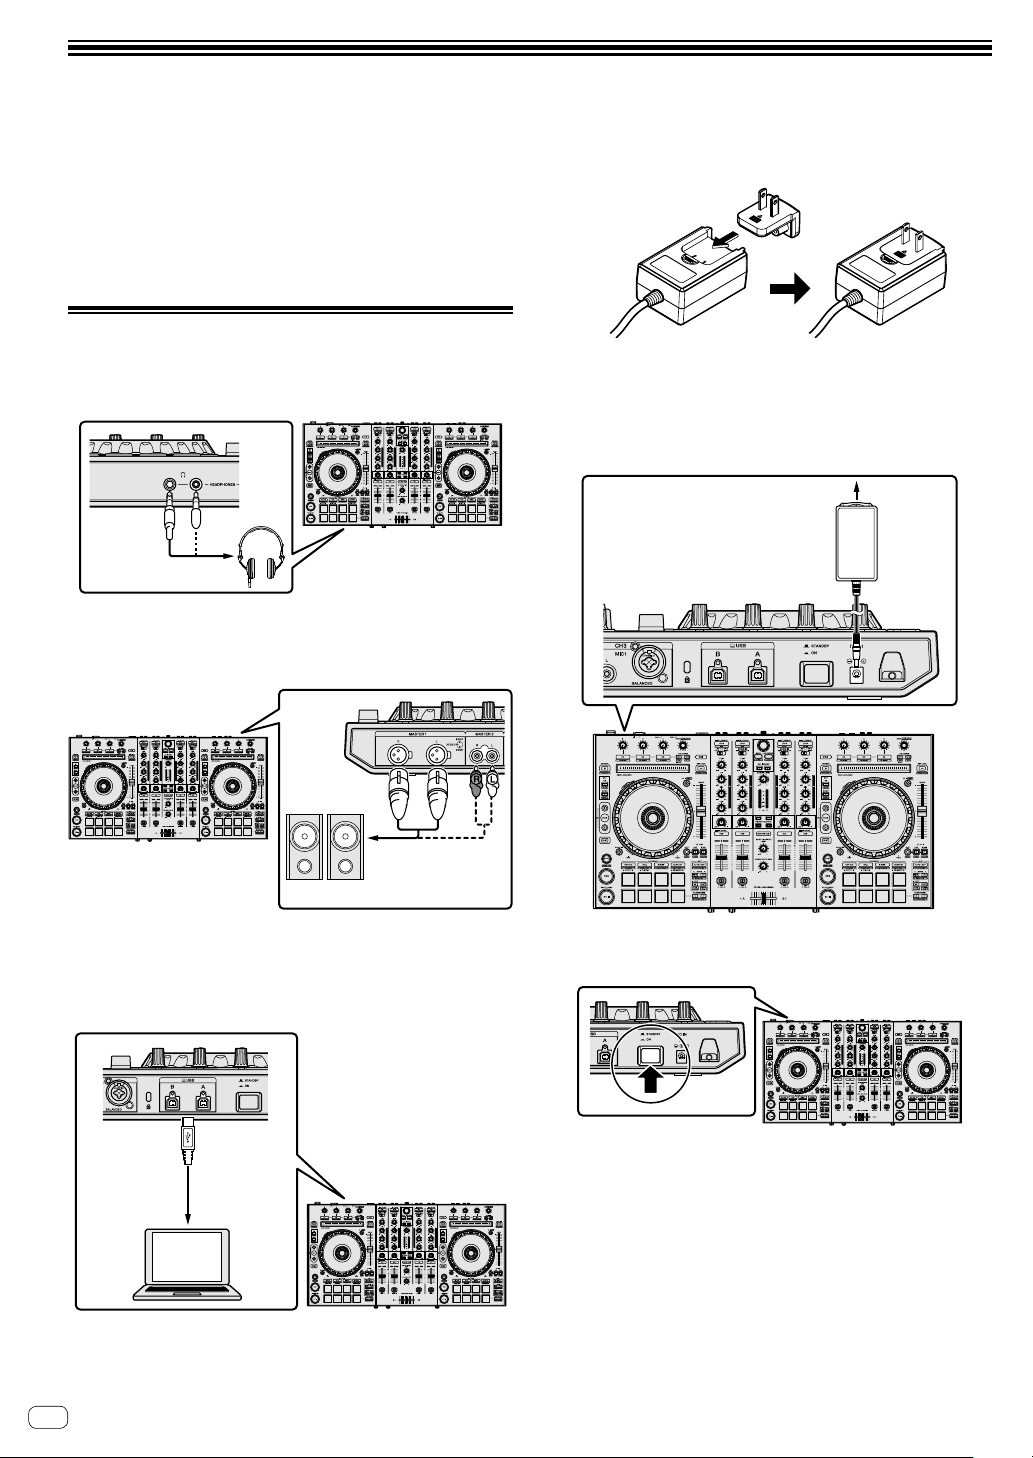
Connecting devices to this unit
1 Connect headphones to one of the [HEADPHONES]
jacks.
2 Connect powered speakers, a power amplifier,
components, etc., to the [MASTER OUT 1] or [MASTER
OUT 2] terminals.
! To output the sound from the [BOOTH OUT] terminals, connect
speakers or other devices to the [BOOTH OUT] terminals.
! For details on connecting the input/output terminals, see
“Connection example” (p.18).
3 Connect this unit to your PC/Mac via a USB cable.
4 Turn on the PC/Mac.
5 Connect the power plug to the AC adapter.
Slide the power plug into the AC adapter’s guide rails as shown on the
diagram and press in until a click is heard.
! For detailed cautions on the AC adapter, refer to “Operating
Instructions (Quick Start Guide)”.
! The shape of the plug differs according to the region in which the
unit is sold.
6 Connect the AC adapter.
7 Press the [ STANDBY/ON] switch on the rear
panel to turn on this unit.
! For Windows users
The message [Installing device driver software] may
appear when this unit is first connected to the PC or when it is
connected to a different USB port on the PC. Wait a while until
the message [Your devices are ready for use] appears.
8 Turn on the devices connected to the output
terminals (powered speakers, power amplifier,
components, etc.).
! When a microphone, DJ player or other external device is
connected to input terminals, the power of that device also turns
on.
Loading ...
Loading ...
Loading ...