Loading ...
Loading ...
Loading ...
56
Contents Before Using Getting Started Design Center Layout & Editing
Programmable
Stitch Creator
Quick Reference Alphabetic Index
■ Create the pattern
1
The Design Page appears on the screen as shown below.
2 Create the pattern, making sure that it meets the following conditions.
NOTE:
If a pattern does not meet the conditions mentioned above, a warning will appear when continuing
to the next step.
With the
Optimize hoop change setting, the actual sewing order (including the embroidery frame installa-
tion order) is optimized as explained on page 57.
(The Optimize hoop change setting can be found on the Sew menu. The setting is turned on when a
check mark appears in front of the setting.)
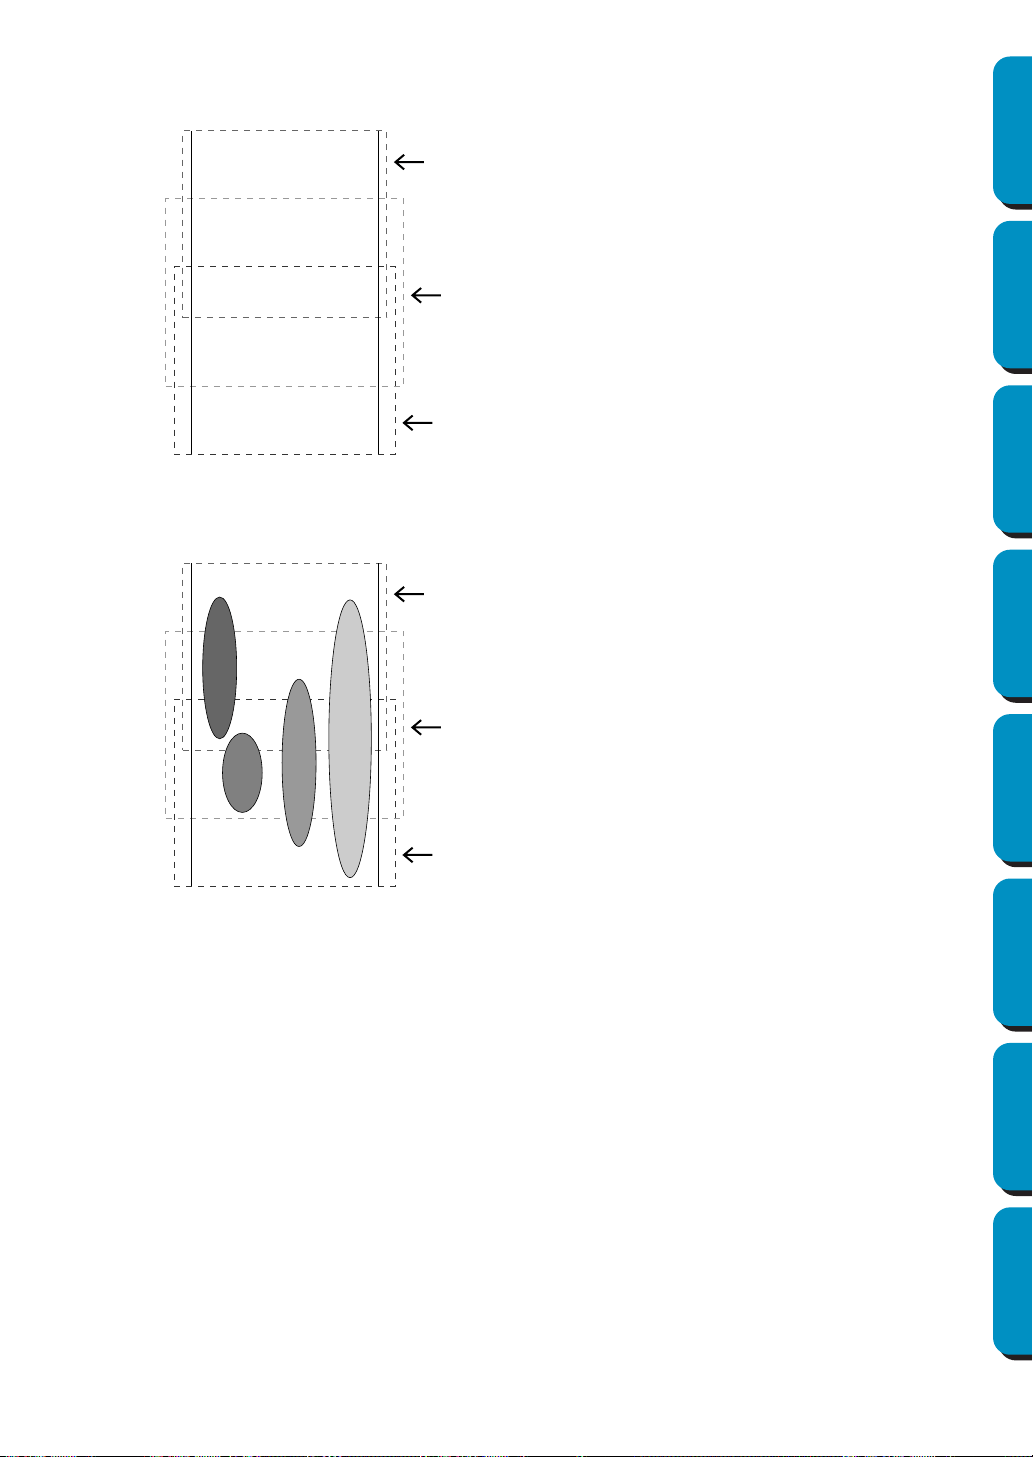
◆ Explanation of a, b, and c:
a: Embroidering area when the
embroidery frame is installed at the
top installation position.
b: Embroidering area when the
embroidery frame is installed at the
middle installation position.
c: Embroidering area when the
embroidery frame is installed at the
bottom installation position.
The broken lines indicate each area.
◆
The size of one pattern must be no bigger
than 100 × 100 mm (or 130 × 180 mm).
(If the pattern is imported from Design
Center, only these size settings are
available.)
◆ Each pattern must completely fit within
one single area (a, b, or c).
1: This pattern is correct since it fits
completely within area a.
2: This pattern is correct since it fits
completely within either area b or
area c.
3: The size of this pattern is accept-
able, but its position must be cor-
rected since it does not fit
completely within any of the areas.
4: This pattern must be corrected
since it is too large.
◆ Specify the sewing order in the same
way that it is specified for a normal
frame.
a
b
c
a
b
c
4
3
2
1
Loading ...
Loading ...
Loading ...