Loading ...
Loading ...
Loading ...
182
Contents Before Using Getting Started Design Center Layout & Editing
Programmable
Stitch Creator
Quick Reference Alphabetic Index
If Auto Punch is selected:
1
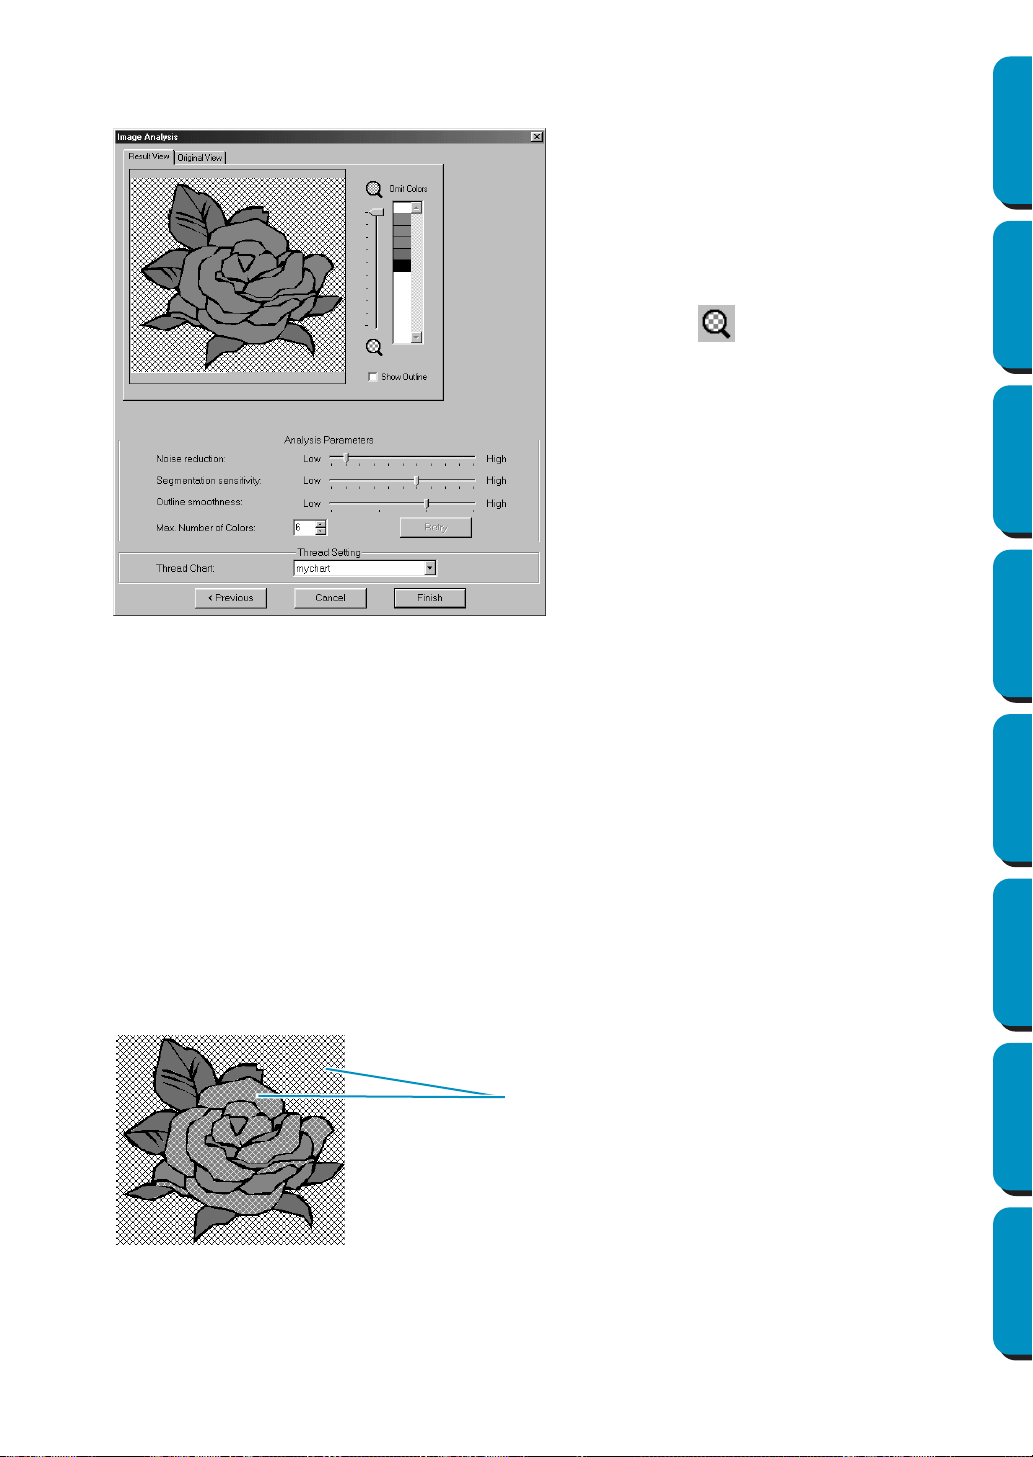
After the image characteristics are analyzed, a dialog similar to the one shown below appears.
2 Select the areas that are to be sewn.
In the image on the
Result View tab, areas not set to be sewn are shown filled with a crosshatch
pattern.
Click in the areas to specify whether or not they will be sewn.
◆ Click the
Result View tab to display the
resulting analyzed image. The embroi-
dery data will be created with this
image.
◆ Click the
Original View tab to display the
original image.
◆ Drag the slider to adjust the zoom
ratio that the image is displayed in.
◆ Select the Show Outline check box to
display the outline extracted from the
analyzed image.
◆ Select the desired image-analyzing set-
tings under Analysis Parameters.
Noise reduction: Sets the level of noise
that is removed from the image.
Segmentation sensitivity: Sets the
smoothness of the extracted outline.
Outline smoothness: Sets the smooth-
ness of the extracted outline.
Max. Number of colors: Sets the num-
ber of colors used.
After the necessary settings are
selected, click Retry to re-analyze the
image. If Retry is not clicked, the new
settings are not applied.
Thread Chart: Selects the thread chart
for selecting the thread color. The most
appropriate thread color from the
selected thread chart is selected. A
user thread chart can also be selected.
These areas will not be sewn
Loading ...
Loading ...
Loading ...