Loading ...
Loading ...
Loading ...
32
Contents Before Using Getting Started Design Center Layout & Editing
Programmable
Stitch Creator
Quick Reference Alphabetic Index
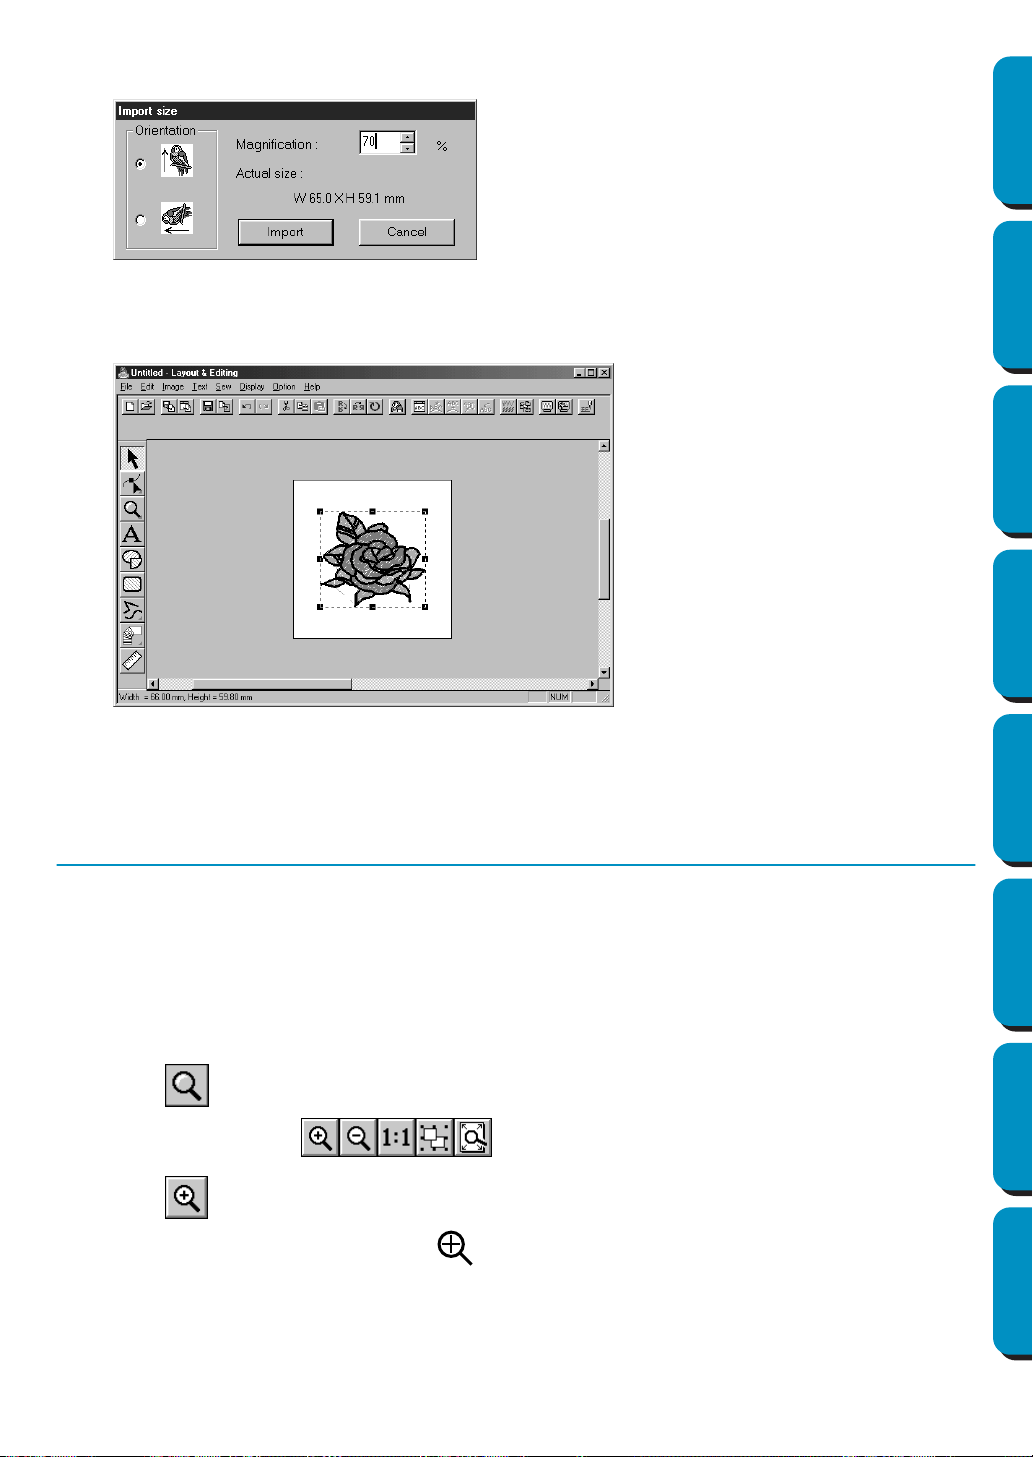
6 The Import Size dialog appears.
7 The embroidery pattern is imported into the Design Page of Layout & Editing.
The dotted line and the handles that appear around the image mean that the image is selected.
An imported image is always selected as a single object. It is not possible to select a part of an
imported image separately.
Step 3 Zooming In and Out
The quality of the display depends on the screen resolution of your computer. By default, the window is
set so that the entire Design Page is visible. If you need to work on a specific part of the Design Page,
you might wish to see a more detailed display of that part. This can be achieved by zooming in. When
you want to see the whole Design Page again, you can zoom out.
We are going to show how to zoom in on a portion of the picture and how to return to the standard dis-
play.
For a more complete description of the zoom features, see “Zoom Mode” on page 125.
1 Click on the Tool Box.
Five buttons appear: .
2 Click .
The shape of the cursor changes to .
◆ Select
70 %, for example.
◆ Leave the default orientation setting as
is.
◆ Click Import.
Loading ...
Loading ...
Loading ...