Loading ...
Loading ...
Loading ...
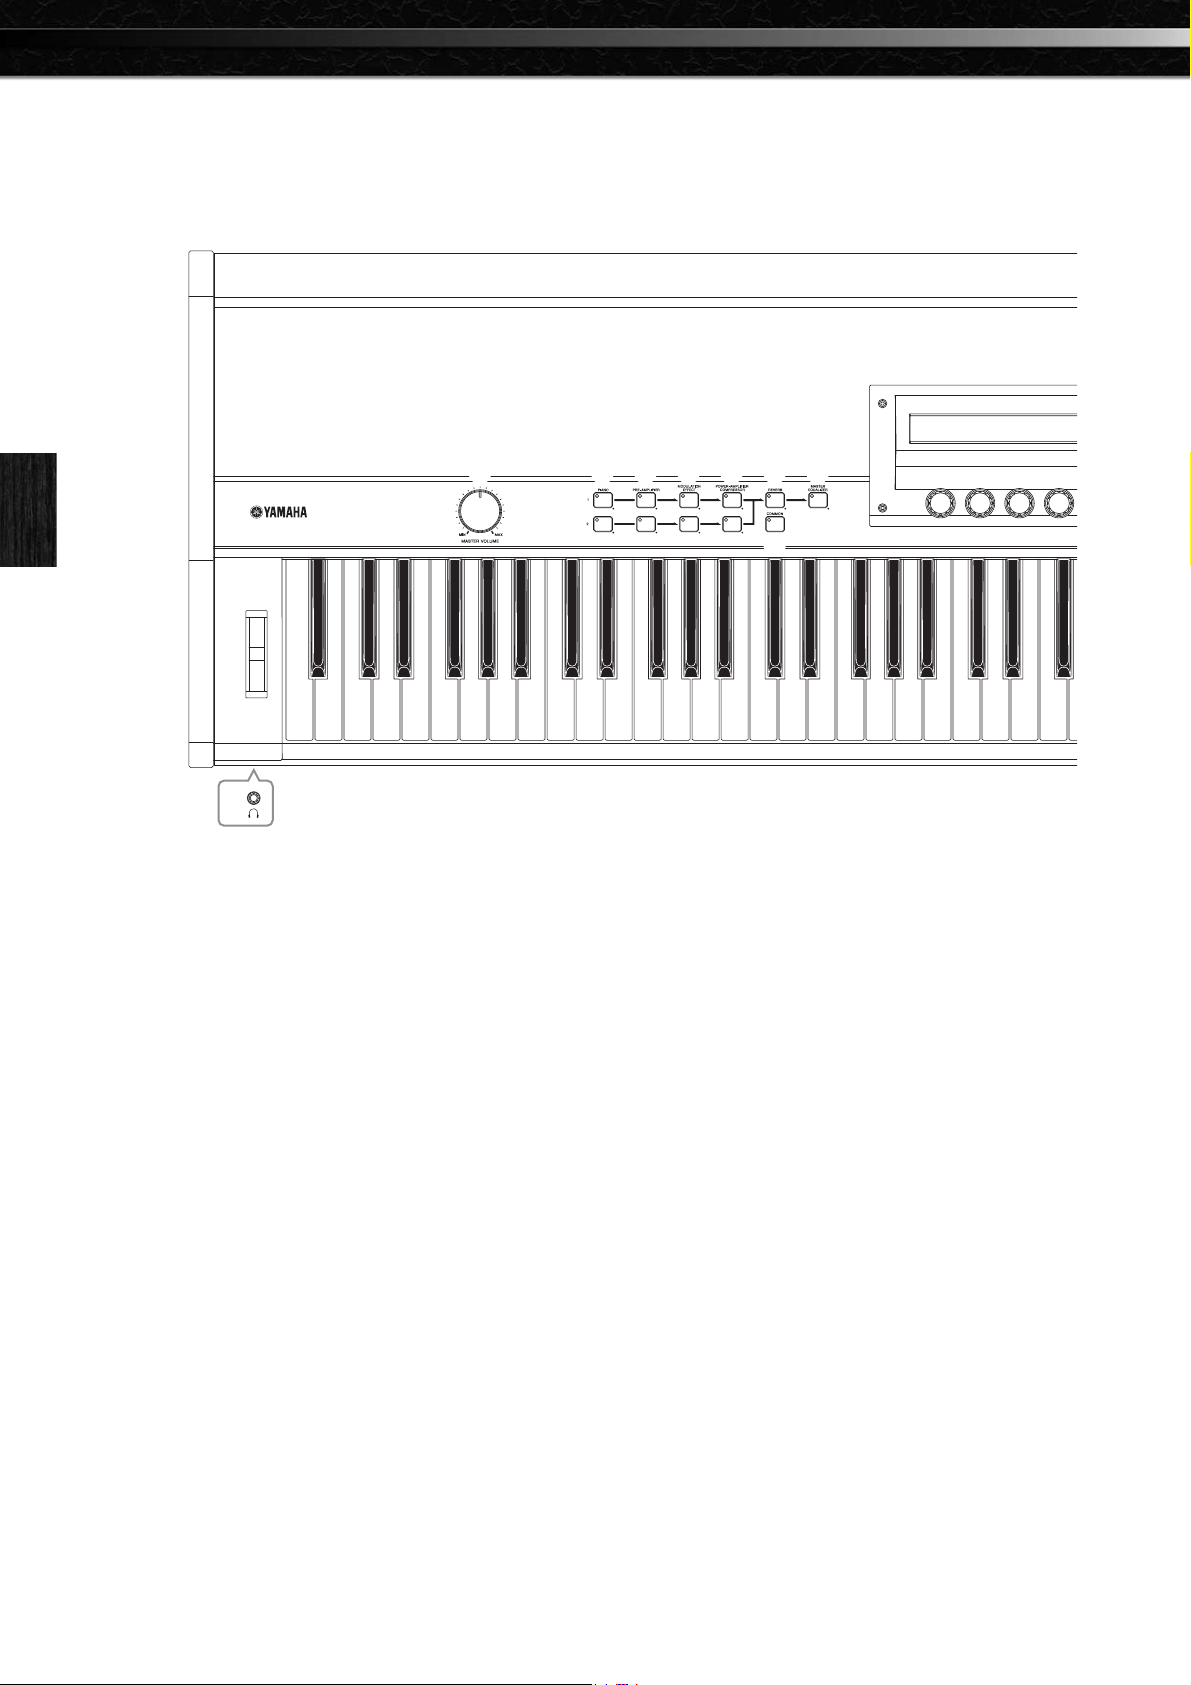
Top Surface
16 CP1 Owner’s Manual
Component Names & Functions
Component Names & Functions
Top Surface
1 Pitch bend wheel (see page 31)
Use this controller to shift the pitch of notes temporarily
upward or downward.
2 Headphones jack (see page 11)
Use this standard audio jack to connect a pair of stereo
headphones.
3 [MASTER VOLUME] dial (see page 14)
Use this dial to adjust the overall volume of the instrument.
4 [PIANO 1] and [PIANO 2] buttons (see page
43)
5 [PRE-AMPLIFIER 1] and [PRE-AMPLIFIER 2]
buttons (see page 45)
6 [MODULATION EFFECT 1] and
[MODULATION EFFECT 2] buttons (see page
46)
7 [POWER-AMPLIFIER/COMPRESSOR 1] and
[POWER-AMPLIFIER/COMPRESSOR 2]
buttons (see page 48)
8 [REVERB] button (see page 50)
9 [MASTER EQUALIZER] button (see page 55)
By pressing the above buttons, you can turn on or off the
pianos, preamps, modulation effects, power amplifiers or
compressors, and reverb effect making up the current
Performance or the master equalizer for the instrument as a
whole (see page 19). When you do so, the button in question
will light up or go out accordingly. Furthermore, by pressing
and holding a button (for at least one second), you can call
up the corresponding setting screen, and the button will start
to flash. Even when a parameter setting screen has been
displayed in this way, the block can still be turned on or off
by pressing the corresponding button. It should be noted
that the button for the currently selected block will flash in
one of two different ways to indicate whether the block is on
or off; specifically, the button stays lit longer when the block
is on, and it stays off longer when the block is off.
) [COMMON] button (see page 51)
By pressing this button and lighting it up, you can call up a
setting screen affecting both of the current Performance’s
parts.
! Display (see page 14)
Using the display, you can confirm system messages, set
parameters, and perform a range of other tasks.
@ Knobs 1 to 6 (see page 28)
Numbered 1 through 6 from left to right, these knobs can be
turned to adjust the settings of the parameters assigned to
them. Within individual setting screens, furthermore, a
different set of parameters or tasks is assigned to the knobs,
and they can be turned or pressed to set the parameters or
execute the tasks.
2
1
3 4 5 6 7 8
)
9
!
@
A-1 B-1 C0 D0 E0 F0 G0 A0 B0 C1 D1 E1 F1 G1 A1 B1 C2 D2 E2 F2 G2 A2 B2 C3 D3 E3 F3 G
Loading ...
Loading ...
Loading ...