Loading ...
Loading ...
Loading ...
Assembling the Clavinova
129
CLP-685, CLP-675, CLP-645, CLP-635, CLP-695GP, CLP-665GP Owner’s Manual
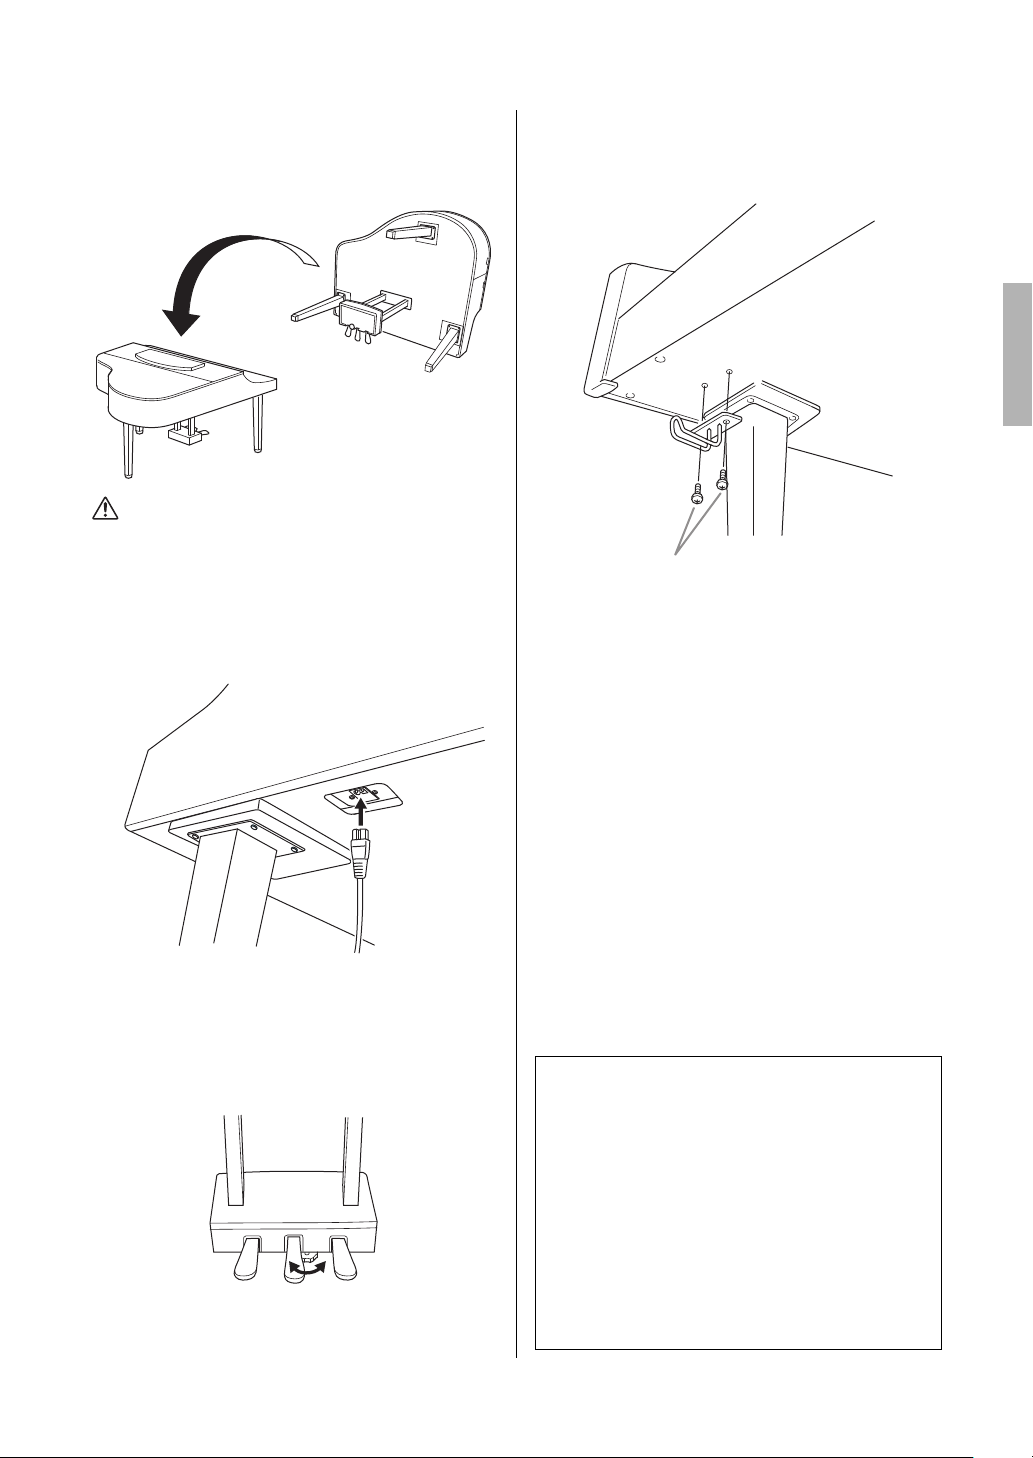
4. Raising the unit to the standing
position.
Use the front legs as support to raise the unit.
CAUTION
Be careful not to pinch your fingers. When you raise the unit,
do not hold the key cover.
5. Plug the power cord into the
[AC IN] connector.
6. Rotate the adjuster until it comes in
firm contact with the floor surface.
7. Attach the headphone hanger.
Attach the headphone hanger using two thin
screws (4 x10 mm) as shown in the illustration.
Right leg on the bottom of the main unit,
when viewed from front
Tran sporting
If you move to another location, you can transport
the instrument along with other belongings. You can
move the unit as it is (assembled) or you can
disassemble the unit down to the condition it was in
when you first took it out of the box. Transport the
keyboard horizontally. Do not lean it up against a
wall or stand it up on its side. Do not subject the
instrument to excessive vibration or shock. When
transporting the assembled instrument, make sure all
screws are properly tightened and have not been
loosened by moving the instrument.
4 x 10 mm thin screws
Loading ...
Loading ...
Loading ...