Loading ...
Loading ...
Loading ...
150
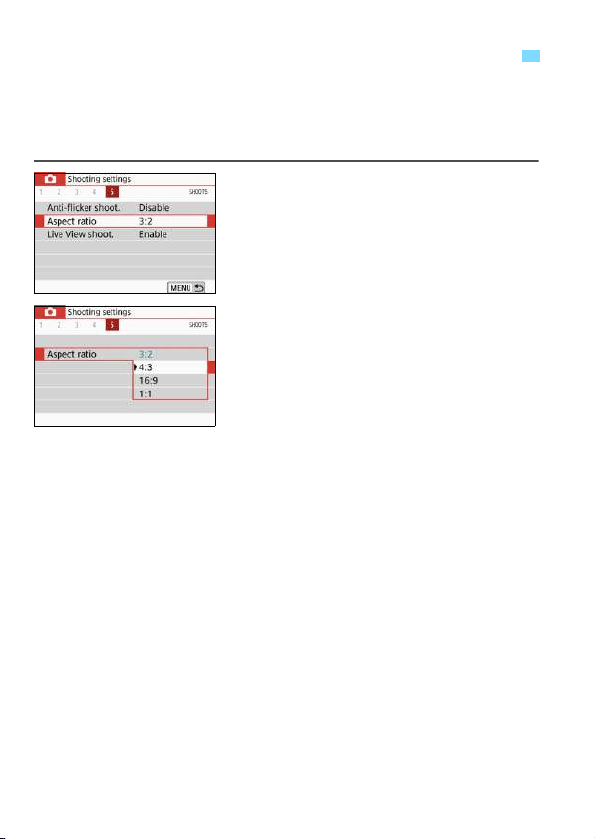
You can change the image’s aspect ratio. [3:2] is set by default. When
[4:3], [16:9], or [1:1] is set, frame lines indicating the image area will be
displayed in the viewfinder. During Live View shooting, the image
appears with the surrounding area masked in black on the LCD monitor.
1
Select the aspect ratio.
Under the [z5] tab (the [z4] tab in
Live View shooting), select [Aspect
ratio], then press <0>.
2
Set the aspect ratio.
Select an aspect ratio, then press
<0>.
JPEG images
The images will be saved with the set aspect ratio.
RAW images
The images will always be saved with the [3:2] aspect ratio. The
selected aspect ratio information is added to the RAW image file.
When you process the RAW image with Digital Photo Professional
(EOS software), this allows you to generate an image with the same
aspect ratio set for shooting. In the case of the [4:3], [16:9], and [1:1]
aspect ratios, the lines to indicate the aspect ratio will appear during
image playback, but they are not actually drawn on the captured
image.
3
Changing the Image’s Aspect Ratio
N
Loading ...
Loading ...
Loading ...