Loading ...
Loading ...
Loading ...
- 12
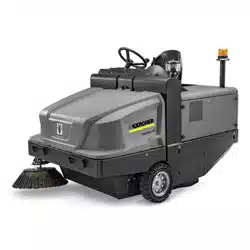
Set the sweeping track using the two
adjusting screws.
Check sweeping mirror.
DANGER
Risk of injury!
Always apply the safety rod when the
waste container is raised.
Perform the safeguarding only from
outside the hazard zone.
Drive the waste container up and se-
cure it with the safety rod.
Fold the safety rod for the high empty-
ing up and insert it into the holder (se-
cured).
1 Holder of safety rod
2 Safety rod
Open the side cover as described in
Chapter "Replace brush roller".
Release the 6 wing nuts on the side
holding plate.
Loosen 3 nuts (SW 13) on the front
holding plate.
Press the side seal down (elongated
hole) until it is about 1 to 3 mm to the floor.
Screw in the holding plates.
Repeat the procedure on the other side
of the appliance.
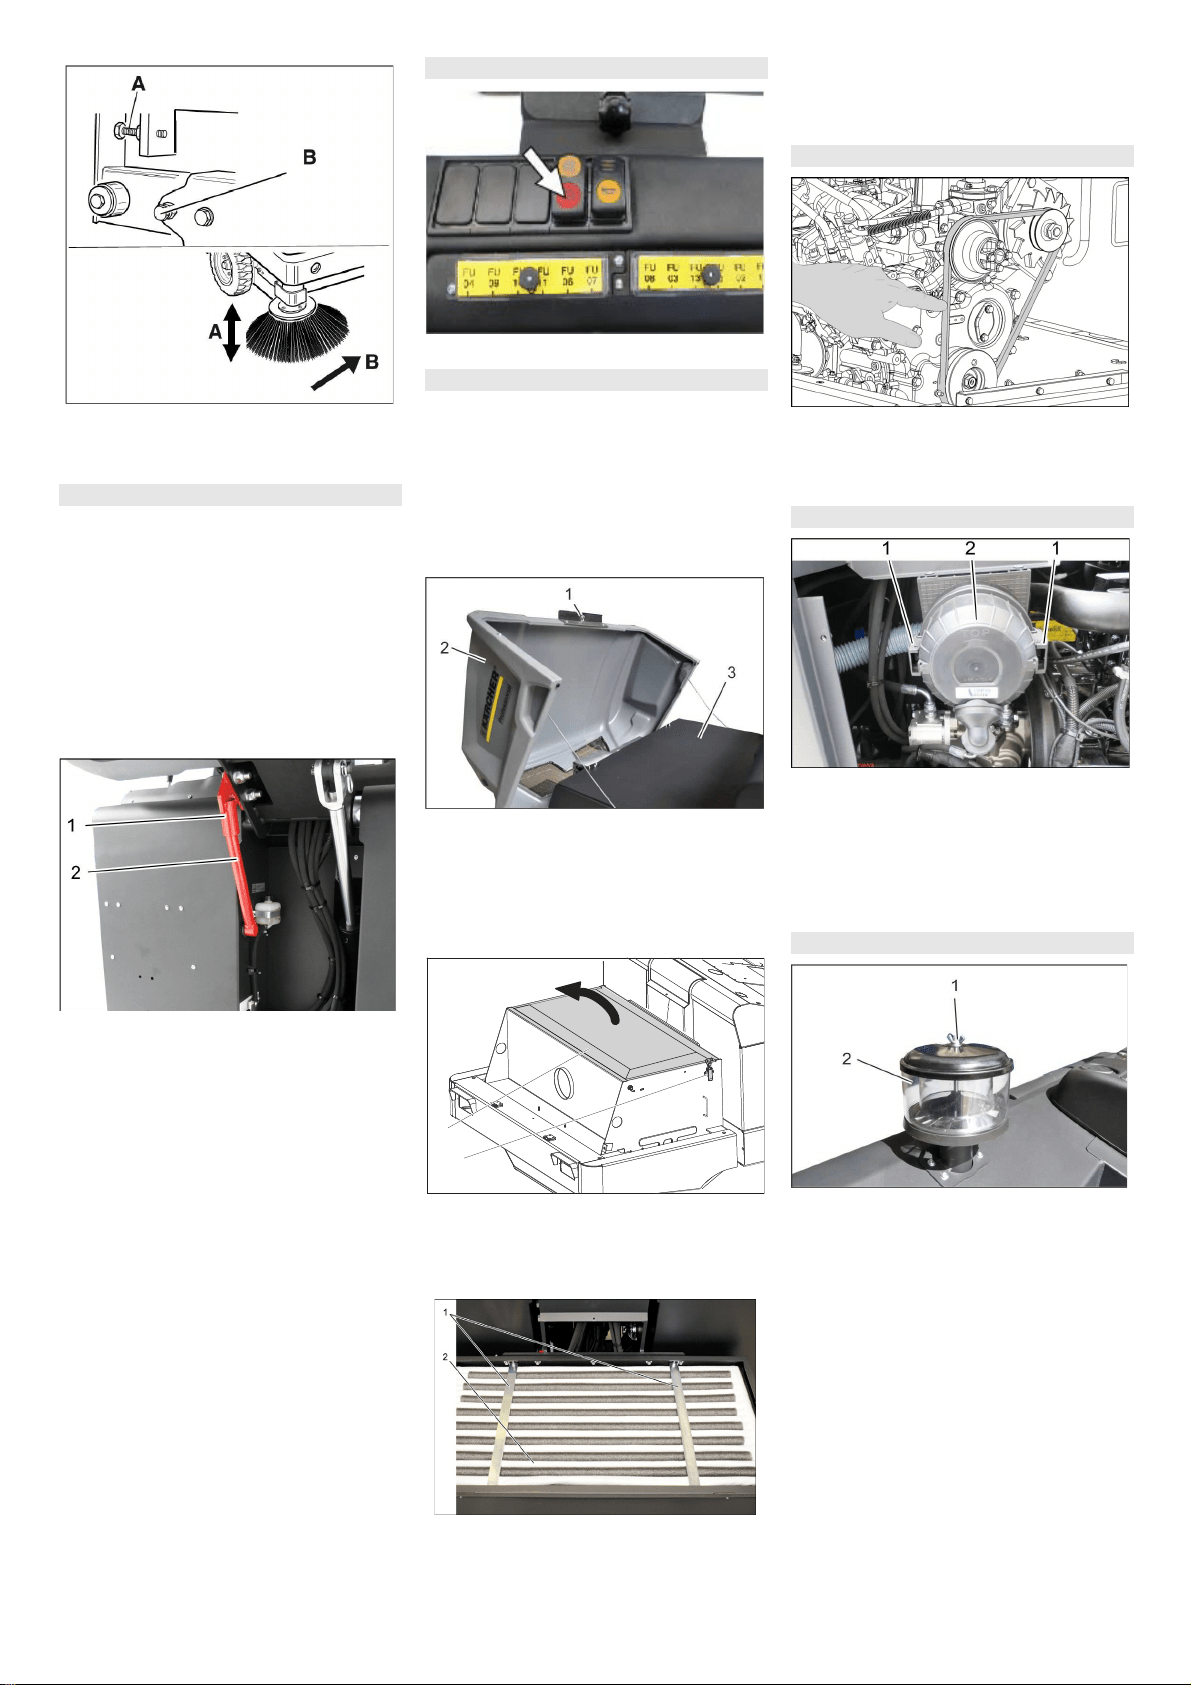
Switch on manual filter shake off.
몇 WARNING
Risk of injury!
Wear a dust mask when working around
the dust filter. Observe safety regulations
on the handling of fine particles.
Clean the dust filter with the filter clean-
ing button.
Empty waste container.
1 Lock of appliance hood
2Cover
3 Filter cover
Open the lock, remove the star grip
screw to do this.
Fold cover forwards.
1 Lock, filter cover (2x)
2 Filter cover
Open the lock.
Open filter cap.
1 Cross struts
2 Dust filter
Check the dust filter, clean or replace if
necessary.
Note
The dust filter may only be replaced by
Kärcher Customer Service.
Insert and lock the filter cover.
The V-Belt must deflect approx. 7-9 mm at
a pressure of 10 kg.
Get the V-belt tension adjusted by an
authorized customer service.
1Lock
2 Air filter housing
Remove side panel.
Remove the air filter housing.
Replace the air filter insert.
Note: Installation position with blowout
opening pointing down (see illustration).
1 Wing nut
2 Centrifugal separator
Unscrew the wing nut from the centrifu-
gal separator.
Clean the centrifugal separator.
Adjust the side seals
Manually clean the dust filter
Check/replace dust filter
2
1
Check and adjust the V-Belt
Check air filter and replace, if necessary
Clean the centrifugal separator
30 EN
Loading ...
Loading ...
Loading ...