Loading ...
Loading ...
Loading ...
- 10
Unscrew all cell caps.
(only with low-maintenance battery)
Connect positive terminal cable from
the charger to the positive pole connec-
tion on the battery.
Connect negative terminal cable from
the charger to the negative pole con-
nection on the battery.
Plug in mains connector and switch on
charger.
Charge battery using lowest possible
level of charging current.
When the battery is charged, first re-
move the charger from the mains and
then disconnect it from the battery.
Screw in cell caps.
(only with low-maintenance battery)
Disconnect pole terminal to negative
pole (-).
Disconnect pole terminal to positive
pole (+).
Loosen the mounts on battery base.
Remove the battery from the battery
holder.
Dispose of the used battery according
to the local provisions.
DANGER
Risk of injury!
Always apply the safety rod when the
waste container is raised.
Perform the safeguarding only from
outside the hazard zone.
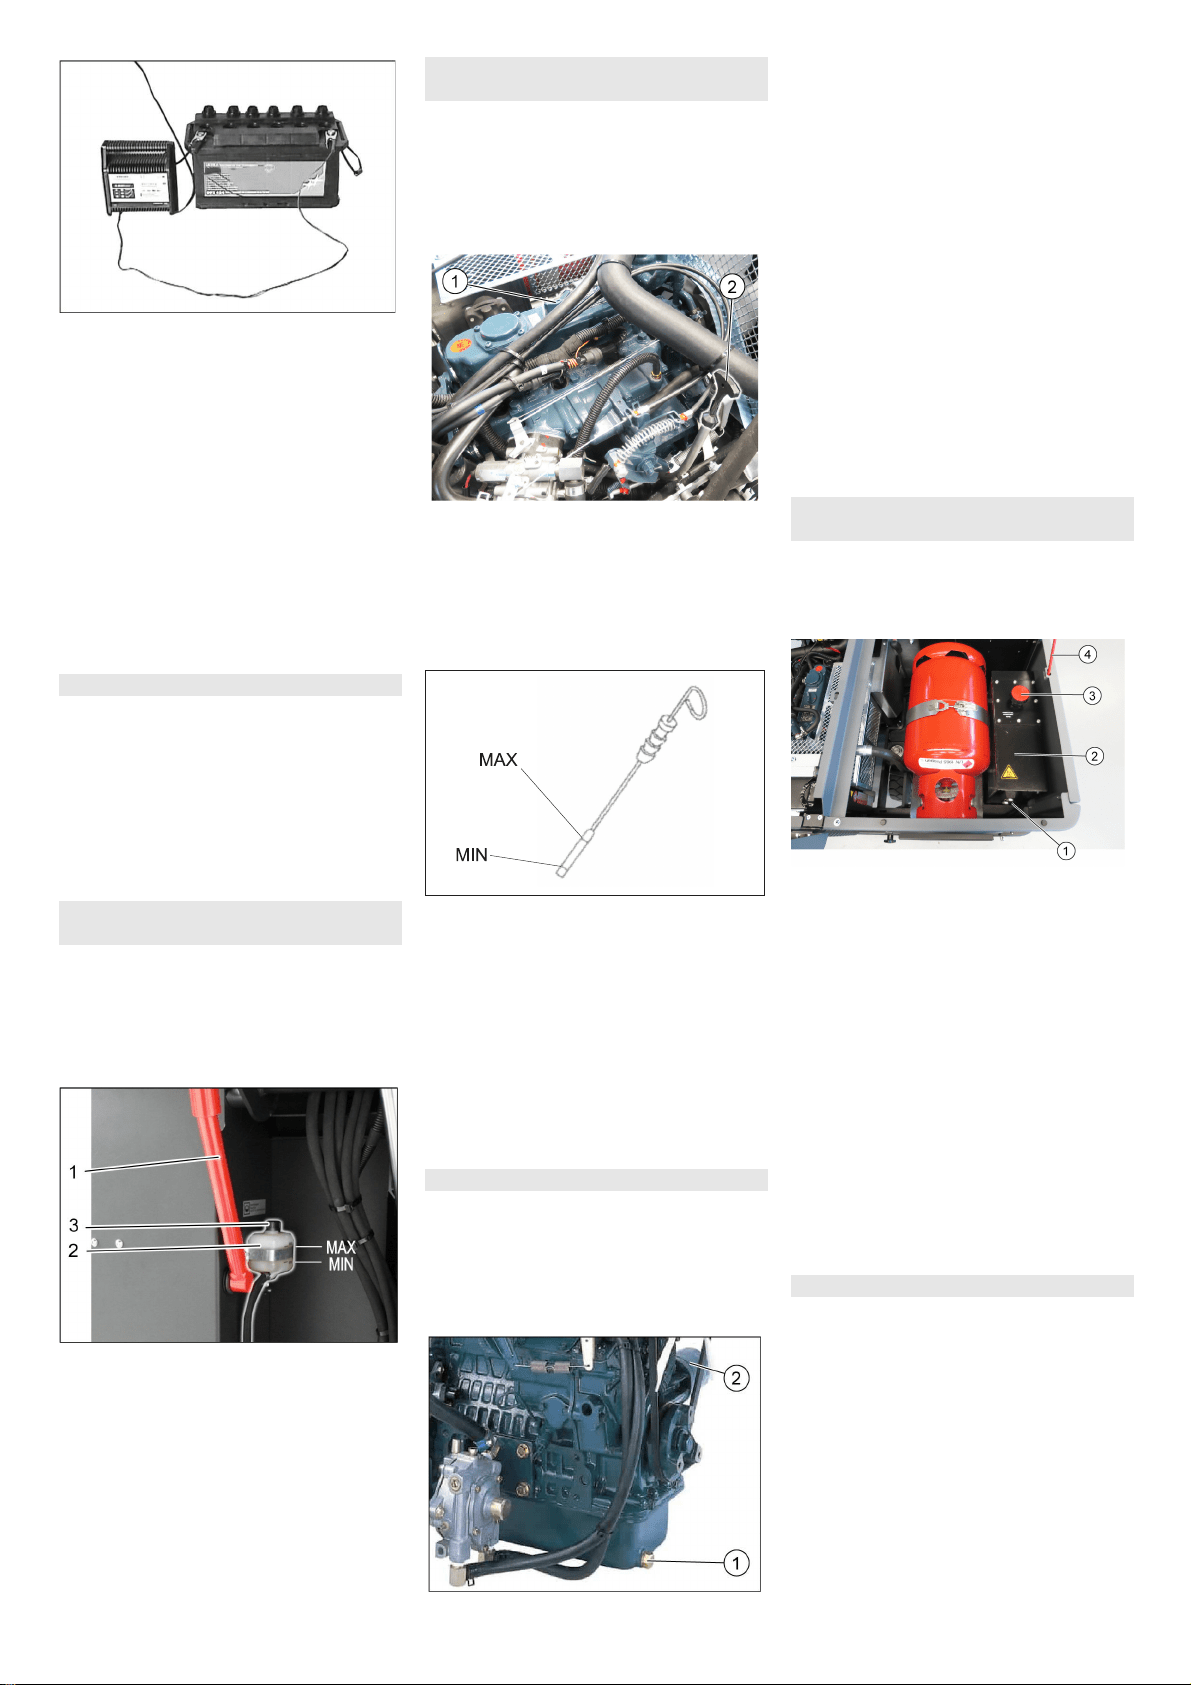
1 Holder of safety rod
2 Brake fluid container
3 Closing head
Move up the waste container and secure
it by means of the safety rod, see Chapter
"Emptying the waste container"
Check if the there is enough brake fluid
in the brake fluid reservoir.
Note
The filling level has to be between Min.
and Max.
If necessary, refill DOT brake fluid cur-
rently commercially available.
DANGER
Risk of burns!
Allow engine to cool down.
Wait for at least 5 minutes after switch-
ing off the engine before checking the
engine oil fill level.
1 Oil cap (engine)
2 Oil dipstick
Pull out oil dipstick.
Wipe off oil dipstick and insert.
Pull out oil dipstick.
Read the value of the oil level.
Insert the oil dip again.
– The oil level must lie between “MIN“
and “MAX“ marking.
– Add motor oil if the oil level is below the
"MIN" marking.
– Do not fill oil above the "MAX" marking.
Remove oil cap.
Fill in motor oil.
For oil type refer to Chapter "Technical
specifications".
Close oil cap.
Wait at least 5 minutes.
Check engine oil level.
CAUTION
Risk of burns due to hot engine oil!
Allow engine to cool down.
Prepare a collection container for at
least 6 litres of engine oil.
Allow engine to cool down.
1 Oil drain screw
2 Engine oil filter
Unscrew oil drain plug.
Remove oil cap.
Drain off oil.
Unscrew the oil filter.
Clean the intake and sealing areas.
Coat the washer of the new oil filter with
oil before fitting it.
Fit in the new oil filter and tighten it by
hand.
Screw in the oil drain screw along with
the new washer.
Tightening torque: 25 Nm
Fill in motor oil.
For oil type and filling quantity refer to
Chapter "Technical specifications".
Close oil cap.
Let the motor run for approx. 10 seconds.
Check engine oil level.
NOTICE
The waste container must not be raised.
Open the device hood and secure it us-
ing the hood support.
1 Hydraulic oil sight glass
2 Hydraulic tank
3 Screw cap, oil fill opening
4 Hood support
Check hydraulic oil level in the looking
glass.
– The oil level must lie between “MIN“
and “MAX“ marking.
– Add hydraulic oil if the oil level is below
the "MIN" marking.
Loosen the closing cap of the oil filling
opening.
Clean the filling area.
Refill hydraulic oil.
For oil type refer to Chapter "Technical
specifications".
Replace and tighten the closing cap of
the oil filling opening.
NOTICE
Only Kärcher Customer Service is author-
ised to carry out maintenance tasks on the
hydraulic unit.
Lock parking brake.
Start the motor.
Check all hydraulic hoses and connec-
tions and ensure that they are leak-
proof.
Remove the battery
Checking the brake fluid level and
topping up brake fluid
Check engine oil level and top up, if
required
Change the motor oil and the oil filter
Check hydraulic oil level and refill
hydraulic oil
Check hydraulic unit
28 EN
Loading ...
Loading ...
Loading ...