Loading ...
Loading ...
Loading ...
- 6
Illustration
1 Operating hour counter
2 Charge warning lamp
3 Oil pressure warning lamp
4 Cooling water temperature warning lamp
5 Motor suction air
6 Warning light parking brake operated
7 Forward travel direction
8 Direction of travel reverse
9 Indicator light parking light/low beam
(option)
10 Warning lamp fuel reserve
- blinks for reserve
- illuminates when gas bottle is empty
Loosen parking brake; press brake
pedal at the same time.
Activate the parking brake; press brake
pedal at the same time.
Note
This procedure is necessary if the device
needs to be pushed off the palette or towed
away, or must be moved onto a transport
vehicle without its own drive.
ATTENTION
Do not move the machine for long distanc-
es without engaging self-propulsion; a
speed of 10 km/h should not be exceeded.
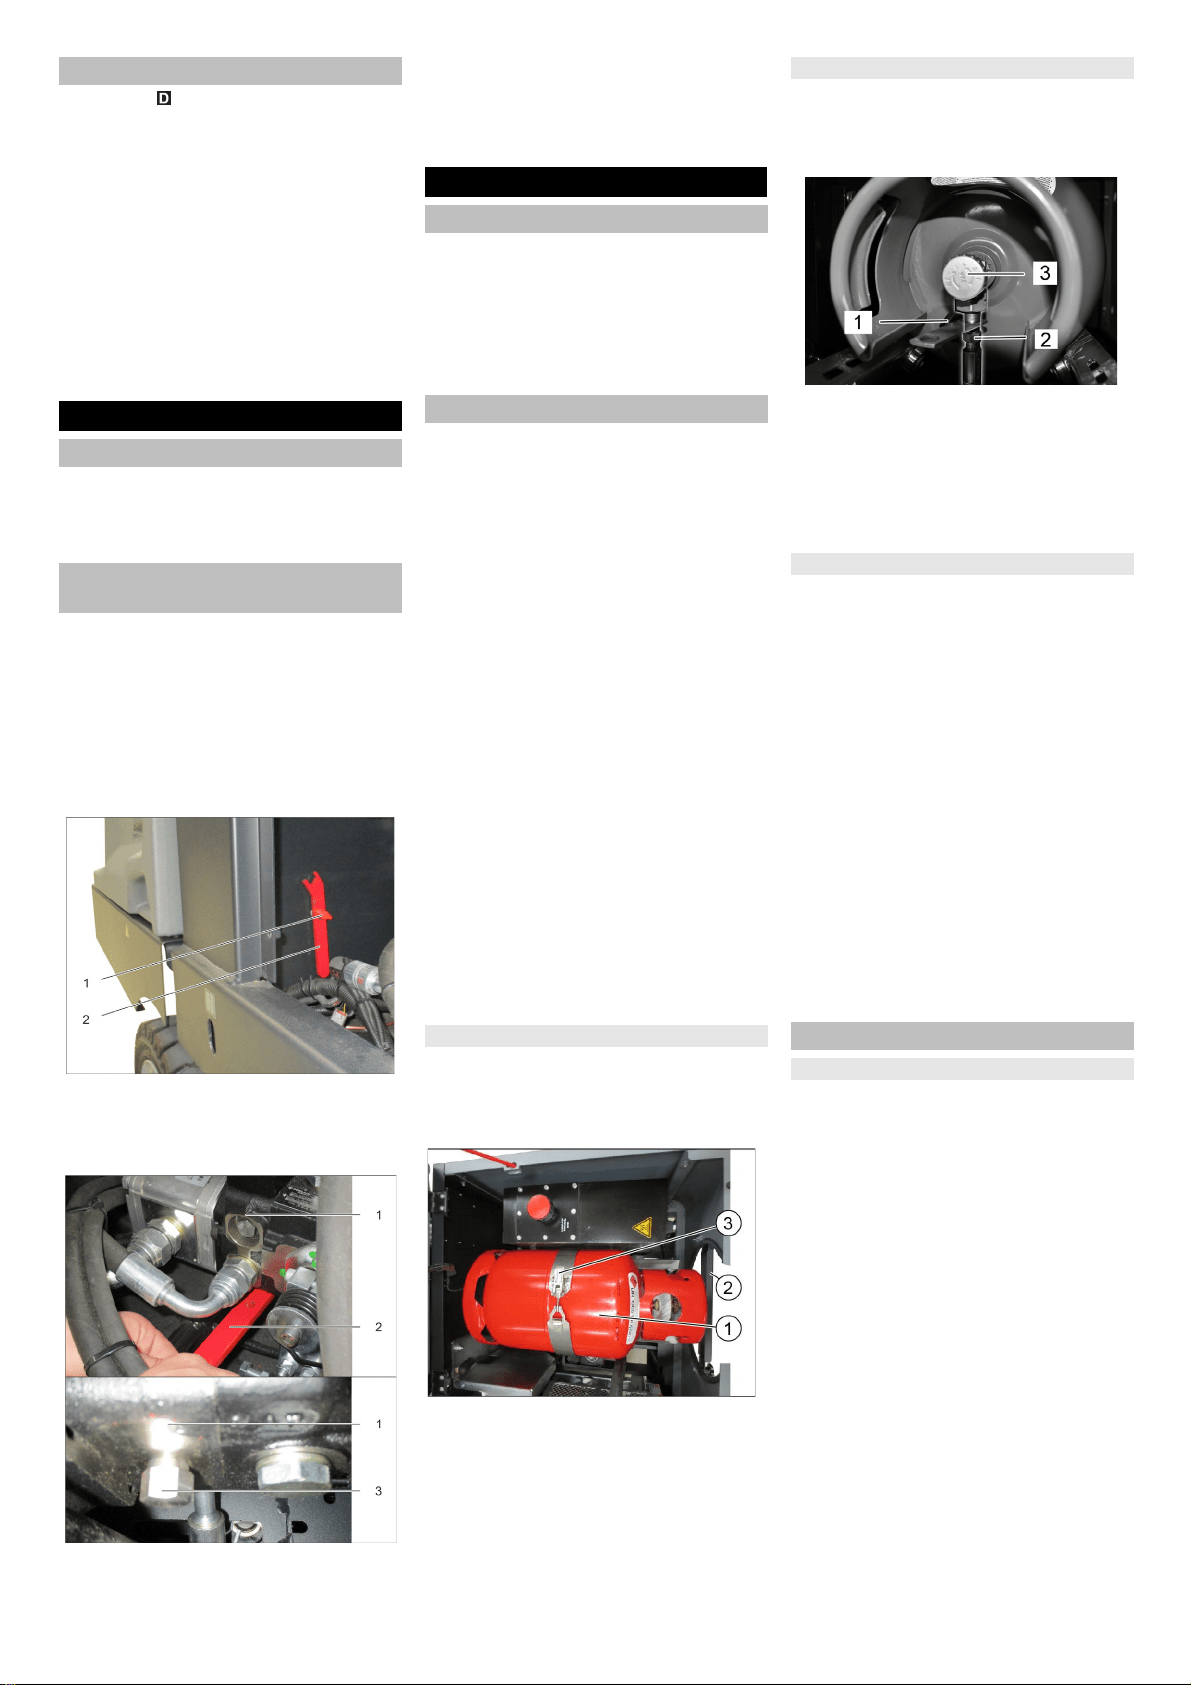
1Screw
2Key
Unscrew the screw.
Remove the spanner.
1 Hydraulic pump
2Key
3Nut
Loosen the nut using the spanner (open
freewheel) until the device can be
pushed.
IMPORTANT: Once pushed, reclose the
nut (close freewheel = drive position).
Read the operating instructions of the
engine manufacturer before start-up
and follow the safety instructions care-
fully.
Park the sweeper on an even surface.
Remove ignition key.
Lock parking brake.
DANGER
Risk of injury!
Follow safety regulations for LPG vehi-
cles.
Formation of crusts and yellow-frothing
deposits on the gas cylinder indicate
leakiness.
Cylinders must be changed only by in-
structed persons.
Cylinders containing propellant gases
must not be changed in garages and
underground areas.
Do not smoke and use uncovered light
while changing the cylinder.
While changing cylinders, first close the
locking valve of the LPG cylinder firmly
and immediately put the protective cap
on the empty cylinder.
몇 WARNING
Only use replacement cylinders with 11 kg
contents of tested models.
CAUTION
The use of household gas and camping
gas is strictly prohibited.
LPG mixtures of propane and butane are
permitted. The propane content must be at
least 90%.
ATTENTION
Observe the installation position of the gas
cylinder. The connection / ring opening
must point downwards.
1 Gas cylinder
2 Safety rod
3 Bracket closure
Release the screws on the safety rod
and pivot the pole away.
Replace the gas cylinder.
Unscrew the protective cap from the
connecting valve of the gas cylinder.
Close the bracket closure.
ATTENTION
After connecting the cylinder, regularly
check that it is not leaky by using a foaming
agent.
1 Protective cover
2 Gas hose with union joint
3 Gas withdrawal valve
Screw the gas hose to the connecting
valve of the gas cylinder (30-mm spanner).
Close the safety bar, and secure it with
a bolt.
If the warning indicator for reserve fuel
shows an empty gas bottle continuously
during operation, proceed as follows:
Close gas drawing valve by turning it in
clock-wise direction.
Stop the machine and continue to run it
at idle speed until the motor shuts off.
Note: This will ensure that all gas lines
are empty and that there can be no icing
which would hinder starting the motor.
Unscrew the gas hose (30-mm spanner).
Screw the protective cap onto the con-
necting valve of the empty gas cylinder.
Open the cliplock.
NOTICE
Connection has a left threading.
몇 Warning
Open the gas drawing valve (3) only after
starting the appliance (refer chapter Start-
ing the appliance).
Check engine oil level.
Check the filling level in the coolant ex-
pansion tank.
Check the sweeping roller and the side
brush for wear and wrapped belts.
Check the wheels for tied up belts.
Check the centrifugal separator and the
air filter, clean if required.
Check function of all operator control el-
ements.
Check appliance for damages.
Clean the dust filter with the filter clean-
ing button.
Note: For description, see section on Care
and maintenance.
Indicator lamps and display
Before Startup
Lock/ release parking brake
Moving sweeper without engaging
self-propulsion
Start up
General notes
Install/replace gas bottle
Installing the gas bottle
Connecting gas cylinder
Replacing the empty gas bottle
Inspection and maintenance work
Daily before starting operations
24 EN
Loading ...
Loading ...
Loading ...