Loading ...
Loading ...
Loading ...
Editing Patterns (Embroidery Settings Screen)
97
EMBROIDERY
4
When is touched in the editing screen, the
embroidery settings screen appears. After editing the
pattern, touch to continue to the embroidering
screen.
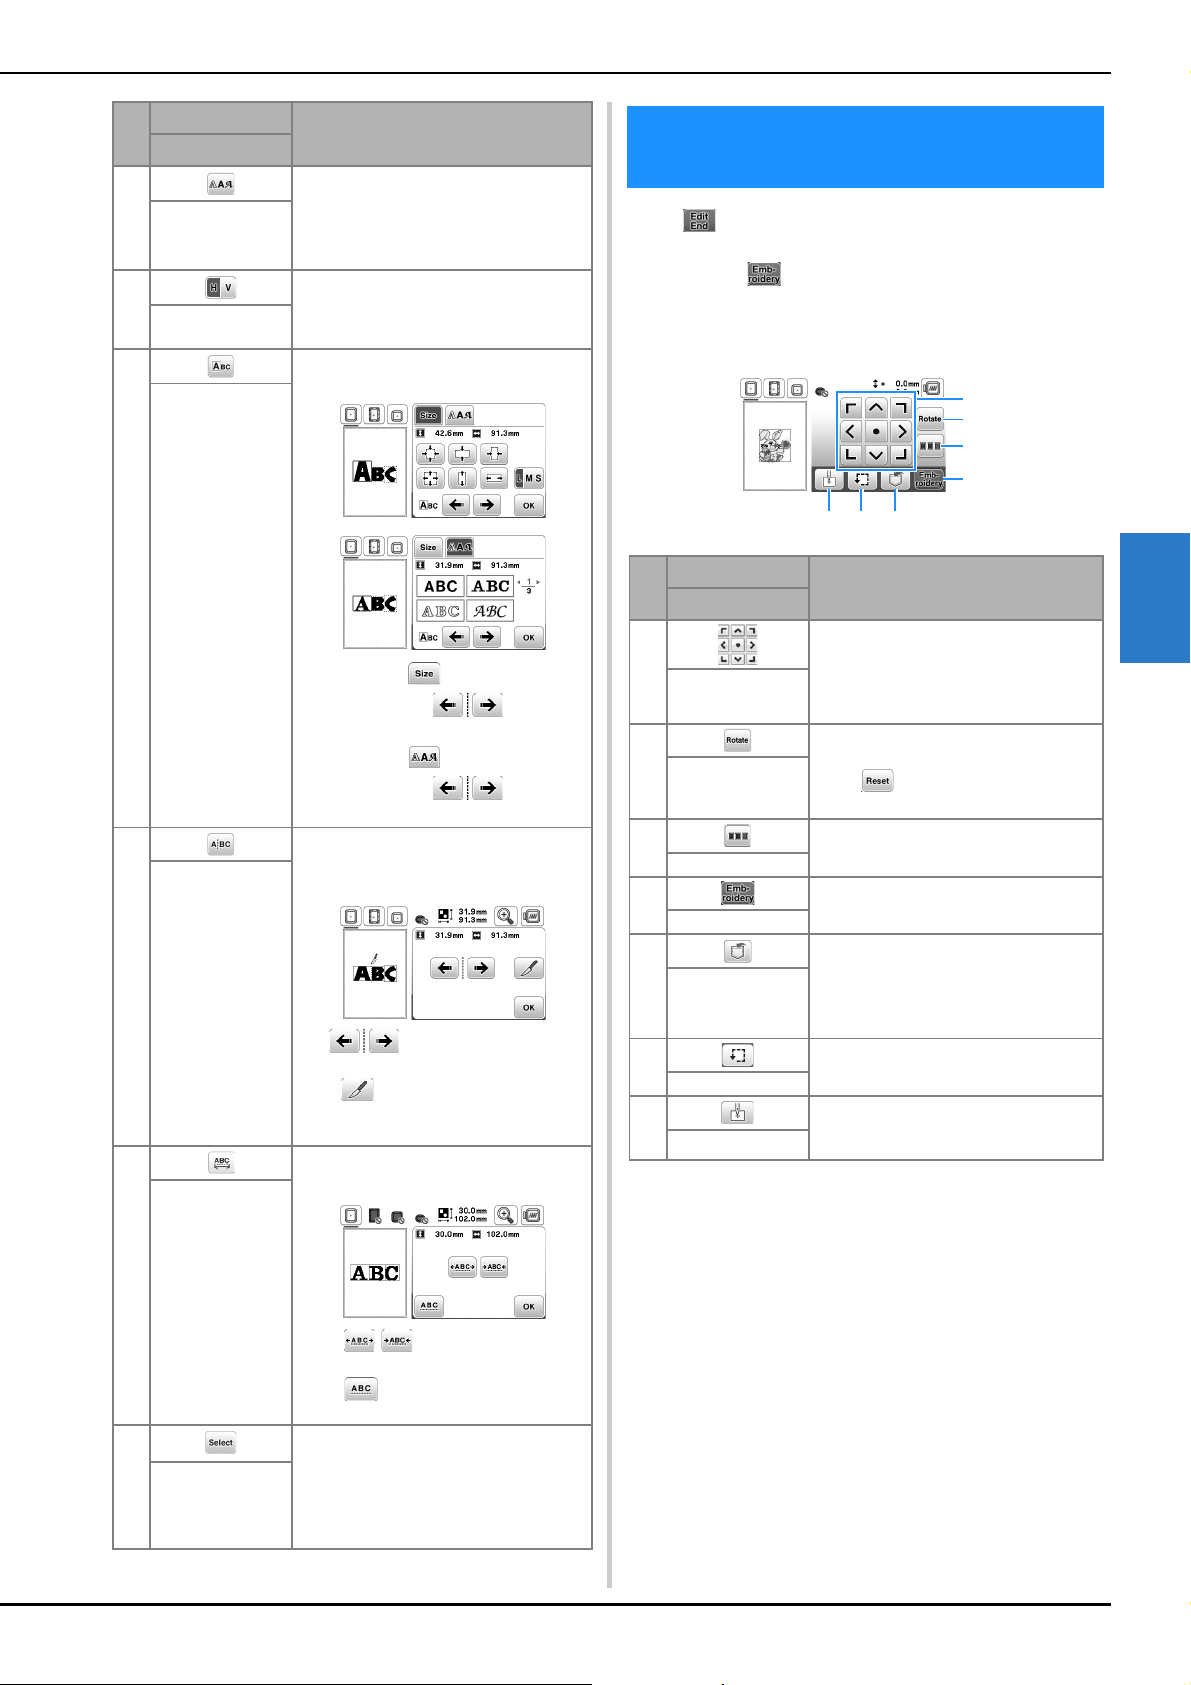
■ Embroidery settings screen
3 Touch this key to change the font of the
selected characters.
Depending on the font that was selected,
it may not be possible to change the
font.
Font key
4 Touch this key to switch between text
written vertically and horizontally.
(Japanese font only)
Vertical/horizontal
text key
5 Touch this key to edit each character
separately.
When touching , select the
character by using to change
the size.
When touching , select the
character by using to change
the font.
Edit character key
6 Touch this key to split text between
characters so that they can be edited
separately.
Use to select where the
pattern is to be separated, and then
touch to separate it.
Any pattern that is split cannot be
recombined.
Split text key
7 Touch this key to change the spacing of
character patterns.
Touch / to increase or decrease
the character spacing.
Touch to return the pattern to its
original appearance.
Character spacing
key
8 When a combined pattern is selected,
use this key to select a part of the pattern
to edit. The selected pattern is outlined
by the red box. If the line feed key was
used while entering text, single lines can
be selected.
Select key
No.
Display
Explanation
Key Name
Editing Patterns (Embroidery Settings
Screen)
No.
Display
Explanation
Key Name
1 Touch these keys to move the pattern in
the direction shown by the arrow.
(Touch the center key to return the
pattern to the center of the embroidery
area.) (page 98)
Move key
2 Touch this key to rotate the entire
pattern.
Touch to return the pattern to its
original position.
Rotate key
3 Touch this key to rearrange the stitching
sequence for combined patterns.
Color sorting key
4 Touch this key to enter the embroidery
screen.
Embroidery key
5 Touch this key to save patterns to the
machine's memory or USB flash drive.
Patterns can also be transferred to a
computer via wireless network
connection. (page 100)
Memory key
6 Touch this key to check the position of
the pattern. (page 87)
Trial key
7 Touch this key to move the needle start
position to align the needle with the
pattern position. (page 98)
Starting point key
2
7
6 5
4
1
3
Loading ...
Loading ...
Loading ...