Loading ...
Loading ...
Loading ...
Care and Maintenance
103
APPENDIX
5
Cleaning the LCD
If the surface of the LCD is dirty, lightly wipe it with a soft dry
cloth.
Cleaning the machine surface
When wiping dirt off the machine, firmly wring a soft cloth
soaked in (lukewarm) water.
After cleaning the machine, dry it with a soft, dry cloth.
Restrictions on oiling
In order to prevent damaging this machine, it must not be
oiled by the user.
This machine was manufactured with the necessary amount
of oil applied to ensure correct operation, making periodic
oiling unnecessary.
If problems occur, such as difficulty turning the handwheel or
an unusual noise, immediately stop using the machine, and
contact your authorized Brother dealer or the nearest Brother
authorized service center.
Precautions on storing the machine
Do not store the machine in any of the locations described
below, otherwise damage to the machine may result, for
example, rust caused by condensation.
• Exposed to extremely high temperatures
• Exposed to extremely low temperatures
• Exposed to extreme temperature changes
• Exposed to high humidity or steam
• Near a flame, heater or air conditioner
• Outdoors or exposed to direct sunlight
• Exposed to extremely dusty or oily environments
Cleaning the race
Stitching performance will suffer if lint and dust collects in the
bobbin case, therefore, it should be cleaned regularly.
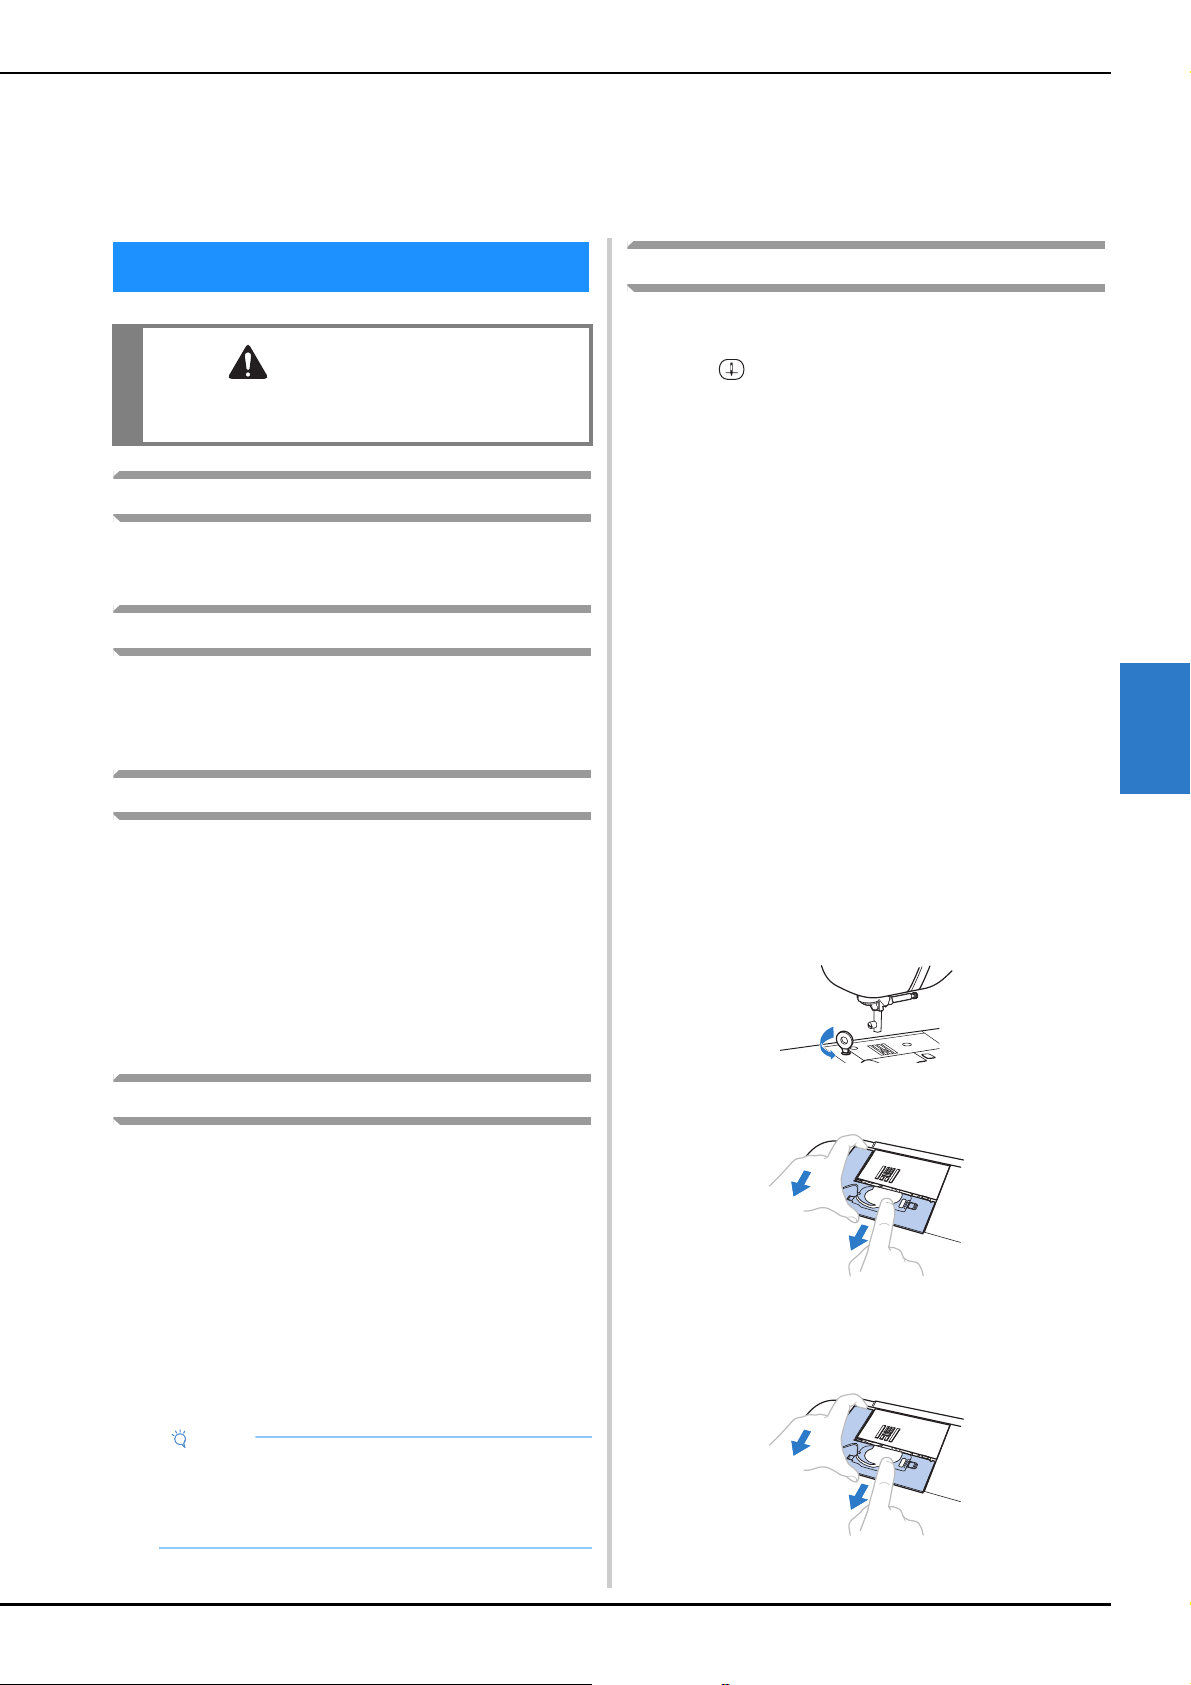
a
Press (Needle position button) to raise the needle.
b
Turn off the machine.
c
Unplug the power cord from the power supply jack on
the right side of the machine.
d
Raise the presser foot to remove the needle and presser
foot.
• For details, refer to “Replacing the Needle” on
page 29 and “Replacing the Presser Foot” on
page 30.
e
Remove the flat bed attachment or the embroidery unit
if either is attached.
f
Remove the bobbin cover.
g
Remove the needle plate cover.
■ If there is a screw in the needle plate cover
1 Use the disc-shaped screwdriver to remove the screw
in the needle plate cover.
2 Grasp both sides of the needle plate cover, and then
slide it toward you.
■ If there is no screw in the needle plate cover
1 Grasp both sides of the needle plate cover, and then
slide it toward you.
Chapter 5
APPENDIX
Care and Maintenance
CAUTION
• Unplug the power cord before cleaning the
machine, otherwise injuries may occur.
Note
• In order to extend the life of this machine,
periodically turn it on and use it.
Storing this machine for an extended period of time
without using it may reduce its efficiency.
Loading ...
Loading ...
Loading ...