Loading ...
Loading ...
Loading ...

Embroidering Preparation
79
EMBROIDERY
4
d
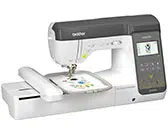
Insert the embroidery unit connection into the
connection port until it snaps into place.
e
Turn on the machine.
A message appears in the screen.
f
Be sure that no objects or hands are near the
embroidery unit and touch .
The carriage moves to its initial position.
The screen for selecting the embroidery pattern type
is displayed.
■ Removing the embroidery unit
Make sure that the machine is completely stopped and
follow the instructions below.
a
Remove the embroidery frame.
• For details on removing the embroidery frame, refer
to “Removing the embroidery frame” on page 84.
b
Touch , and then touch .
The embroidery carriage moves into a position
where it can be stored.
c
Turn off the machine.
d
Hold the release button on the bottom left of the
embroidery unit, and slowly pull the embroidery unit
to the left.
Note
• Make sure that there is no gap between the
embroidery unit and the machine, otherwise the
embroidery pattern may not be embroidered
correctly.
IMPORTANT
• Do not push on the carriage when attaching
the embroidery unit to the machine, otherwise
damage to the embroidery unit may result.
• Do not touch the connector in the embroidery
unit connection slot. The connector could be
damaged, and it may cause malfunctions.
• Do not lift up on the embroidery carriage, and
do not forcefully move it. It may cause
malfunctions.
Note
• If [Opening Screen] is set [ON] within the settings
screen, touch screen for the following message to
appear.
Memo
• Utility stitches cannot be selected when the
embroidery unit is attached.
IMPORTANT
• Always turn off the machine before removing
the embroidery unit.
It may cause malfunctions if removed when
the machine is turned on.
Loading ...
Loading ...
Loading ...
