Loading ...
Loading ...
Loading ...
Utility Stitches
60
i
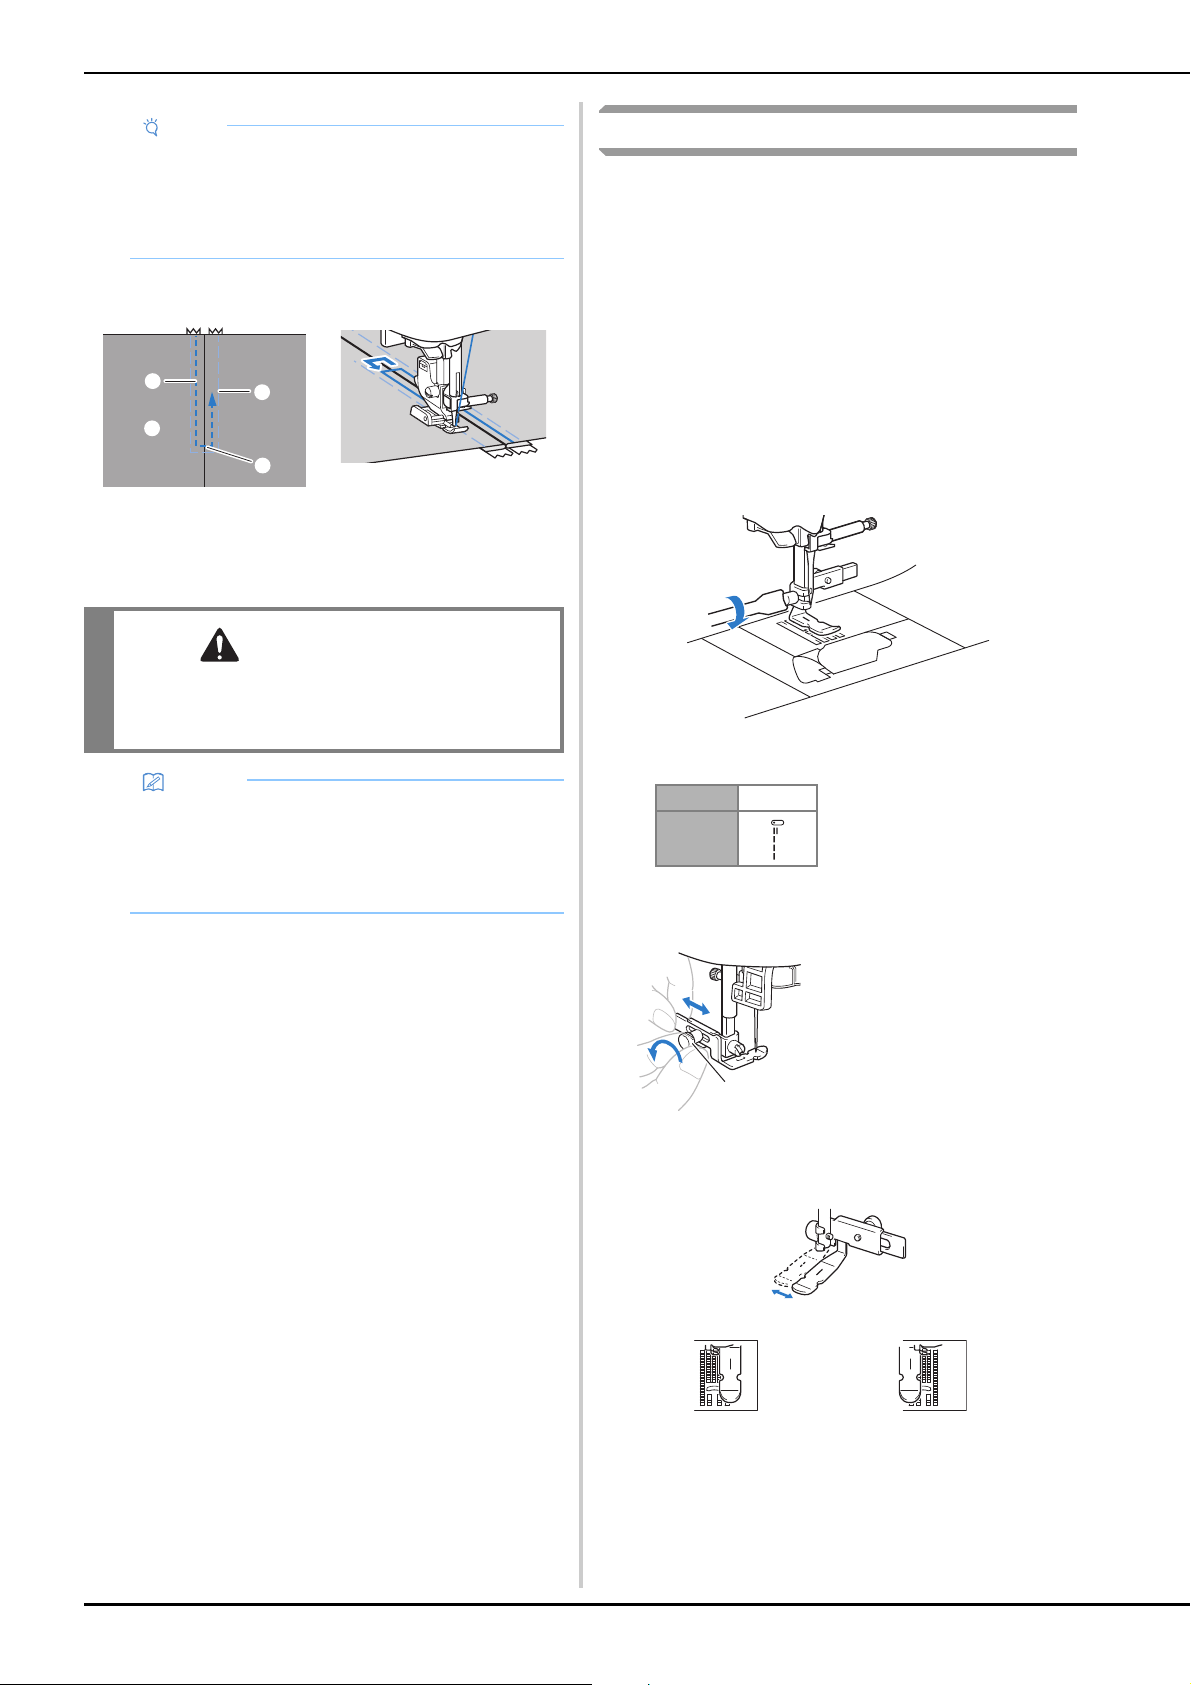
Topstitch around the zipper.
1 Stitching
2 Right side of fabric
3 Basting stitching
4 End of zipper opening
j
Remove the basting stitching.
Zipper/piping insertion
A zipper and piping can be sewn in place.
Use adjustable zipper/piping foot (sold separately with some
models).
■ Inserting a centered zipper
a
Refer to step a–f of “Inserting a centered zipper”
on page 59.
b
Remove the presser foot and presser foot holder to
attach the screw-on adjustable zipper/piping foot (sold
separately with some models).
• For details on removing the presser foot holder, refer
to “Removing and attaching the presser foot holder”
on page 31.
c
Select stitch.
d
Loosen the positioning screw on the back of the presser
foot.
e
Slide the presser foot over either the left or right feed
dog.
Note
• When using zipper foot “I”, be sure to select the
straight stitch (middle (center) needle position), and
slowly turn the handwheel toward you
(
counterclockwise)
to check that the needle does
not touch the presser foot.
CAUTION
• When sewing, be sure that the needle does not
touch the zipper, otherwise the needle may
break and cause injury.
Memo
• If the presser foot contacts the zipper slider, leave
the needle lowered (in the fabric) and raise the
presser foot. After moving the slider so it will not
contact the presser foot, lower the presser foot and
continue sewing.
1
2
3
4
No. 1-01
Stitch
1 Positioning screw
Left sewing position Right sewing position
1
Loading ...
Loading ...
Loading ...