Loading ...
Loading ...
Loading ...
415
Synchronized Release
6
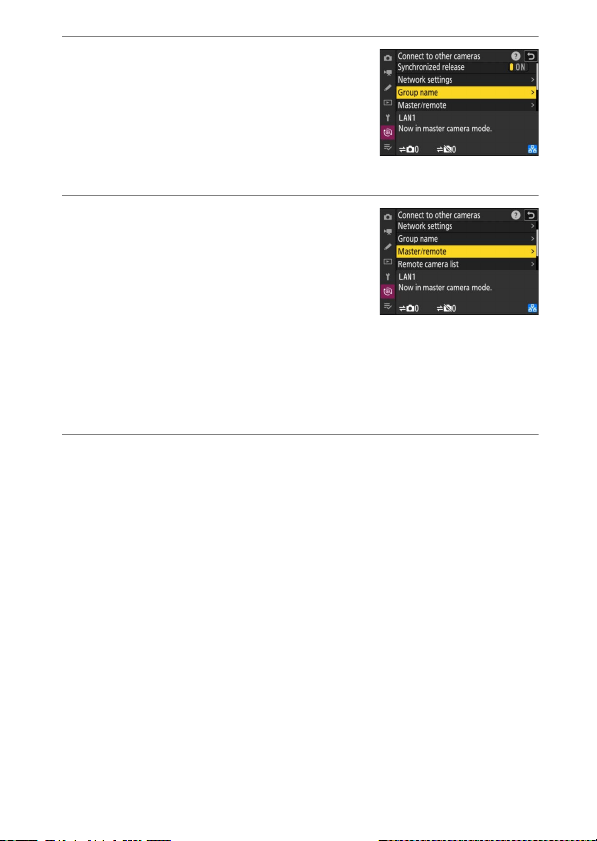
Highlight [Group name], press
2
, and
enter a group name.
Enter a group name for the synchronized
cameras. Group names can be up to eight
characters long.
•
All master and remote cameras on the
network must all be in the same group.
7
Highlight [Master/remote] and press
2
.
Choose a role for each camera from
“master” and “remote”.
•
[Master camera]: Pressing the shutter-
release button on the master camera
releases the shutters on the remote
cameras. Each group can have only one master. If the group has
multiple master cameras, only the first to connect to the network
will actually serve in that capacity.
•
[Remote camera]: The shutters on the remote cameras are
synchronized with the shutter on the master camera.
8
Repeat Steps 1 through 7 for the remaining cameras.
When configuring remote cameras, be sure to select [Remote
camera] in Step 7.
Loading ...
Loading ...
Loading ...