Loading ...
Loading ...
Loading ...
9
Press the CRUST button to move the arrow to desired setting: Light, Medium, or Dark crust.
(Crust is not adjustable in Cycles , , , , and .)
8
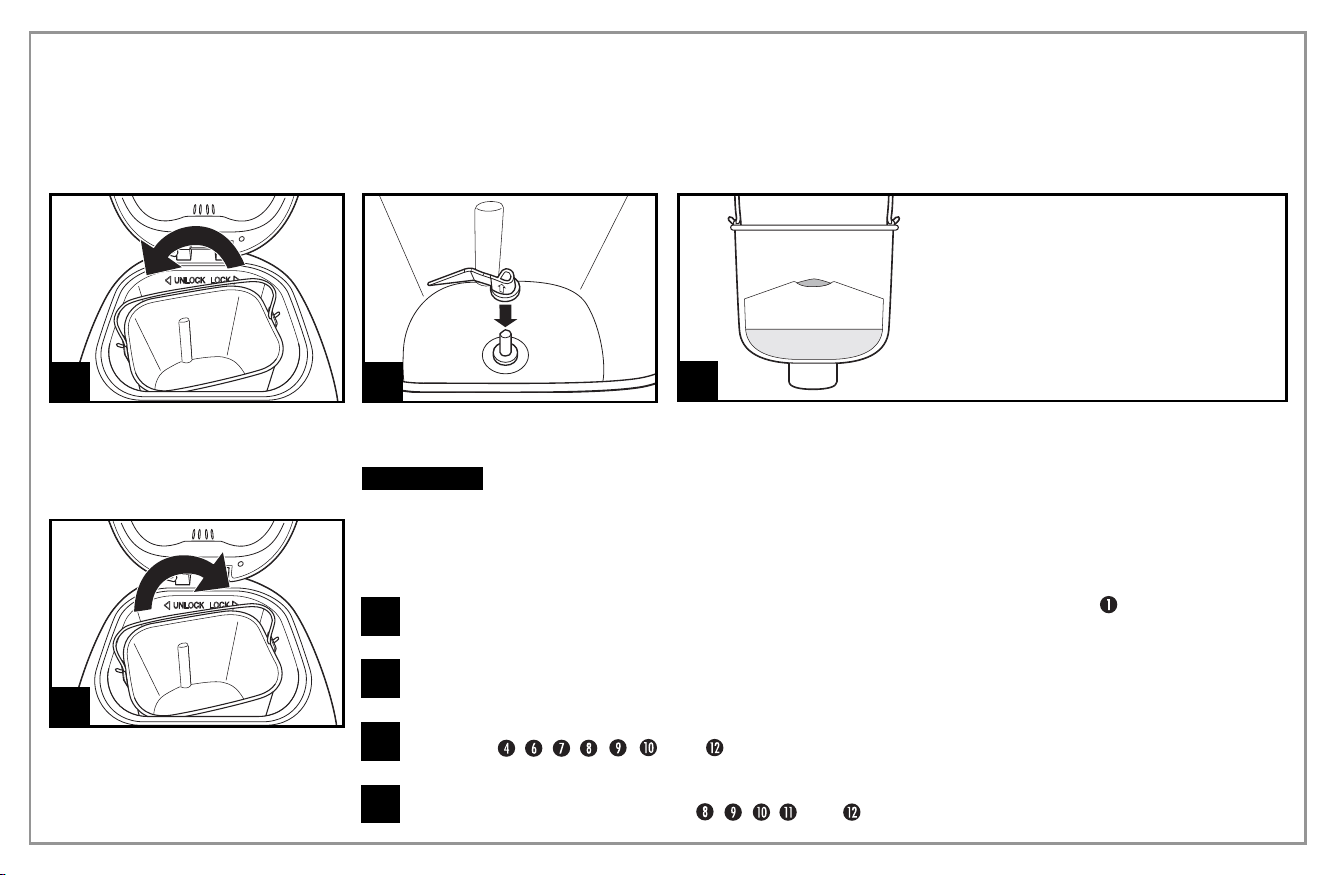
1
Using the bread pan handle,
turn the bread pan counter-
clockwise and then pull it out of
the appliance.
Detailed
Instructions
BEFORE FIRST USE:
• Check for any missing or damaged parts.
• Clean all the parts according to the Cleaning
section.
• Set the breadmaker on Bake mode and bake
empty for about 10 minutes. Let unit cool
down and clean all the detached parts again.
The appliance may emit a little smoke and/or
odor when you turn it on for the first time.
This is normal and will subside after the first
or second use. Make sure the appliance has
sufficient ventilation.
• Dry all parts thoroughly. The appliance is ready
for use.
2
Push the kneading paddle onto
the drive shaft inside the bread
pan.
w CAUTION Falling Object
Hazard: Breadmaker can wobble
and walk during kneading cycle.
Always position it in the center of
the counter away from the edge.
3
Add the ingredients to the bread pan in the order listed in the recipe.
First, add the liquids, sugar, and salt; then the flour; and last the yeast.
NOTE: Make sure that yeast does not come into contact with salt or
liquids.
LAST: Yeast. MUST be separate
from wet ingredients
SECOND: Dry ingredients (sugar,
salt, shortening, flour)
FIRST: Liquid ingredients – room
temperature
4
Place the bread pan into the
appliance and make sure it is
firmly locked in place by turning
it clockwise. Close the lid.
Plug in the appliance. A beep will be heard and the display will default to Cycle .
Press the CYCLE button until your desired cycle is displayed.
5
6
Press the LOAF SIZE button to move the arrow to 1.5- or 2-lb. loaf size. (Loaf size is not an option
in Cycles , , , , , , and .)
7
840194103 ENv04.indd 9 12/15/14 4:18 PM
Loading ...
Loading ...
Loading ...