Loading ...
Loading ...
Loading ...
USEFUL FUNCTIONS
Sewing Basics
93
2
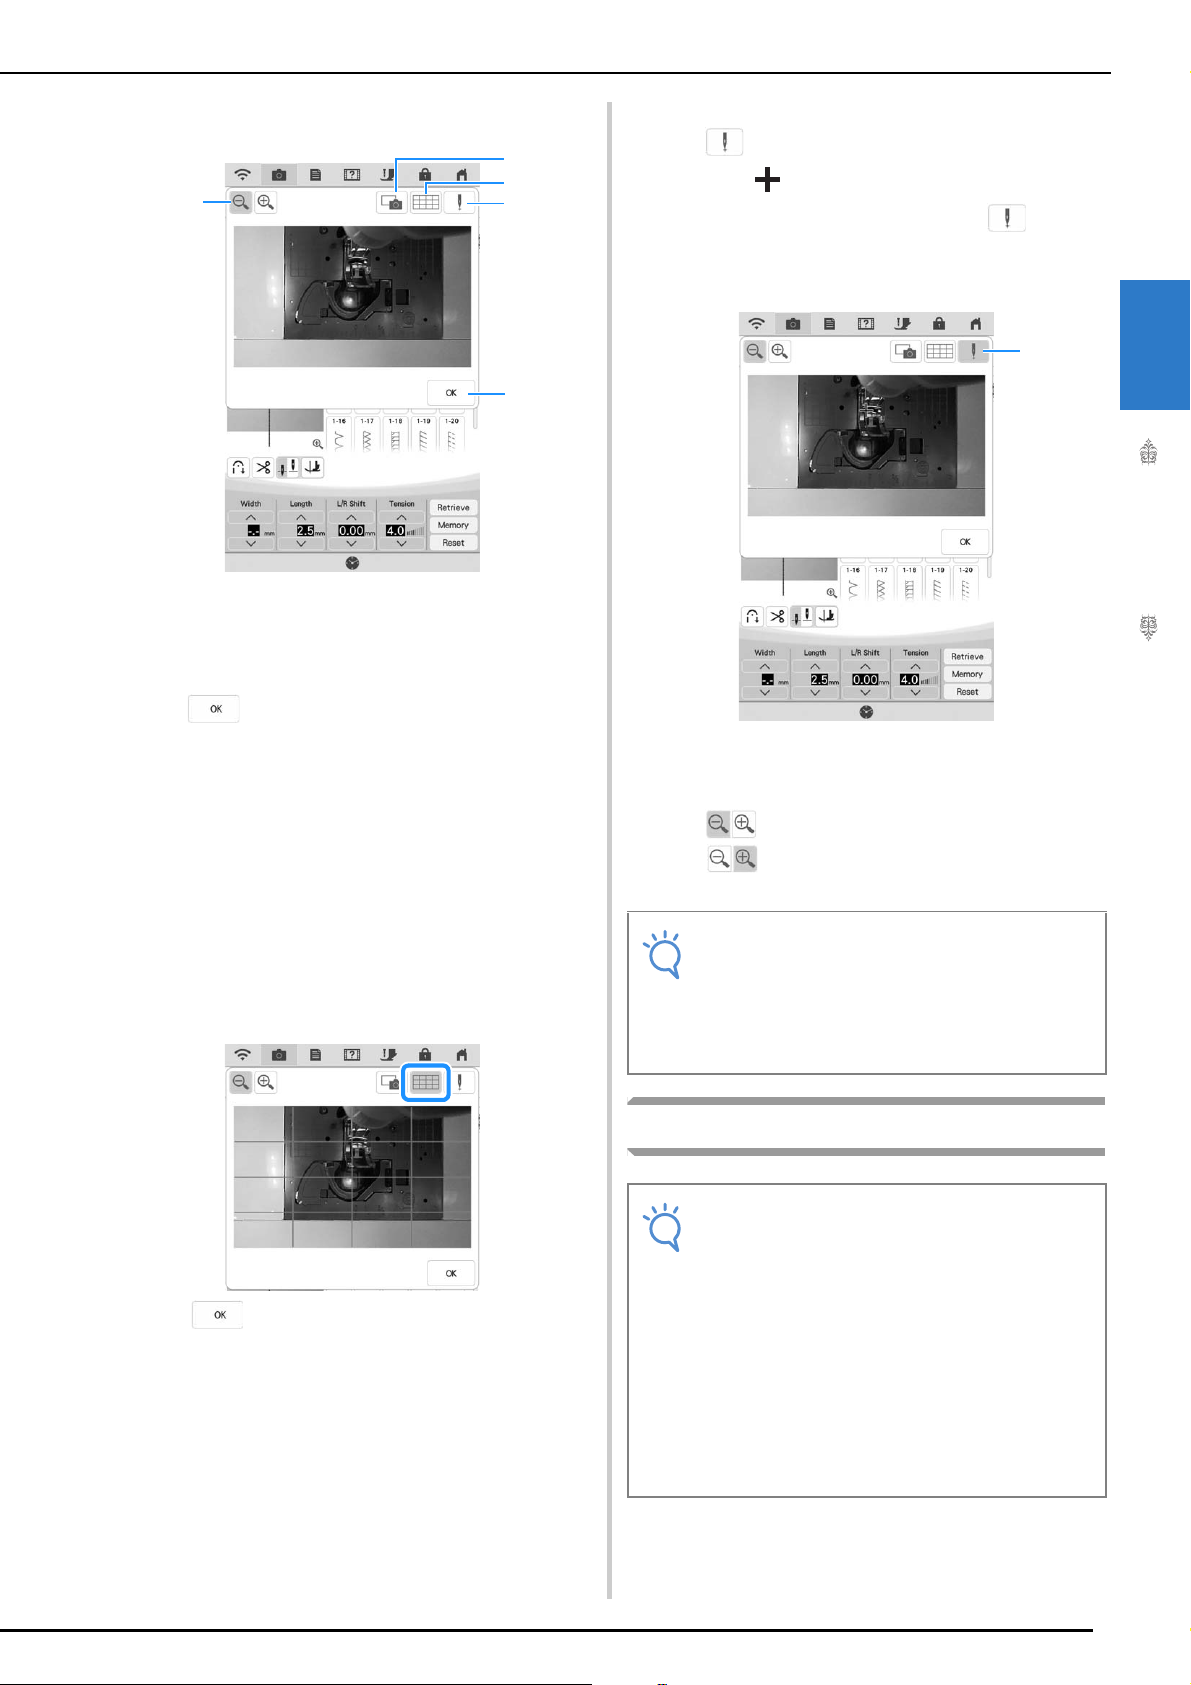
■ Using the Camera View Window
The camera view window appears.
a CAMERA IMAGE
b GRID VIEW
c NEEDLE DROP POSITION
d
e ZOOM
CAMERA IMAGE
Press this key to save a camera image to the USB
media.
Insert the USB media to the machine to save a
camera image (Refer to “Saving a Settings Screen
Image to USB Media” on page 33). The files for
camera images are saved as “.PNG”. A maximum of
100 camera images can be saved in one USB media.
GRID VIEW
Press this key to display a grid.
Press to close the screen.
NEEDLE DROP POSITION
Press to show the needle drop position in the
screen as “ ”.
Lower the presser foot before pressing . Once
the needle drop position appears on the screen, you
can raise the presser foot and change the needle
drop position by moving the fabric.
a Needle drop position
ZOOM
Press to enlarge the image in the screen.
Press again to return the image to its original
display size.
Specifying the Sewing End Point
b
c
d
e
a
Note
• The camera view window disappears when
you start sewing.
• When sewing thick fabrics, the needle drop
position indicated in the screen may differ
from the actual position.
Note
Using the same material and stitch pattern as
your project, sew trial stitches to check the
result. The machine’s sewing end point may
become misaligned in the following cases:
• The end point sticker is loose.
• The fabric was not sewn straight.
• The fabric was pushed too hard during
feeding.
• Fabrics difficult to sew, such as
heavyweight, quilted, stretchy, or thin
fabrics, were used.
a
Loading ...
Loading ...
Loading ...