Loading ...
Loading ...
Loading ...
TROUBLESHOOTING
208
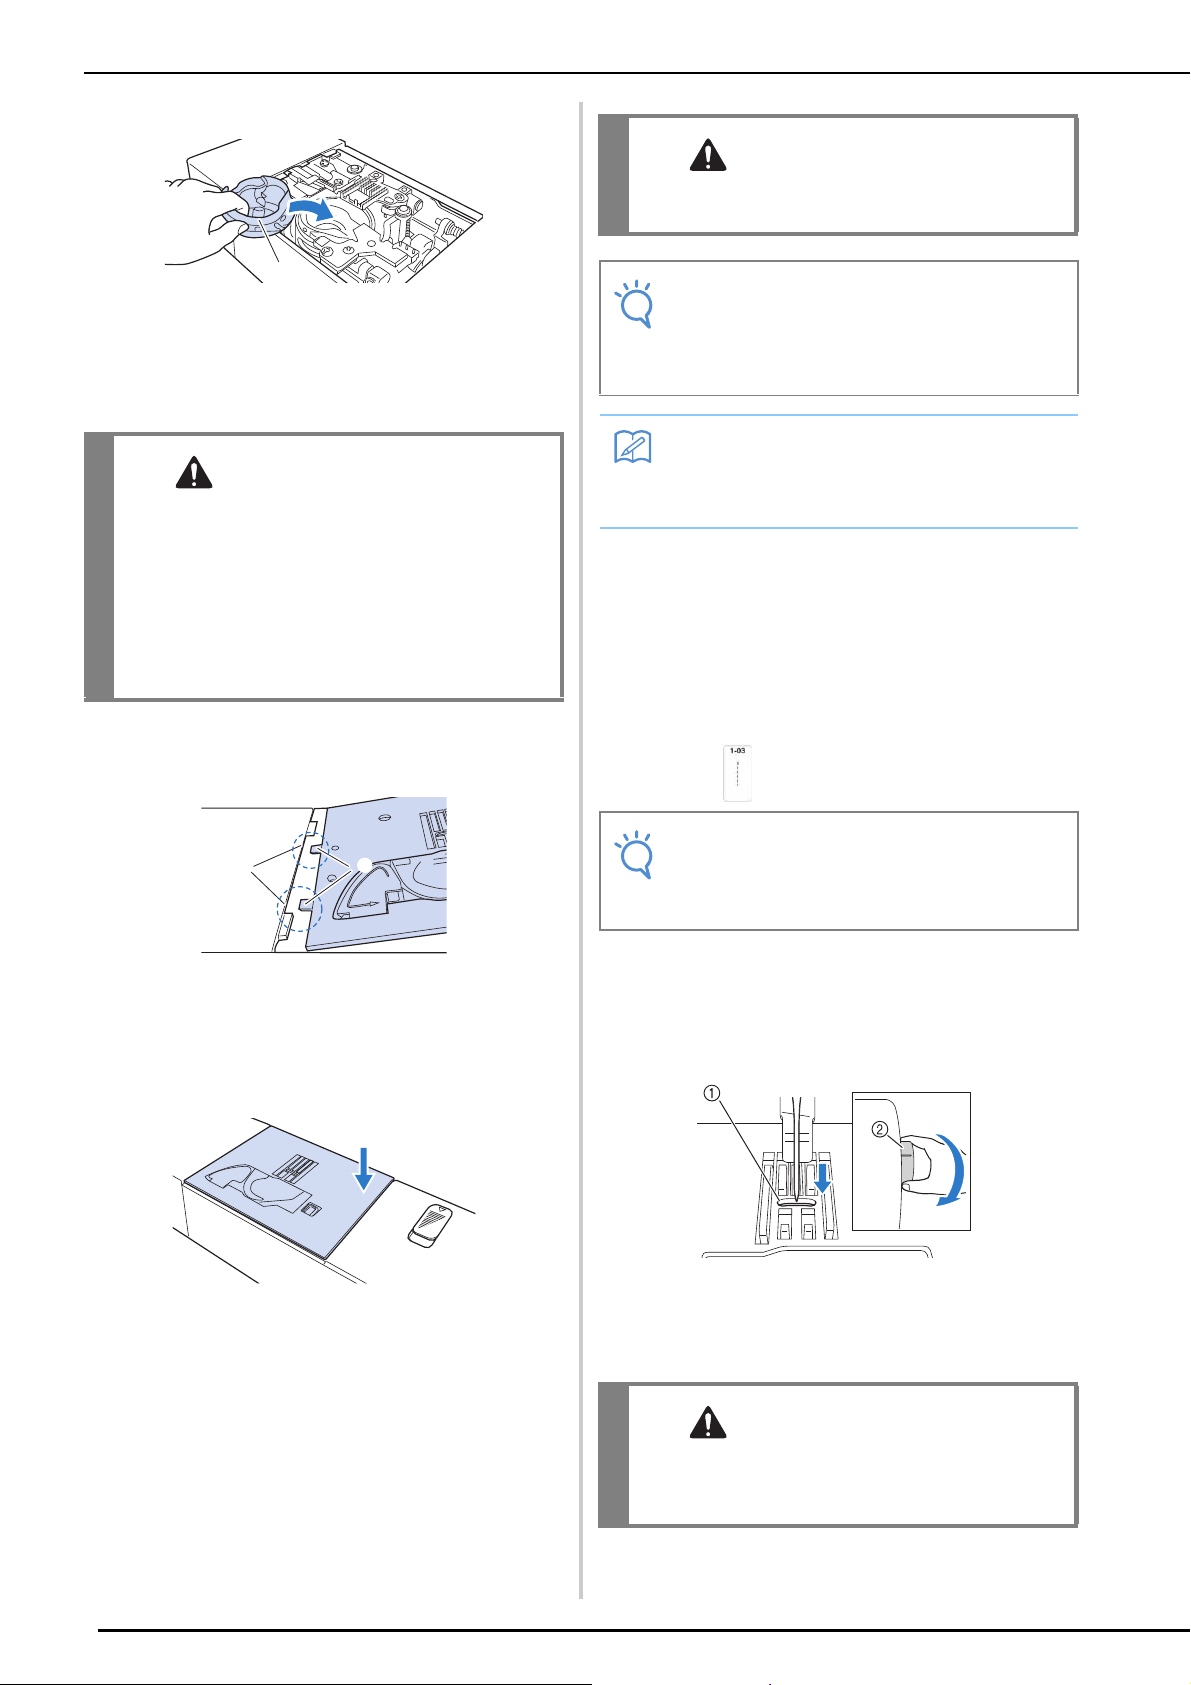
* Align the and ● marks.
a mark
b ● mark
c Bobbin case
* Make sure that the indicated points are aligned
before installing the bobbin case.
k
Insert the tabs on the needle plate into the
notches in the machine.
a Tabs
b Notches
l
Press down on the right side of the needle
plate to secure it.
m
Check the condition of the needle, and then
install it.
If the needle is in a poor condition, for example, if it is
bent, be sure to install a new needle.
* Refer to “CHANGING THE NEEDLE” on page 69.
■ Checking Machine Operations
If the needle plate has been removed, check
machine operations to confirm that installation has
been completed correctly.
a
Turn on the machine.
b
Select .
c
Slowly turn the handwheel toward you
(counterclockwise), and look from all sides
to check that the needle falls at the center
of the hole in the needle plate.
a Hole in the needle plate
b Handwheel
If the needle contacts the needle plate, remove the
needle plate, and then install it again.
CAUTION
• Never use a bobbin case that is scratched;
otherwise, the upper thread may become
tangled, the needle may break, or sewing
performance may suffer. For a new bobbin
case, contact your nearest Brother authorized
service center.
• Make sure that you fit the bobbin case
properly, otherwise the needle may break.
c
a
b
CAUTION
• Never use bent needles. Bent needles can
easily break, possibly resulting in injuries.
Note
• After completing this procedure, continue
with the following procedure in “Checking
Machine Operations” to check that the
machine is operating correctly.
Memo
• Since the needle may have been damaged
when the fabric was caught in the machine,
we recommend replacing it with a new one.
Note
• Do not yet install the presser foot and
thread.
• Be sure to select Straight stitch (Middle).
CAUTION
• Be sure to unplug the machine before
removing the needle plate. Otherwise, electric
shock or injury may result.
Loading ...
Loading ...
Loading ...