Loading ...
Loading ...
Loading ...
SEWING THE STITCHES
Utility Stitches
125
3
■ Piecing
Sewing two pieces of fabric together is called piecing.
When cutting pieces for quilt blocks, make sure the
seam allowance is 6.5 mm (approx. 1/4 inch).
a
Select or and attach presser foot “J”.
b
Align the edge of the fabric with the edge of
the presser foot, and start sewing.
* To sew a 6.5 mm (approx. 1/4 inch) seam allowance
along the right edge of the presser foot with
selected, the L/R Shift should be set to 5.50 mm
(approx. 7/32 inch).
a 6.5 mm (approx. 1/4 inch)
* To sew a 6.5 mm (approx. 1/4 inch) seam allowance
along the left edge of the presser foot with
selected, the L/R Shift should be set to 1.50 mm
(approx. 1/32 inch).
a 6.5 mm (approx. 1/4 inch)
* To change the needle position, use or in
the L/R Shift display.
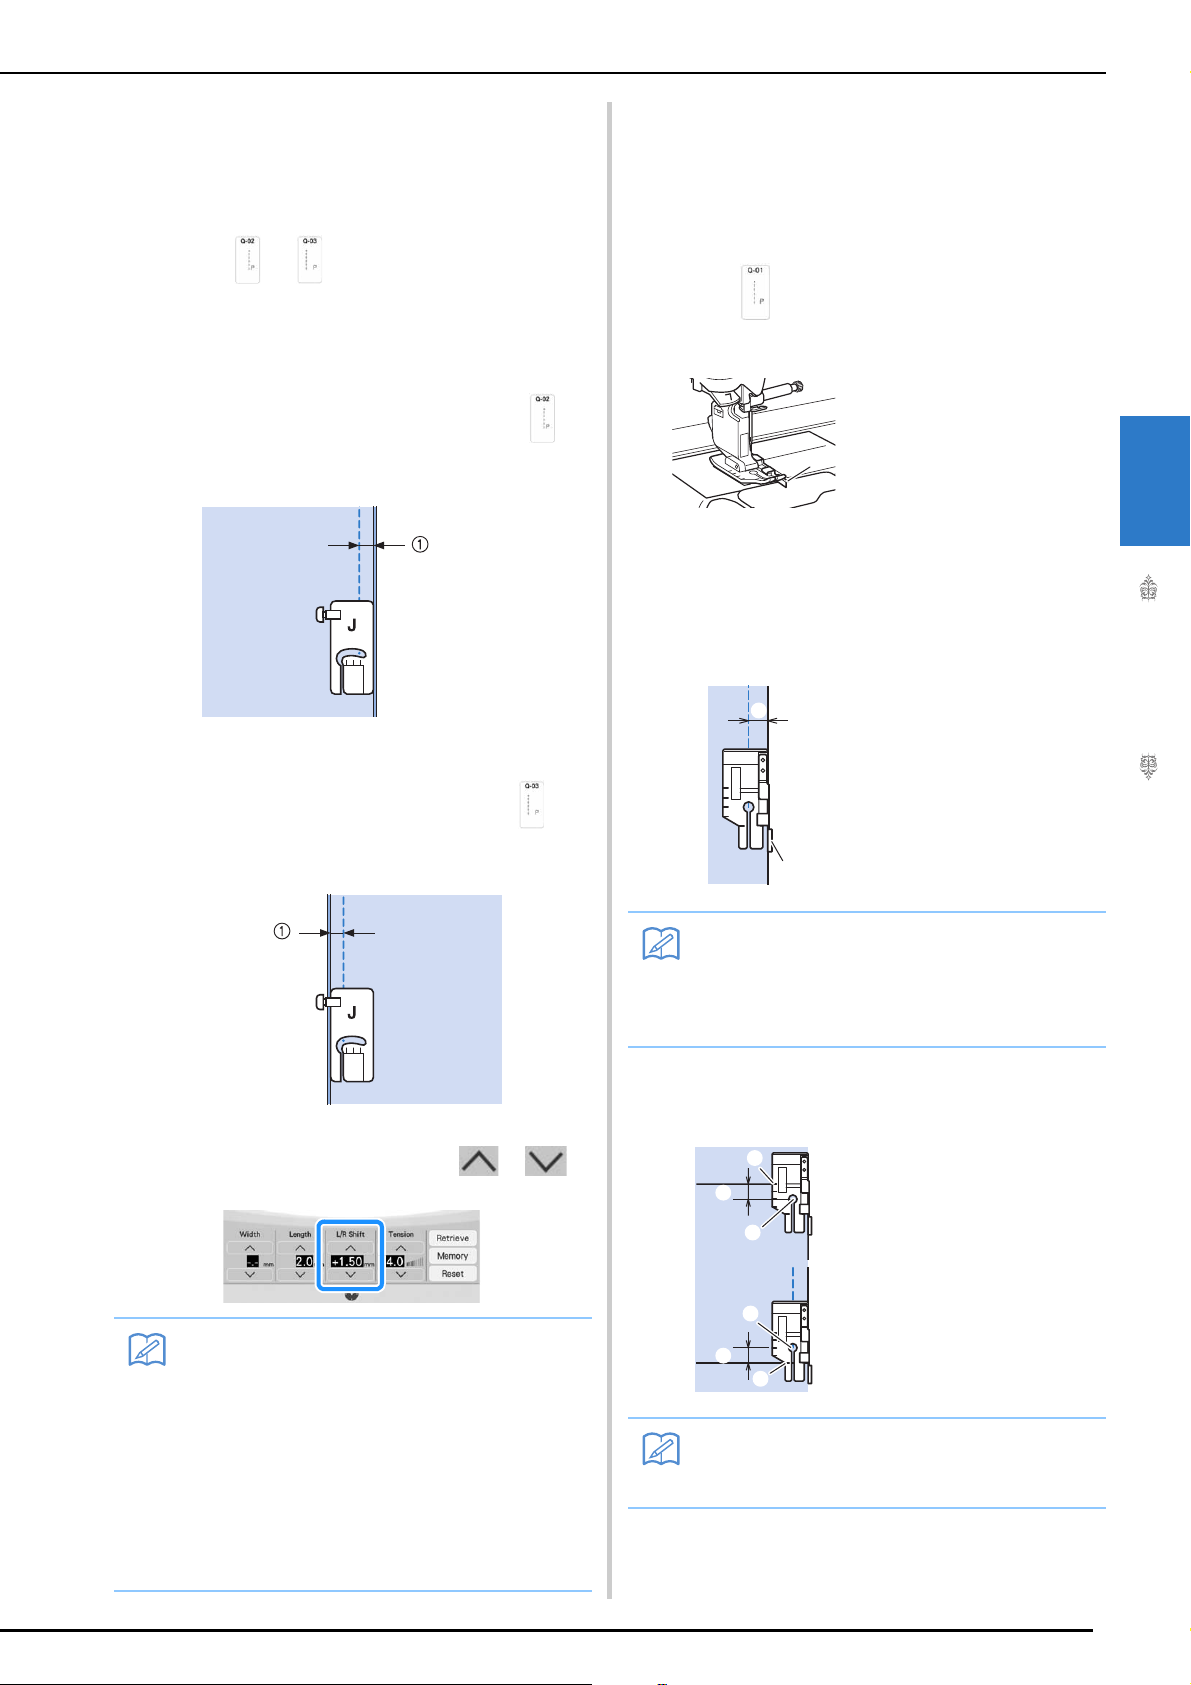
■ Piecing Using the 1/4" Quilting Foot with
Guide
This quilting foot can sew an accurate 1/4-inch or 1/8-
inch seam allowance.
It can be used for piecing together a quilt or for
topstitching.
a
Press , and then attach the 1/4" quilting
foot with guide.
b
Use the guide and marks on the presser foot
to sew accurate seam allowances.
Piecing a 1/4 inch seam allowance
Keep the edge of the fabrics against the guide as you
sew.
Creating an accurate seam allowance
Use the mark on the foot to begin, end, or pivot 1/4
inch from edge of fabric.
Memo
•
Using a straight stitch (middle needle position)
makes it easier to sew smoothly (page 110).
•
When stitch Q-01 is selected and the guideline
marker is set at 6.50 mm (when "Initial Position" is
set to center needle position) or 10.00 mm (when
"Initial Position" is set to left needle position), the
space between the needle position and the
guideline will be 6.5 mm or approximately 1/4 inch.
Aligning the edge of the fabric with the guideline will
allow you to easily sew accurate 1/4 inch seams.
a Guide
a Guide
b 1/4 inch
Memo
• For accurate fabric placement, refer to
“Aligning the Fabric with a Mark on the
Needle Plate or Bobbin Cover (with Mark)”
on page 112.
a Align this mark with
edge of fabric to
begin.
b Beginning of stitching
c End of stitching
d Opposite edge of
fabric to end or pivot
e 1/4 inch
Memo
• For details on pivoting, refer to “Pivoting”
on page 89.
a
a
b
a
e
e
c
d
b
Loading ...
Loading ...
Loading ...