Loading ...
Loading ...
Loading ...
LCD SCREEN
32
Embroidery Settings
For details on embroidering settings, refer to the
Operation Manual (Embroidery).
■ Page 8
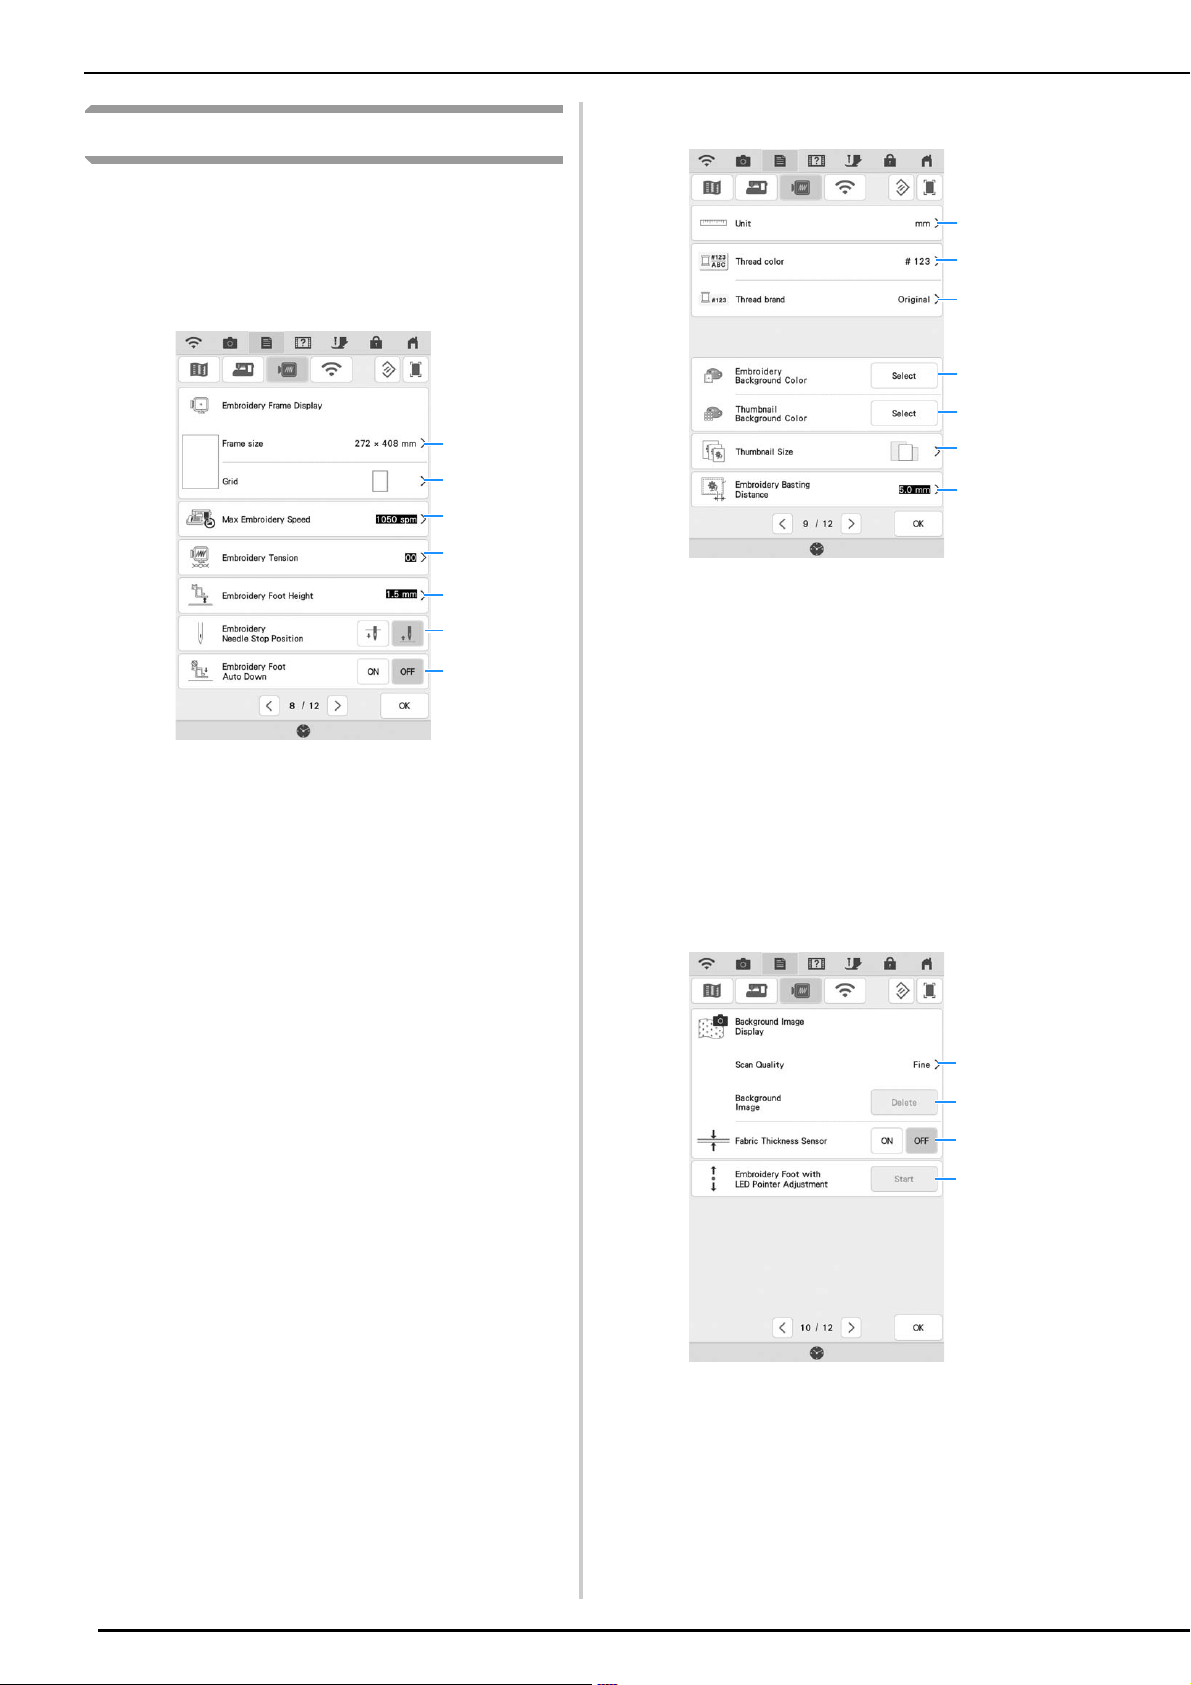
a Select the embroidery frame to be used.
b Change the center point marker or grid lines.
c Adjust the maximum embroidery speed setting.
d Adjust the upper thread tension for embroidering.
e Select the height of the embroidery foot during
embroidering.
f Adjust the needle position for embroidering.
g When set to “ON”, pressing the “Start/Stop”
button when the presser foot is raised
automatically lowers the presser foot before
starting embroidering.
■ Page 9
h Change the display units (mm/inch).
i Change the thread color display on the
“Embroidery” screen: thread number or color name.
j
Select the thread brand of the thread color display.
The thread brand setting is reflected the next time
a pattern is imported.
k Change the color of the background for the
embroidery display area.
l Change the color of the background for the
thumbnail area.
m Press to specify the size of pattern thumbnails.
n Adjust the distance between the pattern and the
basting stitching.
■ Page 10
o Select the quality for displaying the fabric in the
screen.
p Erase the scanned image.
q Set to “ON” when positioning the pattern on thick
fabric using the built-in camera.
r Adjust the position and brightness of the
embroidery foot “W+” with LED pointer (sold
separately). (These settings are not available
unless embroidery foot “W+” with LED pointer is
installed on the machine.)
a
d
e
f
b
c
g
k
l
h
i
m
j
n
q
r
p
o
Loading ...
Loading ...
Loading ...