Loading ...
Loading ...
Loading ...
CHANGING THE NEEDLE
Sewing Basics
69
2
a
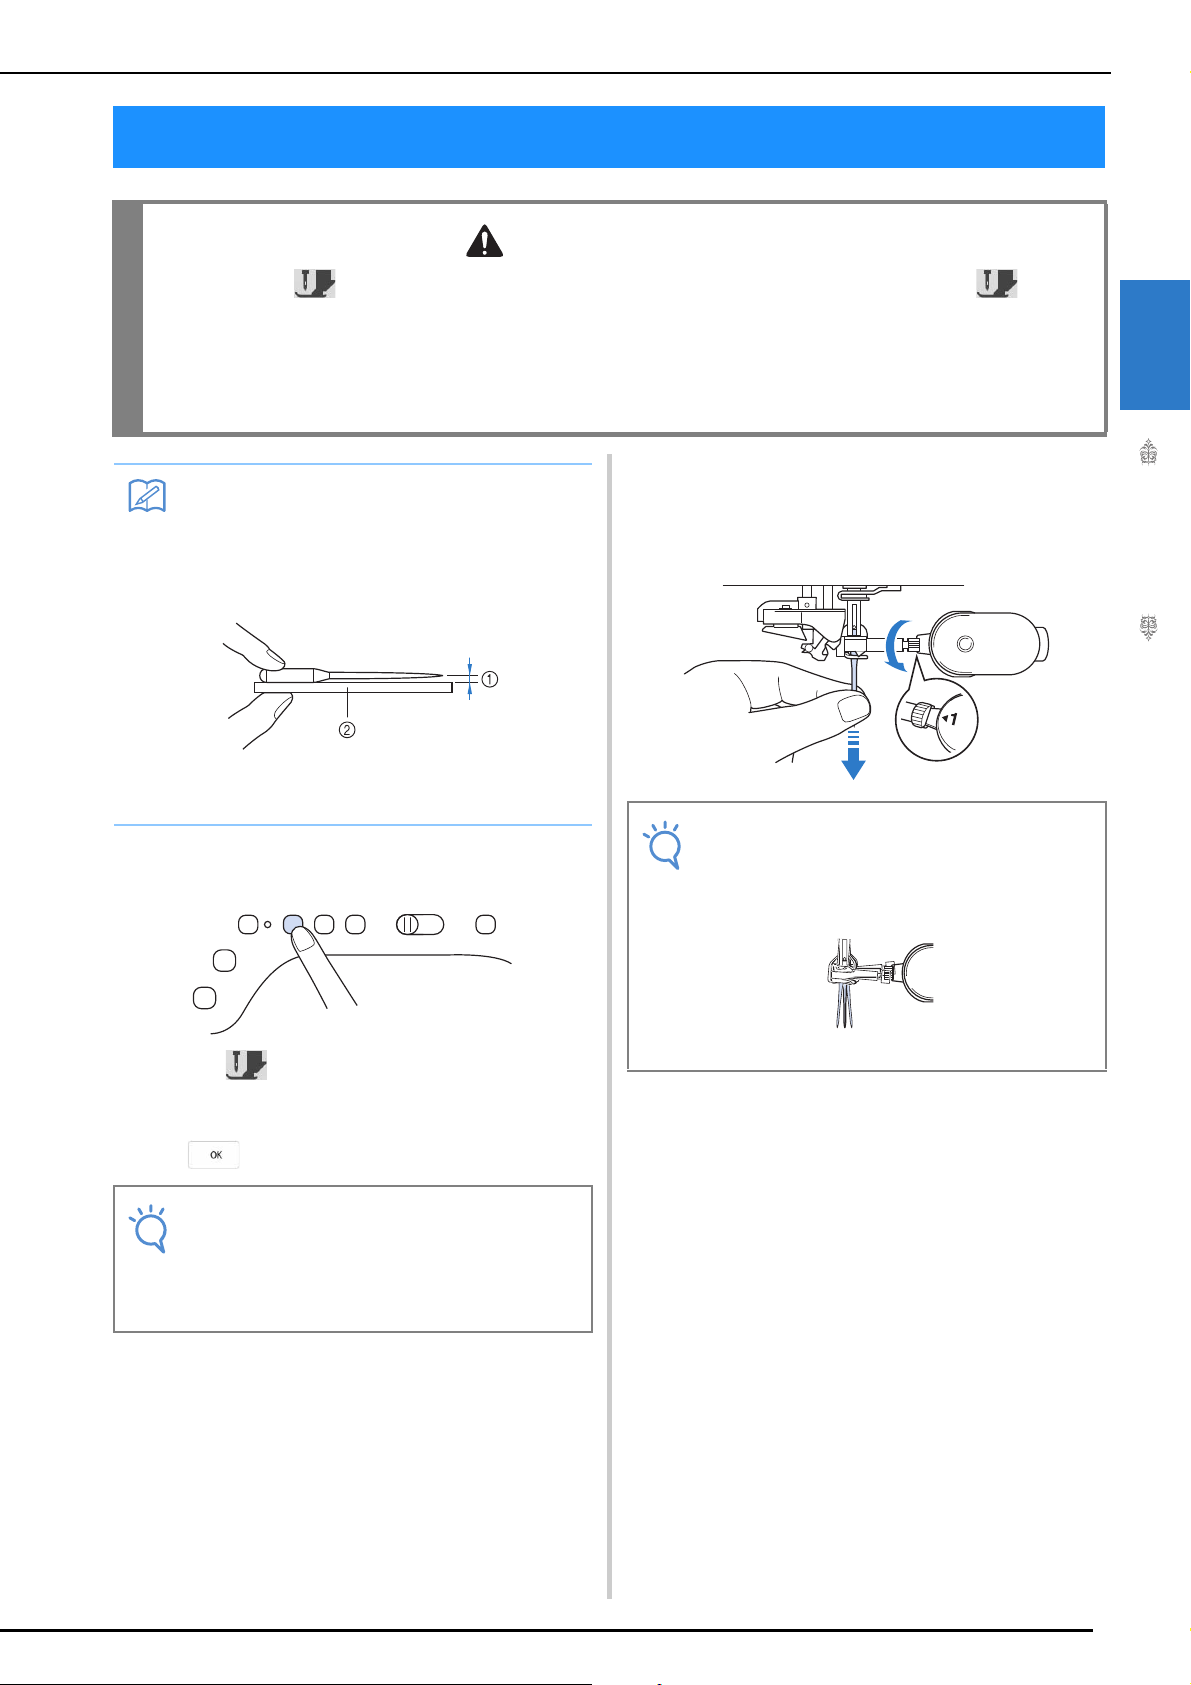
Press the “Needle Position” button to raise
the needle.
b
Press to lock all keys and buttons.
* If the message “OK to automatically lower the
presser foot?” appears on the LCD screen, press
to continue.
c
Use the screwdriver to turn the needle
clamp screw toward the front of the
machine and loosen the screw. Remove the
needle.
CHANGING THE NEEDLE
CAUTION
• Always press on the screen to lock all keys and buttons before changing the needle. If is not
pressed and the “Start/Stop” button or another operation button is pressed accidentally, the machine will
start and injury may result.
• Use only home sewing machine needles made for home use. Other needles may bend or break and may
cause injury.
• Never sew with a bent needle. A bent needle will easily break and may cause injury.
Memo
• To check the needle correctly, place the flat
side of the needle on a flat surface. Check
the needle from the top and the sides.
Throw away any bent needles.
a Parallel space
b Level surface (bobbin cover, glass, etc.)
Note
• Before replacing the needle, cover the hole
in the needle plate with fabric or paper to
prevent the needle from falling into the
machine.
Note
• Do not apply pressure to the needle clamp
screw. Doing so may damage the needle or
machine.
Loading ...
Loading ...
Loading ...