Loading ...
Loading ...
Loading ...
ENTERING STITCH DATA
190
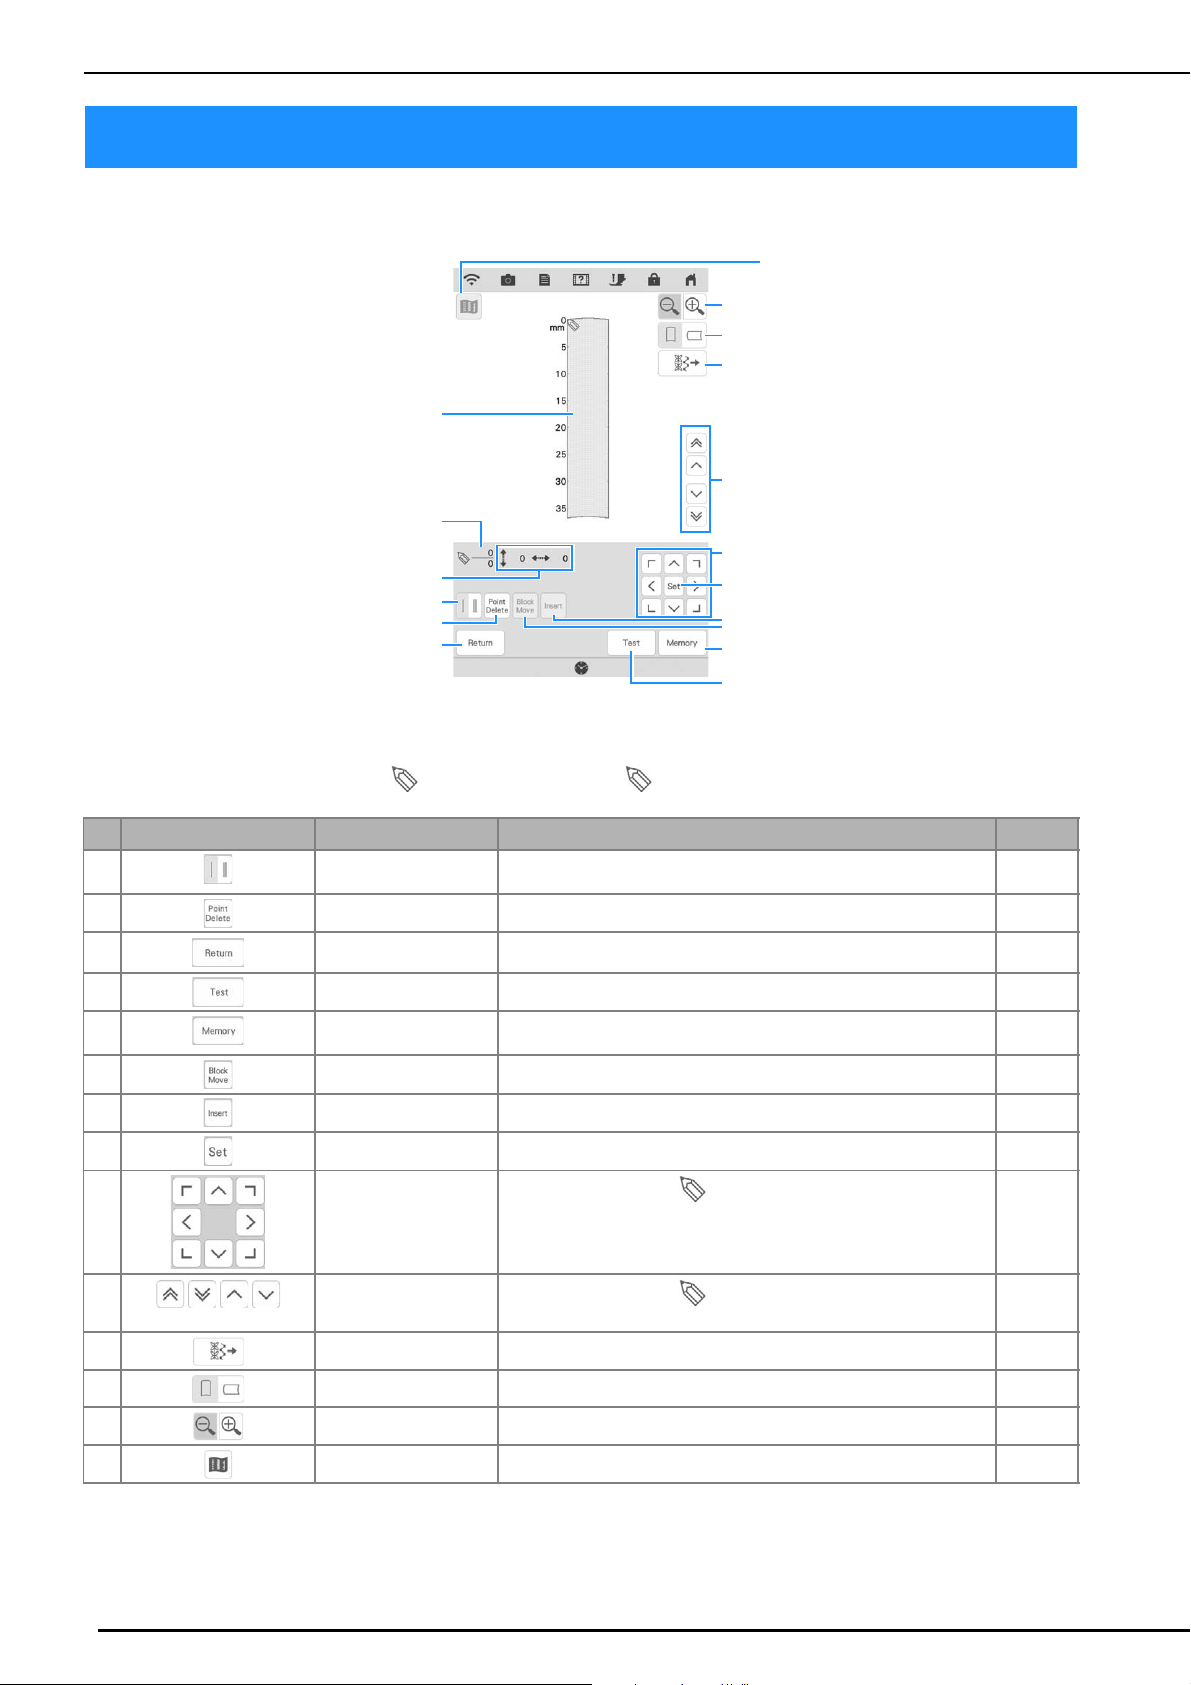
■ Key Functions
a This area displays the stitch being created.
b Displays the number of the present set point over the total number of points in the stitch.
c Displays the y-coordinate of over the x-coordinate of .
ENTERING STITCH DATA
No. Display Key Name Explanation Page
d Single/triple stitching
key
Press this key to select whether one or three stitches will be sewn
between two points.
191
e Point delete key Press this key to delete a selected point. 191
f Return key Press this key to exit the entering stitch data screen. —
g Test key Press this key to sew a test of the stitch. 191, 196
h MY CUSTOM STITCH
memory key
Press this key to store the stitch being created. 196
i Block move key Press this key to group points together and move them together. 193
j Insert key Press this key to insert new points on the stitch design. 194
k Set key Press this key to set a point on the stitch design. 191-193
l
Arrow keys
Use these keys to move over the display area.
191-194
m
Point-to-point key
Use these keys to move from point to point on the stitch, or to
the first or last point entered on the stitch.
192-194
n Stitch edit key Press this key to edit the utility stitches in the machine.
194
o Grid direction key Press this key to change the direction of the grid sheet. 191
p Enlarger key Press this key to see an enlarged version of the stitch being created. 191
q Image key Press this key to view an image of the stitch. 191
a
m
i
h
g
b
d
f
c
e
q
l
k
j
o
n
p
Loading ...
Loading ...
Loading ...