Loading ...
Loading ...
Loading ...
Basic Structure & Display Content
YC61 Owner’s Manual
23
Auto Power Off Function
The Auto Power Off function automatically turns off
this instrument after 30 minutes of inactivity. By default,
this is set to “Disable.”
Setting the Auto Power Off function
[MENU] button → “General” → “Auto Power Off” →
“Enable” (page 38).
NOTICE
• Since any unsaved data will be lost when the Auto Power
Off function turns off this instrument. Make sure to store
your work before this occurs.
• Depending on the instrument status, the power may not
turn off automatically, even after the specified period of
time elapses. Always turn off the power manually when
the instrument is not in use.
Restoring the Factory Default
Settings (Factory Reset)
The Factory Reset function allows you to restore this
instrument to its initial condition. To execute the factory
Reset function, press the [MENU] button → “Job” →
“Factory Reset.”
NOTICE
When the Factory Reset function is executed, all the Live
Set Sounds and the settings of MENU screens and
SETTINGS screens will be overwritten with their defaults. It
is wise, therefore, to regularly create backup copies of
important data on a USB flash drive or the like.
NOTE
Refer to page 56 for information on detailed settings of preset
Live Set Sounds.
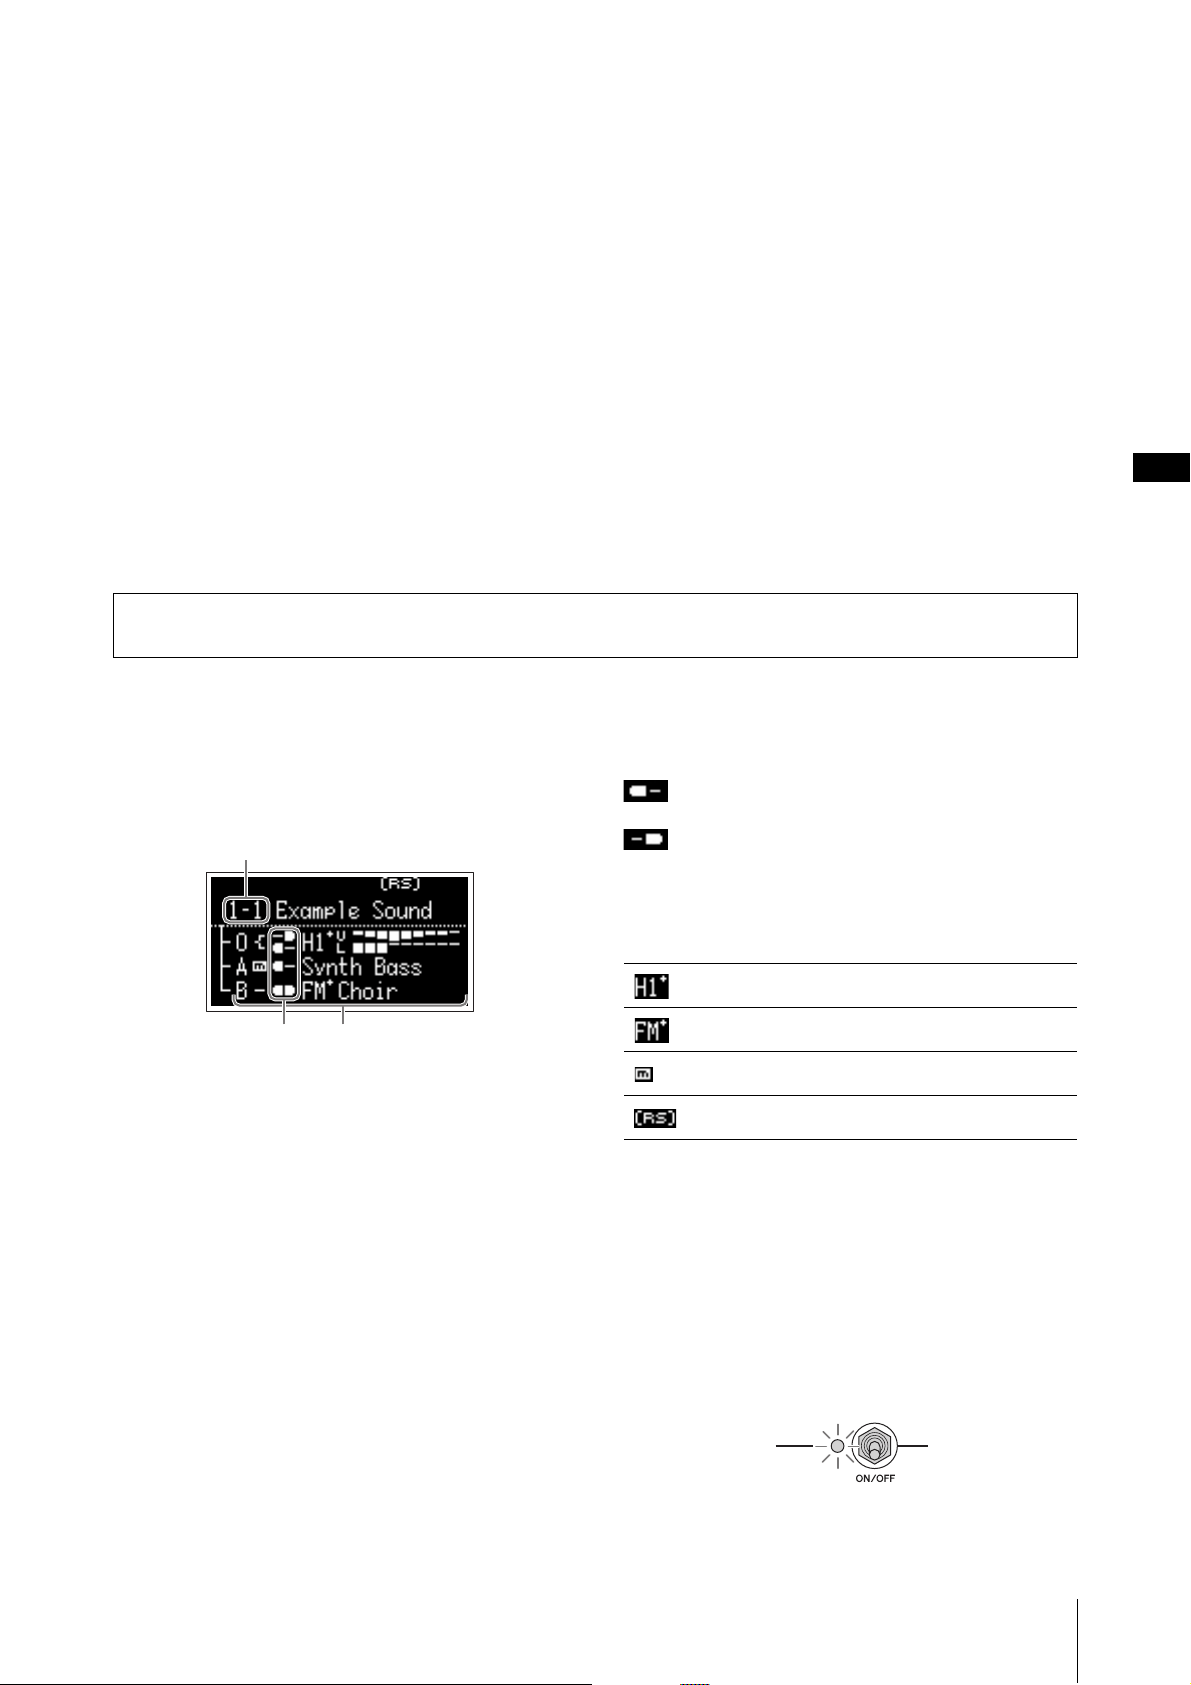
Top Screen Configuration
This section explains the Top (Live Set Sound) screen
which appears when this instrument is turned on with its
default settings (factory settings).
1 Live Set Sound number
Displays the currently selected Live Set Sound number.
The “1-1” is selected automatically when this instrument
is turned on. You can also change which number is
automatically selected when turned on, by changing the
“Power On Sound” setting (page 40).
2 Voice Sections
Indicates the status of each Section.
The sound of this instrument is divided into three Voice
Sections: Organ, Key A, and Key B. The Organ (O) area
shows the organ type and the approximate drawbar
settings, while the Key A (A) and Key B (B) areas show
the Voice names.
Voices having “FM” in the name are those using FM
tone generation.
The Sections set to on will sound simultaneously in a
layer. The Sections set to off are not displayed on the
Top Screen and will not sound.
3 Split
Indicates the current split status of each Voice Section/
part.
indicates that the Section/part sounds when the
keyboard is played in a range below the Split Point.
indicates that the Section/part sounds when the
keyboard is played in a range above the Split Point.
In addition, following special icons may appear on the
Top screen depending on the Live Set Sound settings.
Selecting Voice Sections
To enable (ON) or disable (OFF) each Voice Section, use
the corresponding Section [ON/OFF] switch. When the
indicator lamp of the Section [ON/OFF] switch is lit, the
corresponding Voice Section will sound when you play
the keyboard. When multiple Sections are set to on,
those Sections will sound simultaneously in a layer.
Basic Structure & Display Content
1
23
“Organ Settings” (page 42) are customized.
“FM Unison” “Mode” (page 43) is set.
“Mono/Poly” (page 43) is set to “Mono.”
“Rotary Speaker” settings (page 44) are customized.
Loading ...
Loading ...
Loading ...