Loading ...
Loading ...
Loading ...
84 Servicing Your Honda
Piston/Piston Rings/Piston Pin
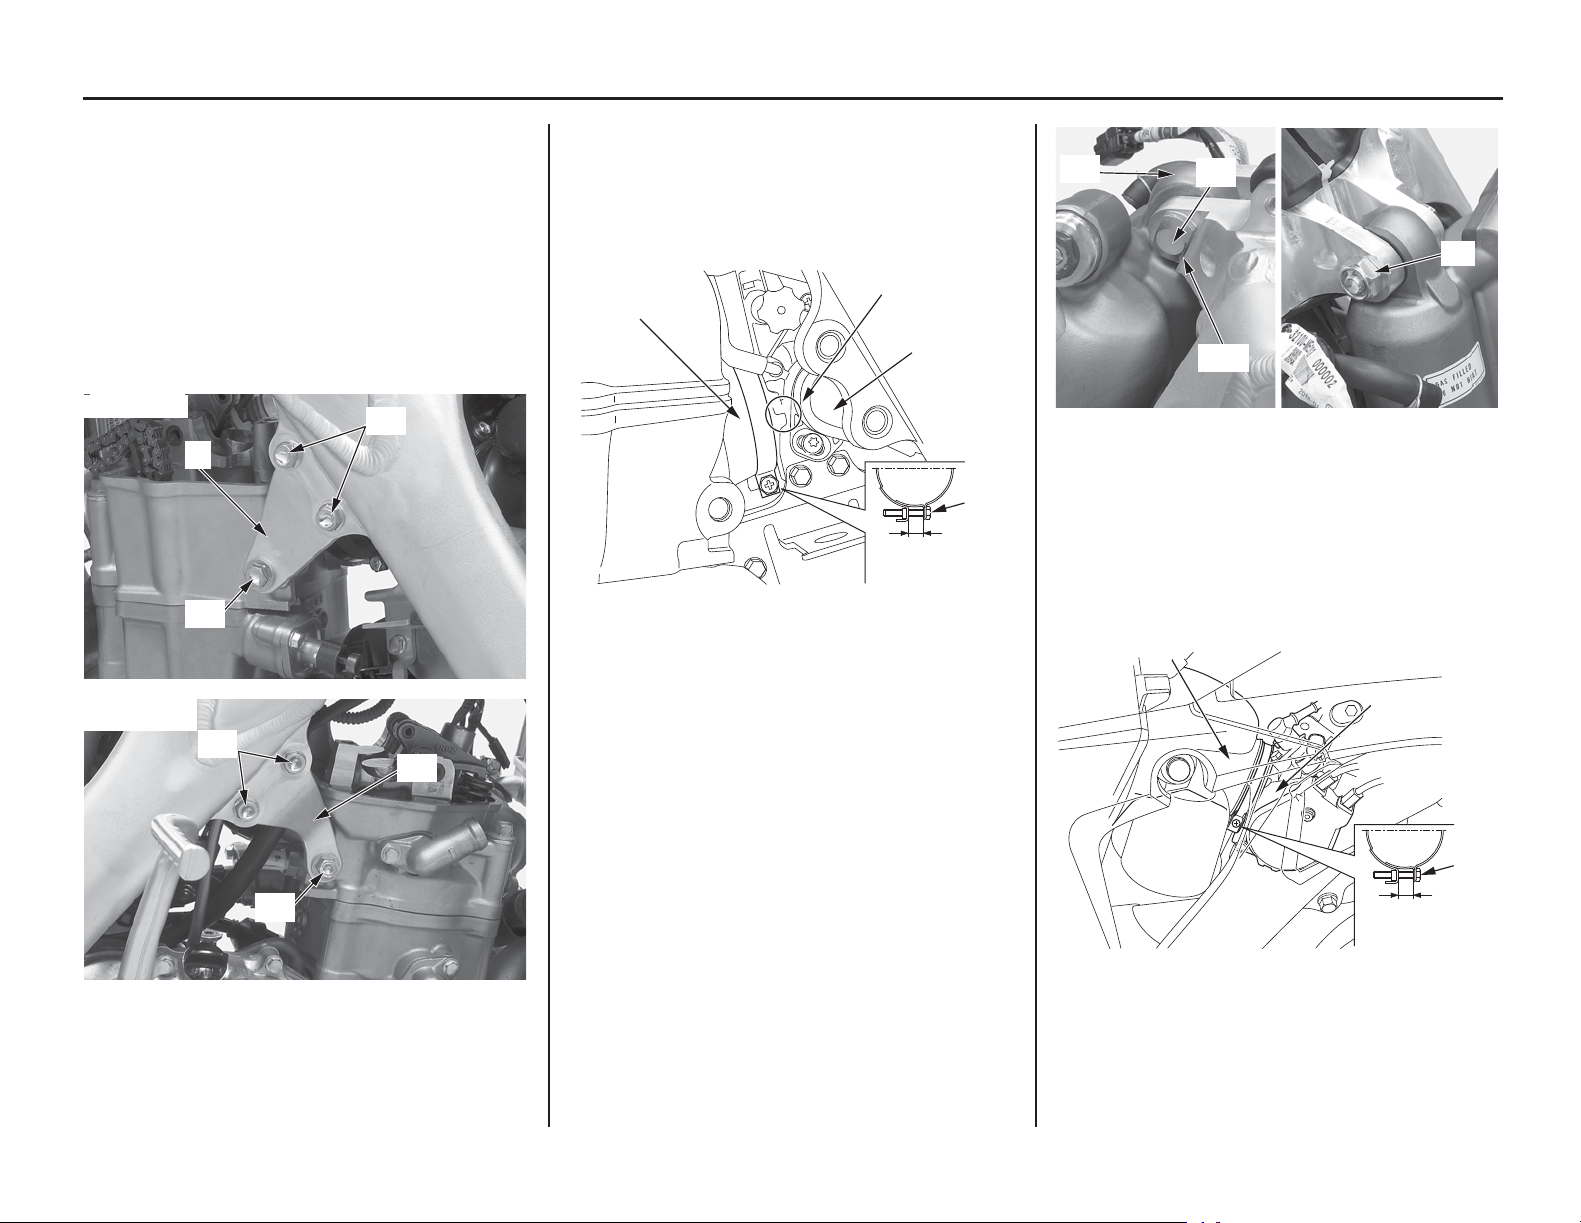
7. Install the left cylinder head hanger plate (9)
and right cylinder head hanger plate (10), then
loosely install the cylinder head hanger plate
bolts (11) and cylinder head hanger bolts (12).
Tighten the cylinder head hanger bolts and
cylinder head hanger plate bolts to the
specified torque:
cylinder head hanger bolts:
40 lbf·ft (54 N·m, 5.5 kgf·m)
cylinder head hanger plate bolts:
24 lbf·ft (32 N·m, 3.3 kgf·m)
8. Install the throttle body (13) to the insulator
(14) by aligning the tab of the throttle body
with the groove of the insulator and tighten the
insulator band screw (15) so the distance
between the band ends is 0.43 ± 0.04 in (11.0
± 1.0 mm).
9. Set the rear shock absorber (16) and install the
rear shock absorber upper bolt (17) and nut
(18) as shown.
Tighten the rear shock absorber upper nut to
the specified torque:
32 lbf·ft (44 N·m, 4.5 kgf·m)
10. Install the air cleaner connecting tube (19)
along with air cleaner case to the throttle body
(20).
Tighten the air cleaner connecting tube band
screw (21) so the distance between the band
ends is 0.30 ± 0.06 in (7.5 ± 1.5 mm).
(9) left cylinder head hanger plate
(10) right cylinder head hanger plate
(11) cylinder head hanger plate bolts
(12) cylinder head hanger bolts
(9)
(12)
(11)
Left side:
(10)
(12)
(11)
Right side:
(13) throttle body (15) insulator band screw
(14) insulator
(13)
(14)
0.43 ± 0.04 in
(11.0 ± 1.0 mm)
(15)
Align
(16) rear shock absorber (18) nut
(17) rear shock absorber upper bolt
(19) air cleaner connecting tube
(20) throttle body
(21) air cleaner connecting tube band screw
(18)
(16)
(17)
Align
(21)
(19)
(20)
0.30 ± 0.06 in
(7.5 ± 1.5 mm)
Loading ...
Loading ...
Loading ...