Loading ...
Loading ...
Loading ...
98 Servicing Your Honda
Drive Chain
Check the upper drive chain roller (1) and lower
drive chain roller (2) for wear or damage.
Measure the diameter of the drive chain rollers and
replace them if below the service limit.
Service Limit:
Upper roller: 1.3 in (33 mm)
Lower roller: 1.4 in (35 mm)
Replace the roller if necessary as follows.
Install the upper drive chain roller (Green) with the
“ ” mark (3) facing toward the bracket and lower
drive chain roller (Black) with the large concave
facing outside.
Install the drive chain roller bolt and nut.
Tighten the drive chain roller bolt and nut to the
specified torque:
9 lbf·ft (12 N·m, 1.2 kgf·m)
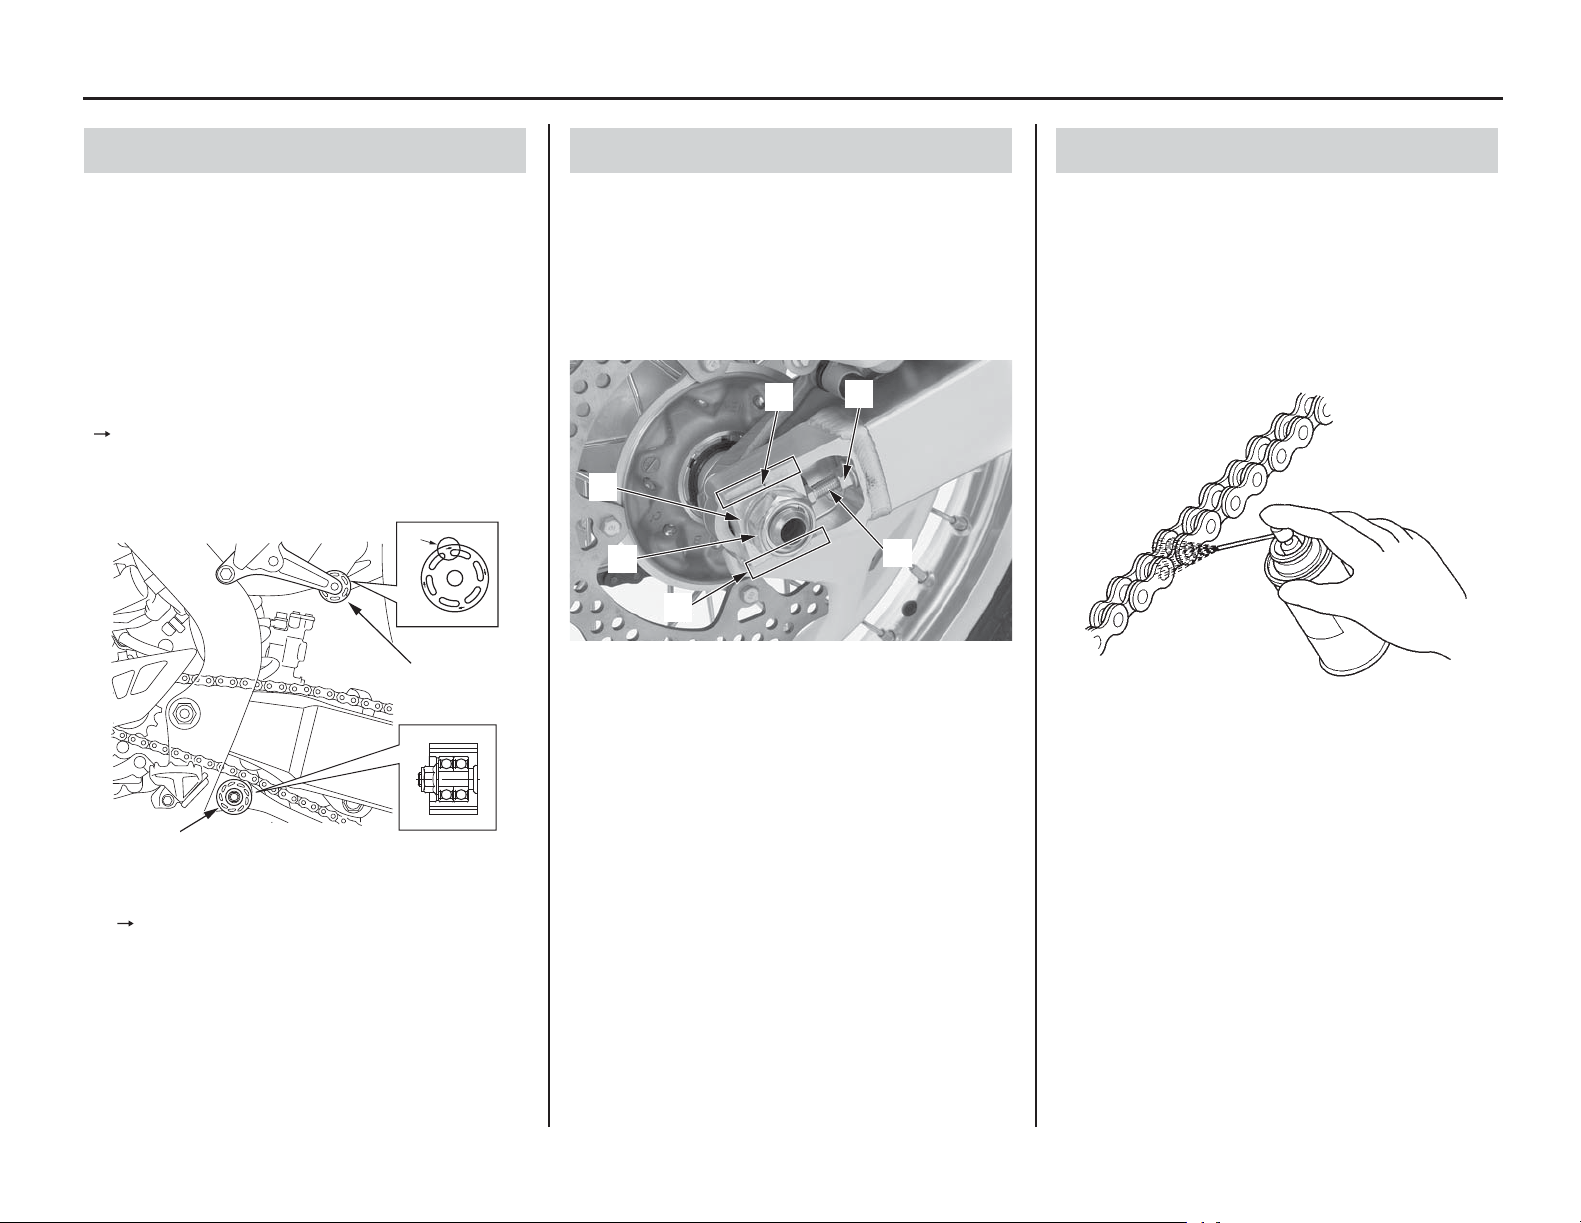
1. Loosen the rear axle nut (1).
2. Loosen the chain adjuster lock nuts (2) and
turn the adjusting bolts (3) counterclockwise to
decrease slack or clockwise to increase slack.
Align the index marks (4) of the axle plates (5)
with the same reference marks (6) on both
sides of the swingarm.
3. Tighten the rear axle nut to the specified
torque:
94 lbf·ft (128 N·m, 13.1 kgf·m)
4. Recheck chain slack and adjust as necessary.
5. Turn the adjusting bolt counterclockwise until
it touches the axle plates lightly. Then tighten
the chain adjuster lock nuts to the specified
torque while holding the adjusting bolts with a
wrench:
20 lbf·ft (27 N·m, 2.8 kgf·m)
Commercially prepared drive chain lubricants may
be purchased at most motorcycle shops and should
be used in preference to motor oil. Pro Honda HP
Chain Lube or an equivalent is recommended.
Saturate each chain joint so that the lubricant
penetrates the space between adjacent surfaces of
the link plates and rollers.
Drive Chain Rollers
(1) upper drive chain roller (Green)
(2) lower drive chain roller (Black)
(3) “ ” mark
(1)
(2)
(3)
Adjustment
(1) rear axle nut (4) index marks
(2) chain adjuster lock nuts (5) axle plates
(3) adjusting bolts (6) reference marks
(5)
(4)
(2)
(1)
(3)
(6)
Lubrication
Loading ...
Loading ...
Loading ...