Loading ...
Loading ...
Loading ...
Steering Damper
104 Servicing Your Honda
Steering Damper
Refer to Safety Precaution on page 23.
Loose, worn or damaged steering damper
components may adversely affect the handling and
stability of your CRF. If any steering damper
components appear worn or damaged, see your
dealer for further inspection. Your dealer is
qualified to determine whether or not replacement
parts are needed.
Do not attempt to disassemble the steering damper;
see your dealer.
The instructions found in this owner’s manual are
limited to adjustment and service of the steering
damper assembly only.
• When your CRF is new, break it in for
approximately 1 hour to ensure that the steering
damper has worked in (page 19).
• After break-in, test run your CRF with the
steering damper at the standard setting before
making any adjustments.
• Check the spherical bearings and dust seal for
dust, dirt, and foreign materials.
• Make all damping adjustments in one-click
increments. (Adjusting two or more clicks at a
time may cause you to pass over the best
adjustment.) Test ride after each adjustment.
• If you have a problem finding an acceptable
adjustment, return to the standard position and
begin again.
1. Unlock the number plate tab (1) from the
handlebar pad.
Remove the bolts (2) and number plate (3).
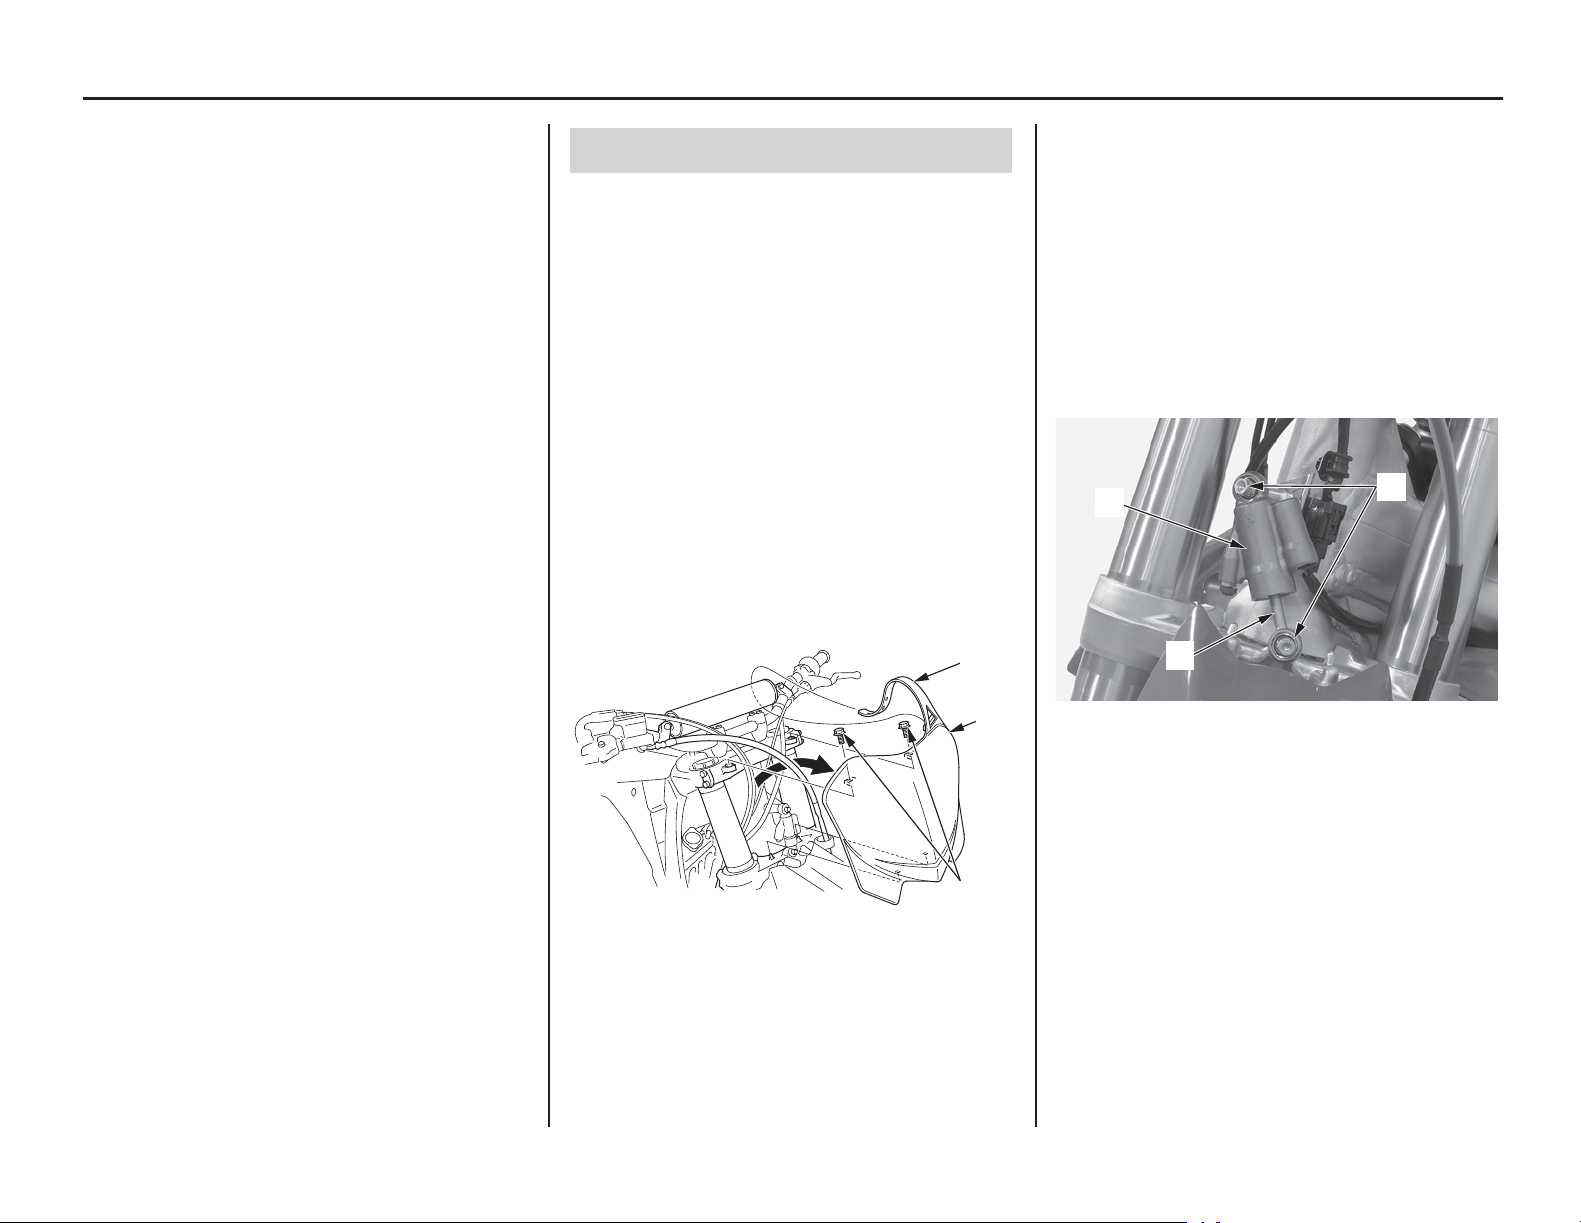
2. Check the steering damper (4) for deformation
or oil leaks.
Check the damper rod (5) for bending or
damage.
Replace the damper case or damper rod if there
is any abnormality.
Refer to an official Honda Service Manual or
see your dealer for steering damper
disassembly.
Check the torque of the steering damper
mounting bolts (6):
15 lbf·ft (20 N·m, 2.0 kgf·m)
Steering Damper Operation Inspection
(1) number plate tab (3) number plate
(2) bolts
(1)
(3)
(2)
(4) steering damper
(5) damper rod
(6) steering damper mounting bolts
(6)
(5)
(4)
Loading ...
Loading ...
Loading ...