Loading ...
Loading ...
Loading ...
114 Adjustments for Competition
Front Suspension Adjustments
• If your CRF is brand-new, put enough part-
throttle break-in time (about 1 hour) on it to
ensure that the suspension has worked in.
• For optimum performance, and extended fork
life, the fork should be completely disassembled
and cleaned after the first 3 hours of riding. See
an official Honda Service Manual or your dealer
for this service.
• When disassembling the fork, turn the
compression (1) and rebound (2) damping
adjusters counterclockwise to the softest position
to prevent damaging the adjustment needle (be
sure to record the number of turns from the
starting position).
1. Remove the number plate (page 104).
2. Place your CRF on an optional workstand or
equivalent support with the front wheel off the
ground.
3. Remove the handlebar lower holder nuts,
washers, mounting rubbers (3) and handlebar
(4).
NOTICE
Keep the master cylinder upright to prevent air
from entering system.
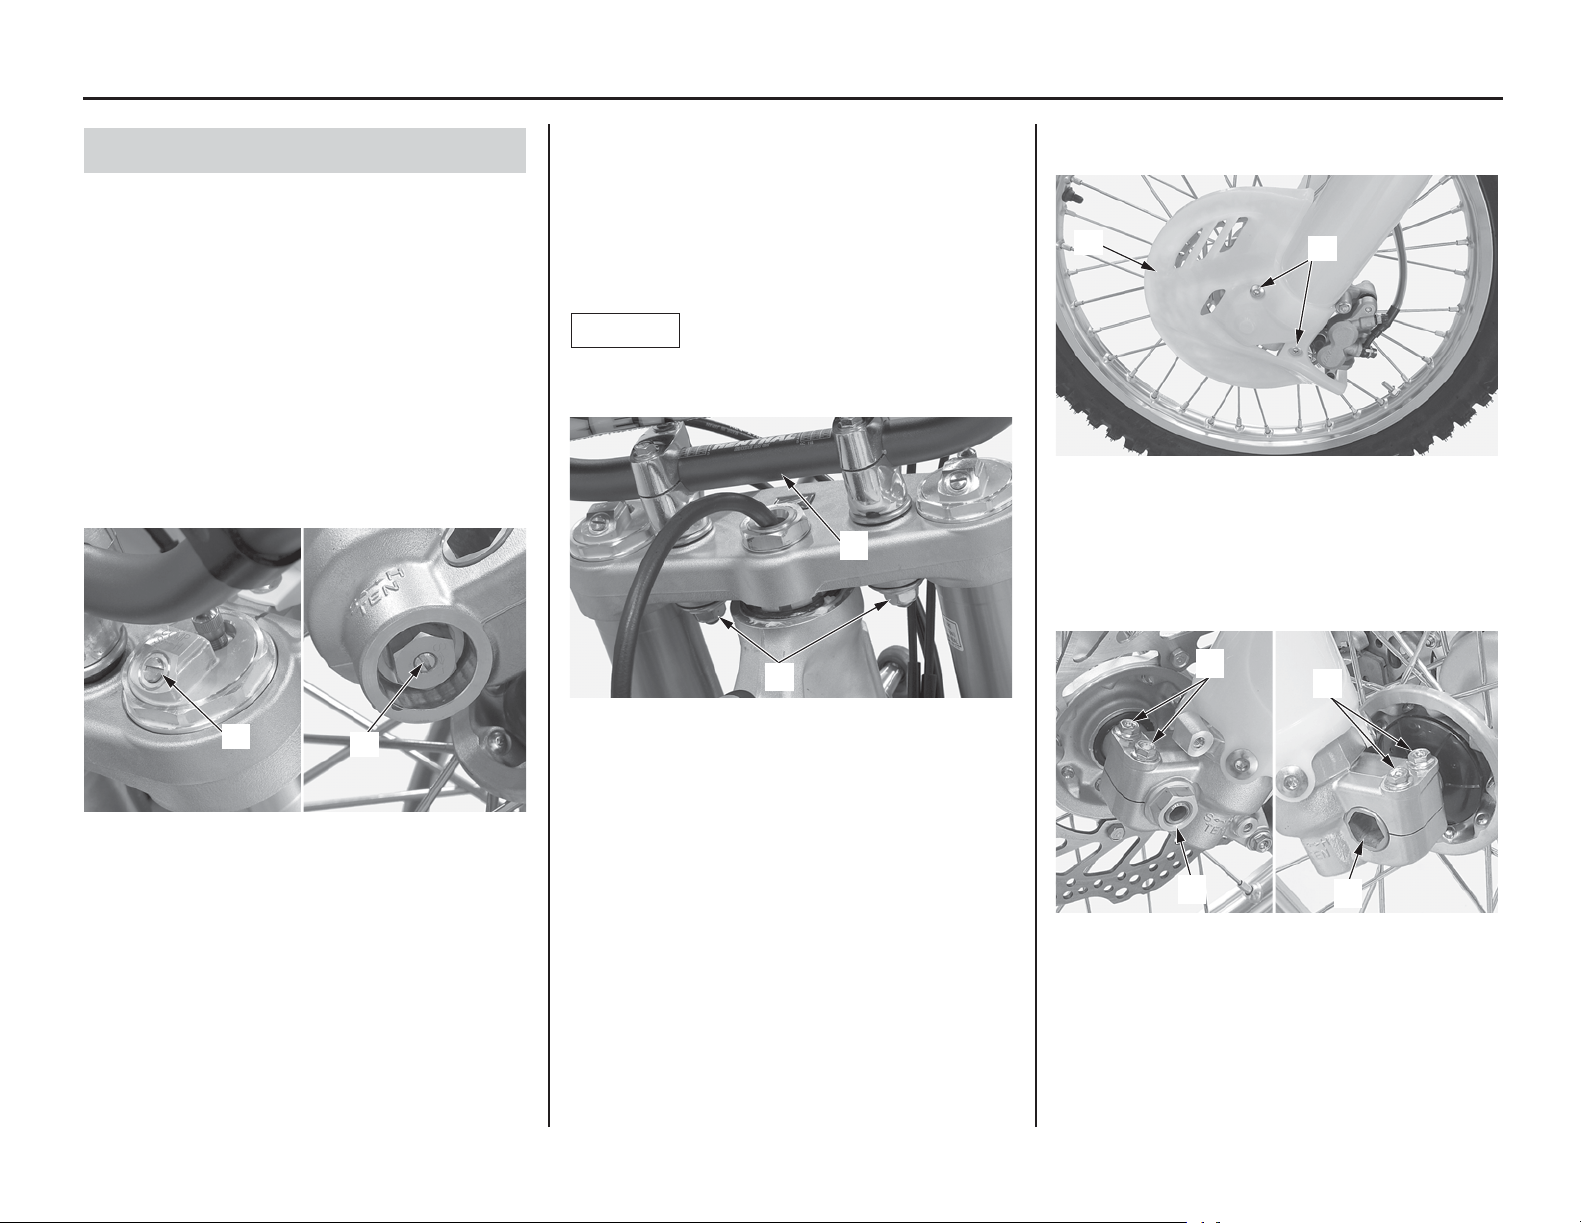
4. Remove the disc cover socket bolts (5) and
disc cover (6).
5. Remove the front axle nut (7) and loosen the
axle pinch bolts (8) on both forks.
Pull the front axle shaft (9) out of the wheel
hub and remove the front wheel with collars.
Front Suspension Disassembly
(1) compression damping adjuster
(2) rebound damping adjuster
(2)
(1)
(3) handlebar lower holder nuts, washers and mounting
rubbers
(4) handlebar
(4)
(3)
(5) disc cover socket bolts
(6) disc cover
(7) front axle nut (9) front axle shaft
(8) axle pinch bolts
(6)
(5)
(9)
(7)
(8)
(8)
Loading ...
Loading ...
Loading ...