Loading ...
Loading ...
Loading ...
Servicing Your Honda 63
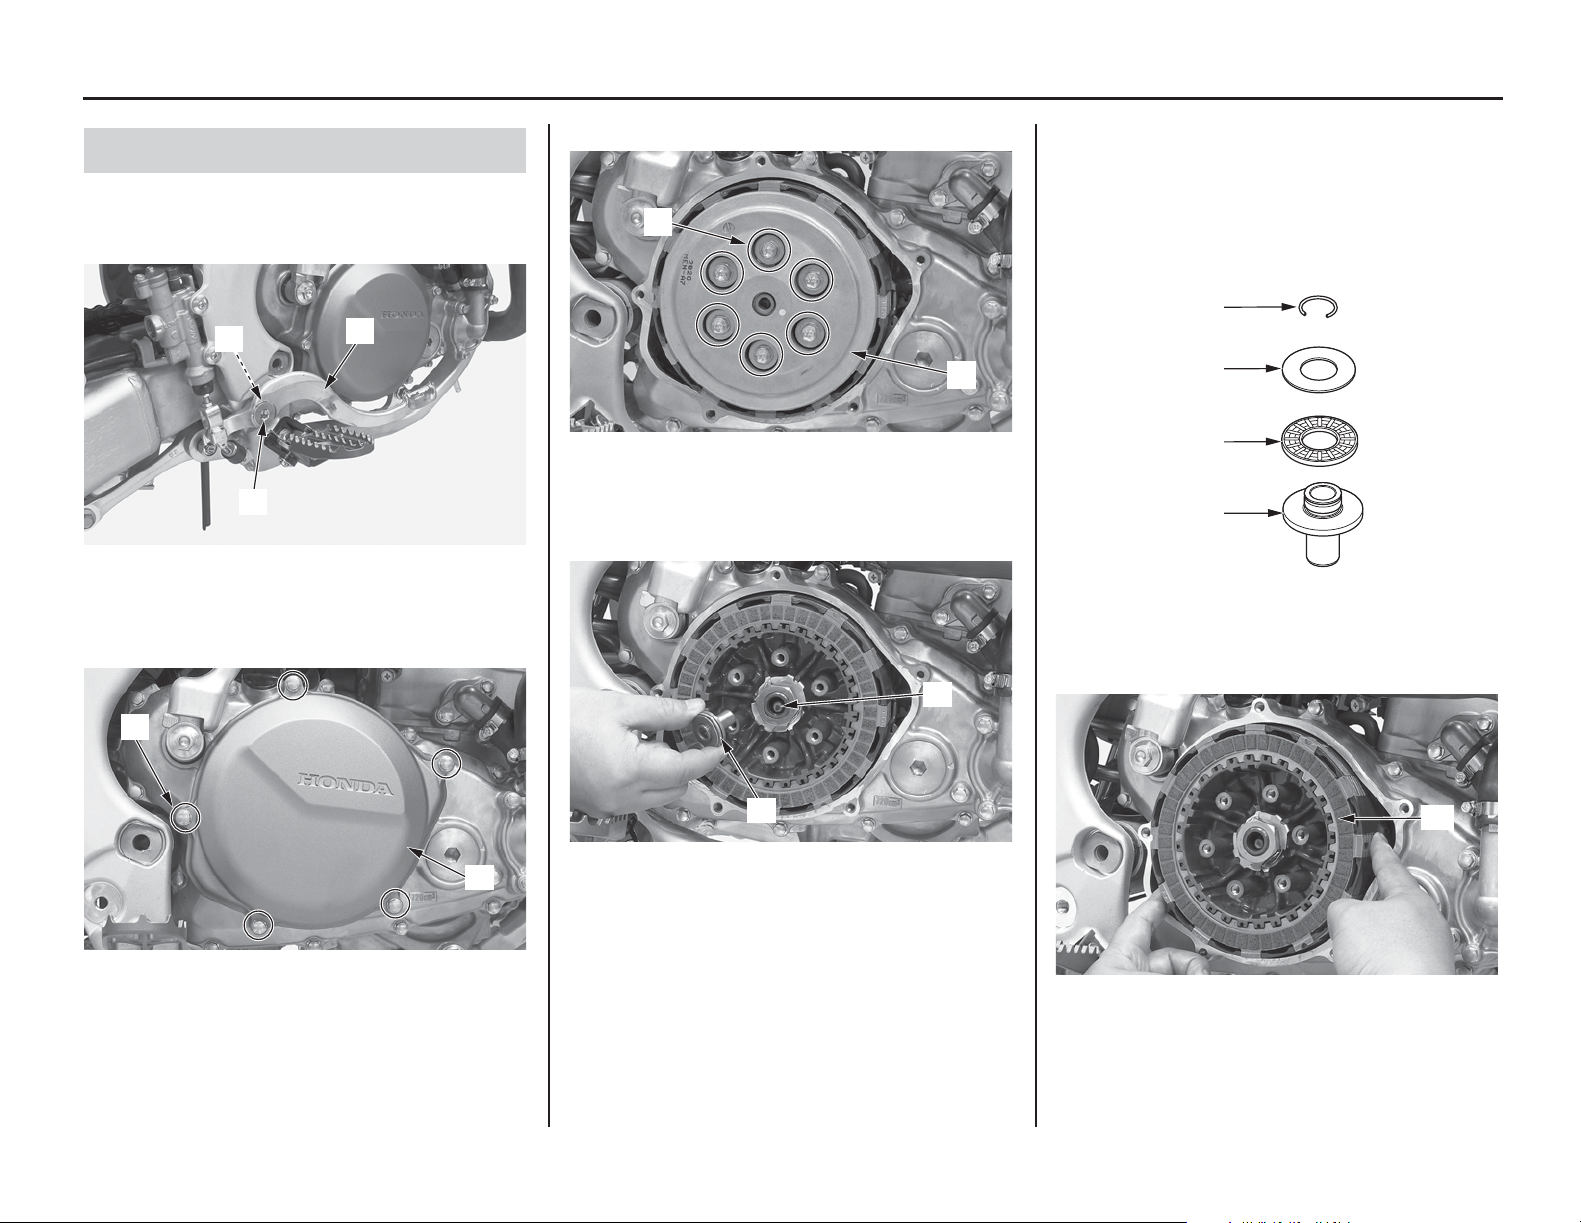
Clutch System
1. Drain the transmission oil (page 52).
2. Remove the rear brake pedal (1) by removing
its pivot bolt (2), washer and dust seals (3).
3. Remove the five clutch cover bolts (4) and
clutch cover (5).
4. Remove the six clutch spring bolts and springs
(6).
Loosen the bolts in a crisscross pattern in two or
three progressive steps.
5. Remove the clutch pressure plate (7).
6. Remove the clutch lifter assembly (8) first,
then remove the clutch lifter rod (9).
7. Disassemble the clutch lifter (10), needle
bearing (11) and washer (12) by removing the
clip (13). Turn the needle bearing with your
finger. The needle bearing should turn
smoothly and quietly.
Replace the needle bearing and washer if the
needle bearing does not turn smoothly.
8. Remove the eight clutch discs, seven clutch
plates, judder spring and spring seat (14).
Clutch Disc/Plate Removal
(1) rear brake pedal (3) washer and dust seals
(2) brake pedal pivot bolt
(4) clutch cover bolts (5) clutch cover
(1)
(3)
(2)
(5)
(4)
(6) clutch spring bolts and springs
(7) clutch pressure plate
(8) clutch lifter assembly (9) clutch lifter rod
(7)
(6)
(9)
(8)
(10) clutch lifter (12) washer
(11) needle bearing (13) clip
(14) clutch discs, clutch plates, judder spring and spring
seat
(13)
(12)
(11)
(10)
(14)
Loading ...
Loading ...
Loading ...