Loading ...
Loading ...
Loading ...
Servicing Your Honda 65
Clutch System
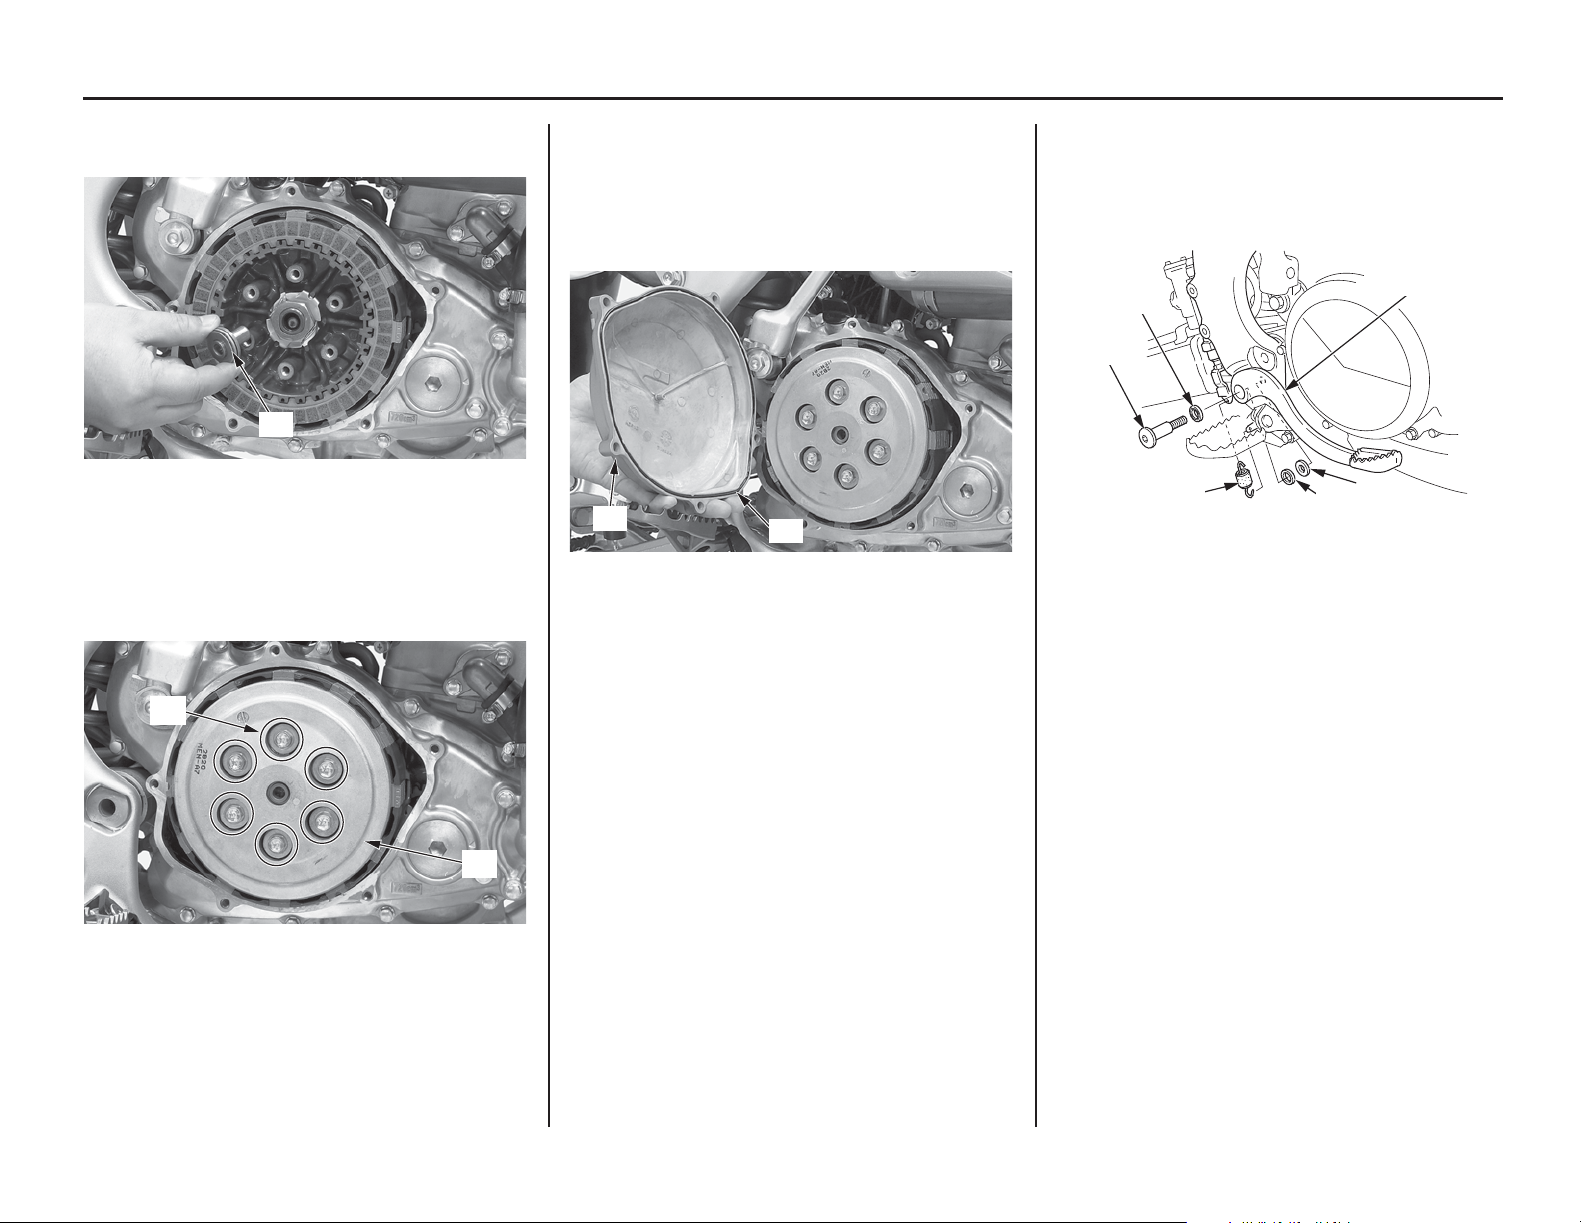
5. Install the clutch lifter assembly (11) onto the
rod.
6. Install the clutch pressure plate (12).
7. Install the six clutch springs and bolts (13).
8. Tighten the bolts in a crisscross pattern in two
or three steps to the specified torque:
9 lbf·ft (12 N·m, 1.2 kgf·m)
9. Apply oil to a new O-ring (14) and install it in
the groove of the clutch cover (15).
10. Install the cover by tightening the five cover
bolts in a crisscross pattern in two or three
steps to the specified torque:
7 lbf·ft (10 N·m, 1.0 kgf·m)
11. Lubricate the dust seals (16) and rear brake
pedal pivot bolt (17) with urea based
multipurpose grease or equivalent.
12. Apply locking agent to the brake pedal pivot
bolt threads.
13. Install the dust seals into the rear brake pedal
(18).
14. Install the pivot bolt with the washer (19) and
tighten the pivot bolt to the specified torque:
27 lbf·ft (36 N·m, 3.7 kgf·m)
Connect the brake pedal return spring (20) if it
is removed.
15. Fill the crankcase with transmission oil
(page 52).
(11) clutch lifter assembly
(12) clutch pressure plate
(13) clutch springs and bolts
(11)
(12)
(13)
(14) O-ring (new) (15) clutch cover
(14)
(15)
(16) dust seals
(17) brake pedal pivot bolt
(18) rear brake pedal
(19) washer
(20) brake pedal return spring
(16)
(17)
(20)
(16)
(19)
(18)
Loading ...
Loading ...
Loading ...