Loading ...
Loading ...
Loading ...

10 11
Owner's Manual Owner's Manual
PARTS DESCRIPTION
1
1.
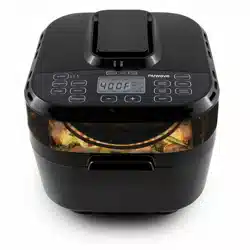
Air Fryer power base
Part #: 37257
2. Base Tray
Part #: 37251
3.
Rotisserie Fork
Part #: 37252
4.
Skewer
Part #: 37253
5.
Reversible Wire Rack
Part #: 37254
6.
Fry Pan Basket Net
Part #: 37255
7. Non-Stick Inner Basket
Part #: 37256
8.
Lid Unlock Button
9.
Lid Handle
10.
Vents
11.
Control Panel
12.
Vent
13.
Heater
14.
Shaft Support Hole
4 5
AIR FRYER PREPARATION
Before Use:
1. Remove all the packaging materials.
2. Remove the glue and labels on the appliance.
3. Clean the Base Tray, Rotisserie Fork, Skewer, Reversible Wire Rack, Fry
Pan Basket Net, and Non-Stick Inner Basket thoroughly with hot water, a
nonabrasive sponge and a mild dish detergent, or in the dishwasher, top
rack only.
4. Wipe the inside and outside of the appliance with a wet cloth. Do not
immerse the appliance in water.
Note: This appliance cooks using hot air. DO NOT ll the unit with oil.
Operation Preparation:
1. Place the appliance on a level, even, and stable heat-resistant surface.
2. Place the Base Tray and Fry Pan Basket in the NuWave Brio Healthy
Digital 10Q Air Fryer.
3. Plug the appliance into a standard wall socket. The power plug is included in
the package.
Note: Do not cover or block the vent located on the top of the NuWave Brio
Healthy Digital 10Q Air Fryer. Doing so can prevent proper ventilation and will
adversely affect the cooking results.
2
6
7
3
9
11
10
12
13
14
8
1. To open the Top Cover, hold the Lid Handle
with one hand and make sure you hear "click"
sound to make sure secure the Top Cover
stay on the position.
How to lock/unlock Air Fryer
2. Place the Base Tray into the Brio 10Q by
holding the handles and make sure the
bottom of the Base Tray is dry and clean.
3. To close the Top Cover, hold the Lid Handle
wth one hand and use the other hand pull up
the Lid Unlock Button and slowly lower the Lid
down until it fully closes.
Loading ...
Loading ...
Loading ...
