Loading ...
Loading ...
Loading ...
117
Selecting an Image Quality
User’s Manual Settin
g
Functions from Menus
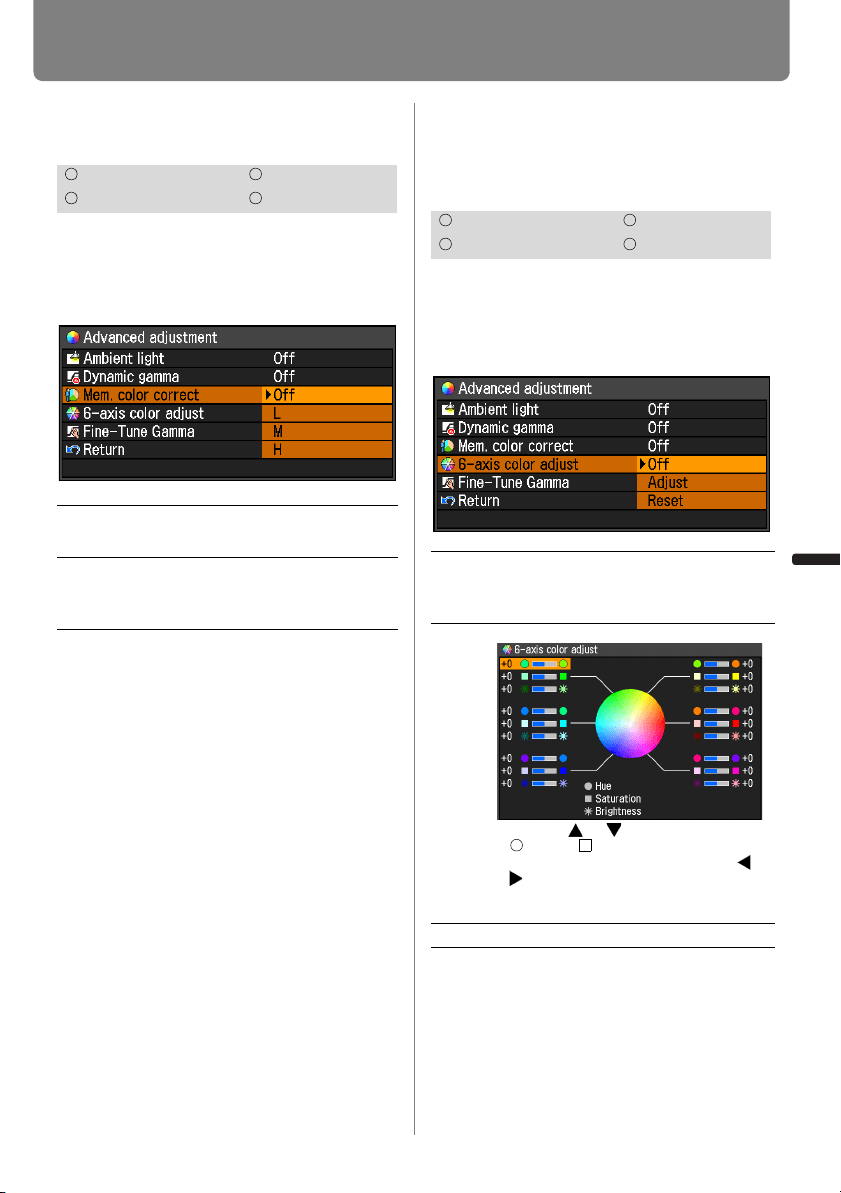
Memory Color Correction
[Mem. color correct]
This function produces beautiful skin
tones, blues, and other colors.
MENU > [Image adjustment] > [Advanced
adjustment] > [Mem. color correct]
Press the OK button to accept your setting
and then press the MENU button or EXIT
button (WX6000 / SX6000).
• The factory default settings are as follows.
- For HDMI (when [HDMI In] (P127) is set
to [Computer]), Digital PC and Analog
PC, when any image mode is used
except [VividPhoto], the default setting
is [Off]. When [VividPhoto] is used, the
default setting is [M].
- For HDMI (when [HDMI In] (P127) is set
to [Auto]) and Component, the default
setting is [L], regardless of the image
mode.
• The adjustment you have made is stored
as adjusted values for the input signals
and image mode of the current projection.
6-axis Color Adjust
(Detailed Color Adjust-
ment)
[6-axis color adjust]
You can make fine adjustments to the
image colors with RGB (red, green, blue)
and CMY (cyan, magenta, yellow).
MENU > [Image adjustment] > [Advanced
adjustment] > [6-axis color adjust]
When you have completed the adjust-
ment, press the OK button to accept your
setting and then press the MENU button
or EXIT button (WX6000 / SX6000).
• [Off] is the factory default.
• The adjustments you have made are stored
as adjusted values for the input signals and
image mode of the current projection.
HDMI Component
Digital PC Analog PC
Off Disables the memory color correc-
tion function.
L
M
H
Specifies the intensity of the memory
color correction in three steps.
HDMI Component
Digital PC Analog PC
Off Disables 6-axis color adjustment.
If you select [Adjust], the previous
setting of 6-axis color adjustment
becomes active again.
Adjust Enables 6-axis color adjustment.
Use the [ ] / [ ] buttons to select
[ Hue], [ Saturation], or [
*
Bright-
ness], then adjust them with the [ ] /
[ ] buttons.
When color adjustments are com-
pleted, press the OK button.
Reset Returns all adjustment values to zero.
Loading ...
Loading ...
Loading ...