Loading ...
Loading ...
Loading ...
- 9
Hose connection at the vacuum pressure
socket of the side brush lowering system
Hose connections at the vacuum pressure
sockets of the roller brush lowering system
Hose connections at vacuum pressure
pump and vacuum pressure socket (accu-
mulator)
Note: The vacuum pressure pump runs
only while the vacuum pressure is built up
in the system. If the pump runs continuous-
ly, contact Customer Service.
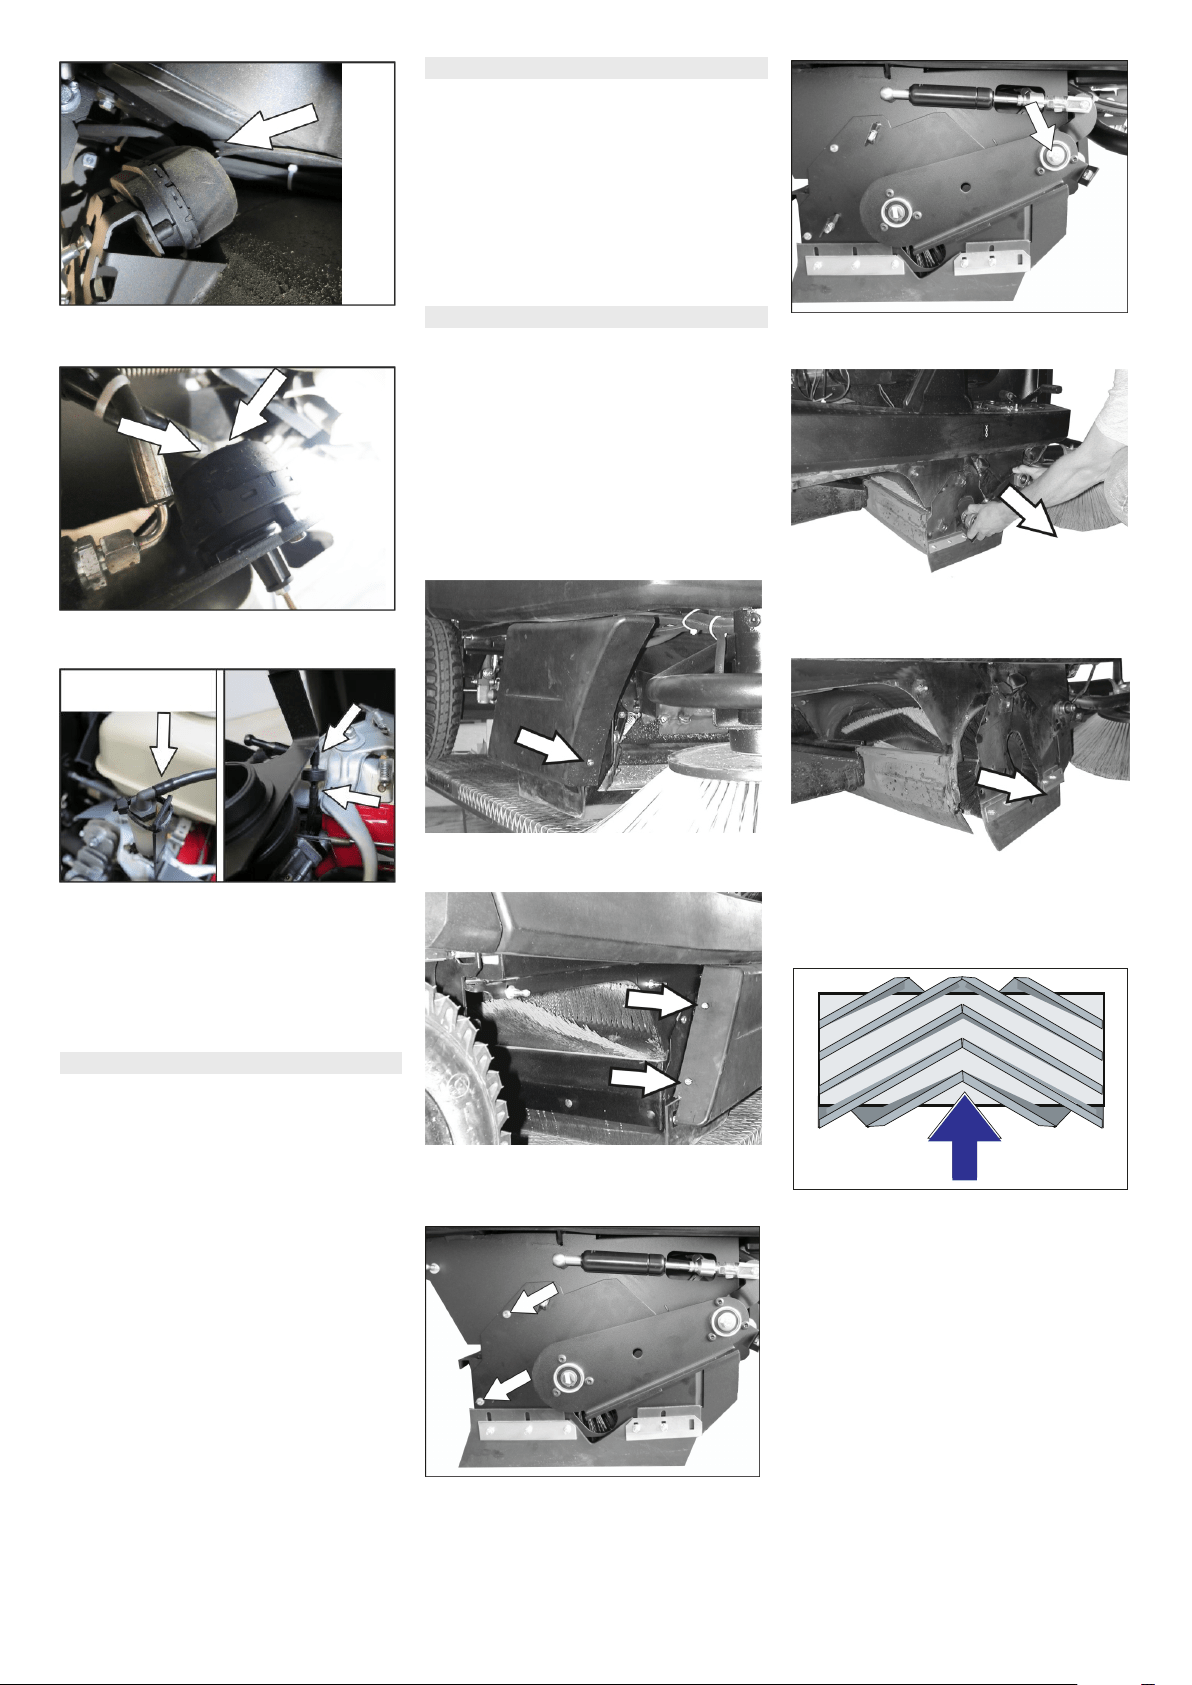
Park the sweeper on an even surface.
Set programme switch to step 1 (driv-
ing). Side brushes lift up.
Turn main key to "0" and remove it.
Loosen 3 fastening screws on the un-
derside.
Remove the worn side brushes.
Clip new side brushes on to driver and
screw on.
Park the sweeper on an even surface.
Set programme switch to step 1 (driv-
ing). Roller brush is raised.
Turn main key to "0" and remove it.
Secure the machine with wheel
chock(s) to prevent it from rolling away.
Raise slightly the waste containers on
both sides and pull them out.
Remove belts or cords from roller
brush.
Replacement is due if a visible deteriora-
tion in sweeping performance caused by
bristle wear is evident.
Park the sweeper on an even surface.
Set programme switch to step 1 (driv-
ing). Roller brush is raised.
Turn main key to "0" and remove it.
Secure the machine with wheel
chock(s) to prevent it from rolling away.
Raise slightly the waste containers on
both sides and pull them out.
Loosen the front attachment screw of
the right-hand side panel.
Loosen the rear attachment screw on
the right-hand side panel.
Remove side panel.
Loosen the screws.
Unscrew the screw on the pivoting point
of the roller brush arm.
Pull out roller brush swinging arm.
Remove the roller brush cover.
Pull out roller brush.
Installation position of roller brush in direc-
tion of travel
Push new roller brush into the roller
brush housing and onto the drive pin.
Note: When installing the new roller brush,
ensure correct positioning of the bristle as-
sembly.
Note: Adjust the bowden cable, so that the
roller brush is lifted approx. 10 mm off the
floor.
Position roller brush cover.
Install the roller brush arm.
Hook the Bowden cable in.
Tighten the fastening screws.
Screw on side panel.
Push in the waste containers on both
the sides and lock them.
Replacing side brush
Checking roller brush
Replacing roller brush
25EN
Loading ...
Loading ...
Loading ...