Loading ...
Loading ...
Loading ...
- 5
Mark the flow direction on the shutter.
Remove the shutter.
Clean the shutter opening with a needle
or a thin wire.
Install the shutter while observing the
flow direction.
Set the switch of the solenoid to "1" with
the submersion pump running and
check the flow.
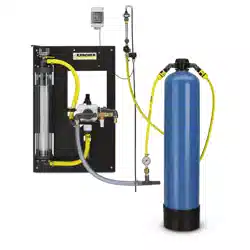
Fill the glass bottle halfway with a water
sample after the active carbon filter and
close it.
Shake the glass bottle vigorously for
about 5 seconds.
If there is a closed foam cover, which has
not disintegrated after 40 seconds, the fill of
the active carbon filter must be replaced.
Foam picture filter OK: very thin foam ring
on the edge, which disintegrates quickly.
Foam picture filter exhausted: thick foam
ring on the edge, which does not disinte-
grate
Turn off the submersion pump.
Disconnect the hose coupling from the
input of active carbon filter
Disconnect the hose coupling from the
output of active carbon filter.
Unscrew the cap of the filter bottle.
Pour out the content of the bottle (2 per-
sons required) and remove the nozzle
pipe.
Rinse the filter bottle with water.
Insert the nozzle pipe.
NOTICE
Dispose off the active carbon according to
local regulations.
Install the funnel 4.901-090.0 onto the
filter bottle.
Add 20 litres of water.
Add 10 kg of supportive gravel.
Add 14 kg = 28 l of active carbon.
Fill the filter bottle with water.
Attach and tighten the cap to the filter
bottle.
Connect the filter bottle output to the
hose from the manometer of the active
carbon filter.
Connect the Input of the filter bottle to
the hose from the flowmeter.
Turn on the submersion pump.
Set the solenoid switch to "1".
Rinse the filter bottle backwards until
the water escapes without bubbles.
Set the solenoid switch to "0".
Turn off the submersion pump.
Connect the filter bottle to the system
observing the correct flow direction.
NOTICE
With systems with option 2. Exchange the
active carbon filter bottles so that the newly
filled filter bottle is the second one the liq-
uids flows through.
Turn on the submersion pump.
Check the flow, approximately 0,5 l/min,
clean shutter if necessary.
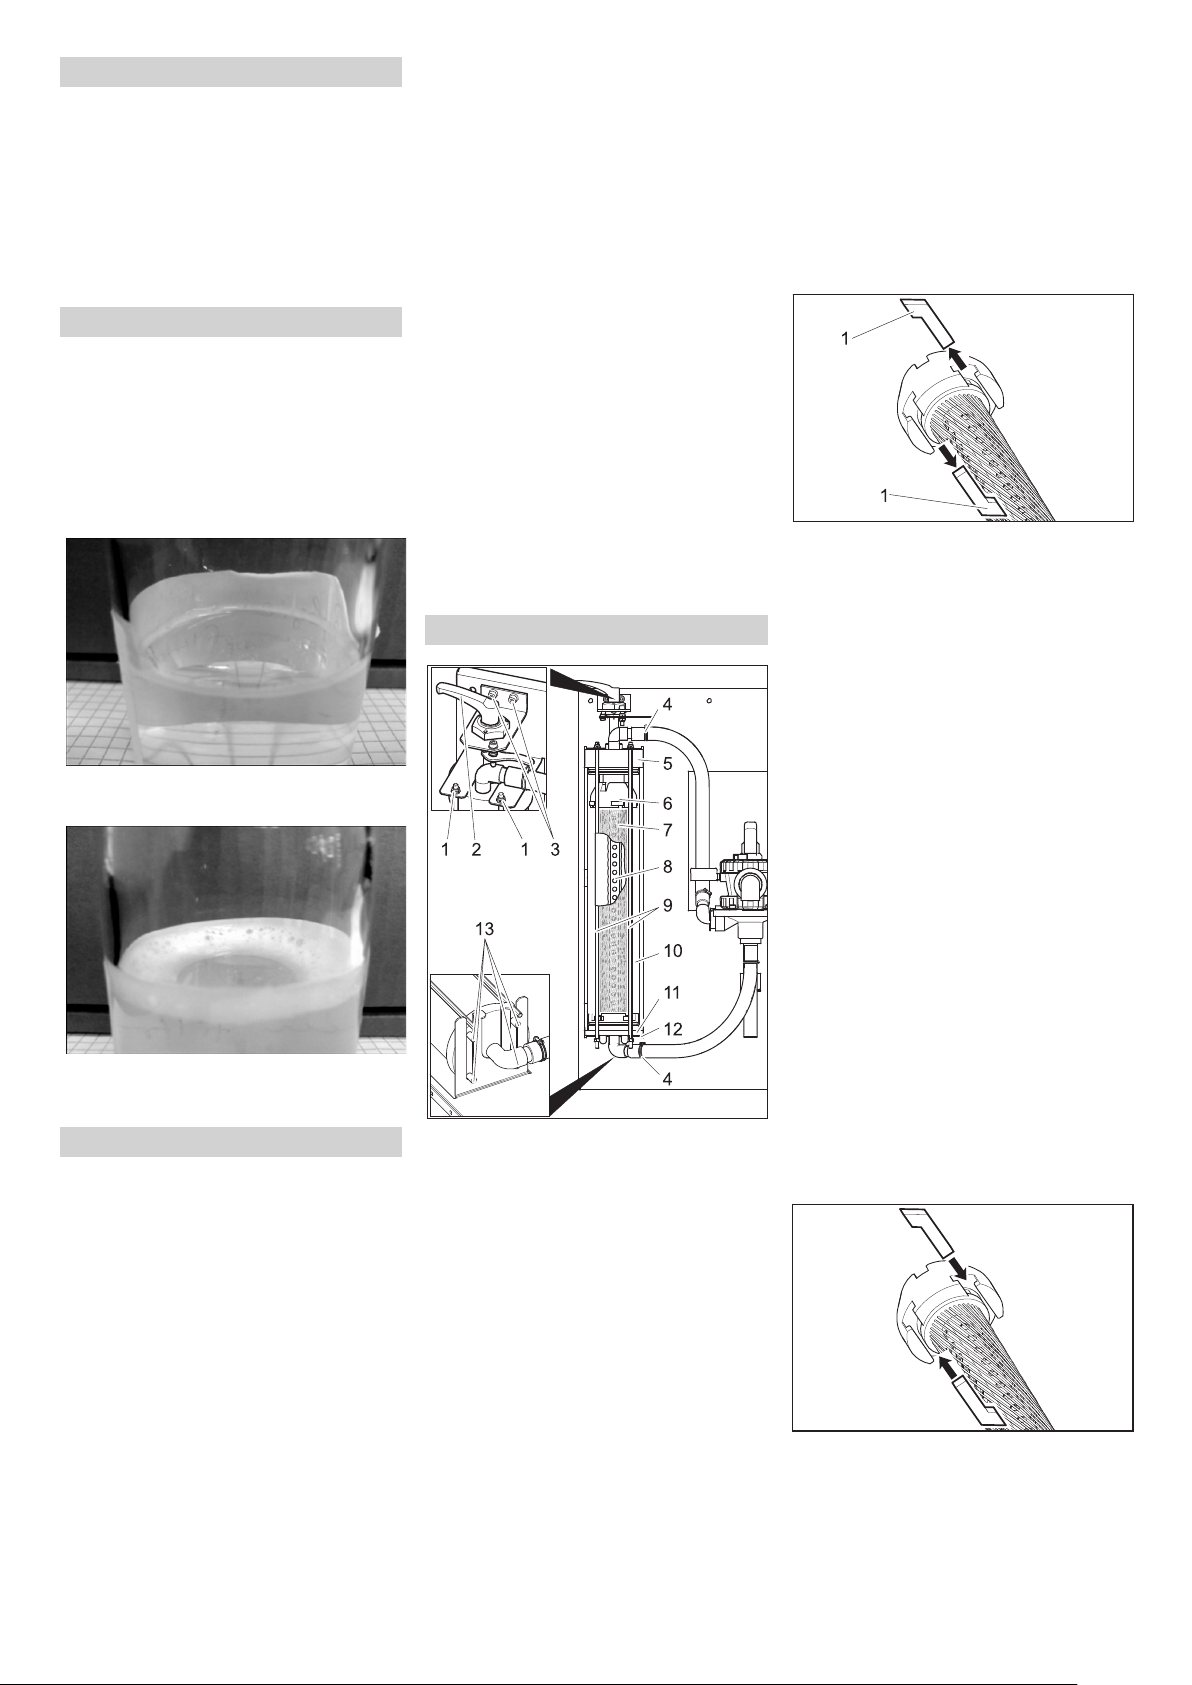
1 Nut
2 Tension lever
3 Screw of the tension lever bearing
4 Hose clip
5 Cover
6 Upper section
7 Filter inlay
8 Filtrate pipe
9 Threaded rod
10 Filament filter
11 Lower part
12 Lower console
13 Pin
Unlock filter.
Open the hose clamps.
Pull the hoses off the hose fittings.
Turn out both the screws of the tension
lever bearing.
Lift upward the entire tension lever
along with the bearings.
Unscrew the nuts at the upper end of
the threaded rods.
Remove the threaded rod assembly.
Pull out the filament filter towards the
front.
Remove the lid of the filament filter.
Pull out the lower part of the filament fil-
ter including filter inlay.
1 Grooved stone
Pullout the grooved stones between the
upper part and the filter inlay and be-
tween the lower part and the filter inlay.
Remove upper and lower part of filter
inlay.
Remove filtrate pipe from filtrate inlay,
Dispose of the filter inlay.
Attach filtrate pipe at one end of the
new filter inlay.
Tighten the filter inlay in such a way that
the filaments do not twist.
Push the fitrate pipe in the filter inlay
and by looking at the opposite side of
the filter element push the inlay in the
direction of the filtrate pipe.
Coat all rings with normal liquid soap
before carrying out any further installa-
tion tasks.
NOTICE
Do not use silicon grease. Silicon in water
will hamper the cleaning and drying effect
during vehicle wash.
Insert the upper and lower part on the
filter element.
Align the upper and lower part in such a
way that the grooved stones can be in-
serted.
Insert the grooved stones and clamp it
tight by slightly turning the filter inlay.
Insert the lower part into the filament fil-
ter and push it in completely.
Replace the filament filter lid.
Clean the shutter
Check active carbon filter
Replace the active carbon
Replacing filter inlay
14 EN
Loading ...
Loading ...
Loading ...