Loading ...
Loading ...
Loading ...
29
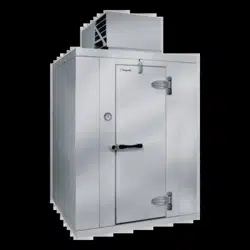
• The smooth (shiny) finish surface of the membrane is the exposed (up) side. The 3” fastening tabs are on the bottom side of
the membrane.
• Unroll roof membrane and align first 3” tab with a square chalk line across the unit. Use a GRiPull roof puller racket vice
grip tool to pull membrane taut. Fasten 3” tab by using 1 ½” black #14 screw and fastening plate. Align membrane so that
the tabs are perpendicular to the adjacent building.
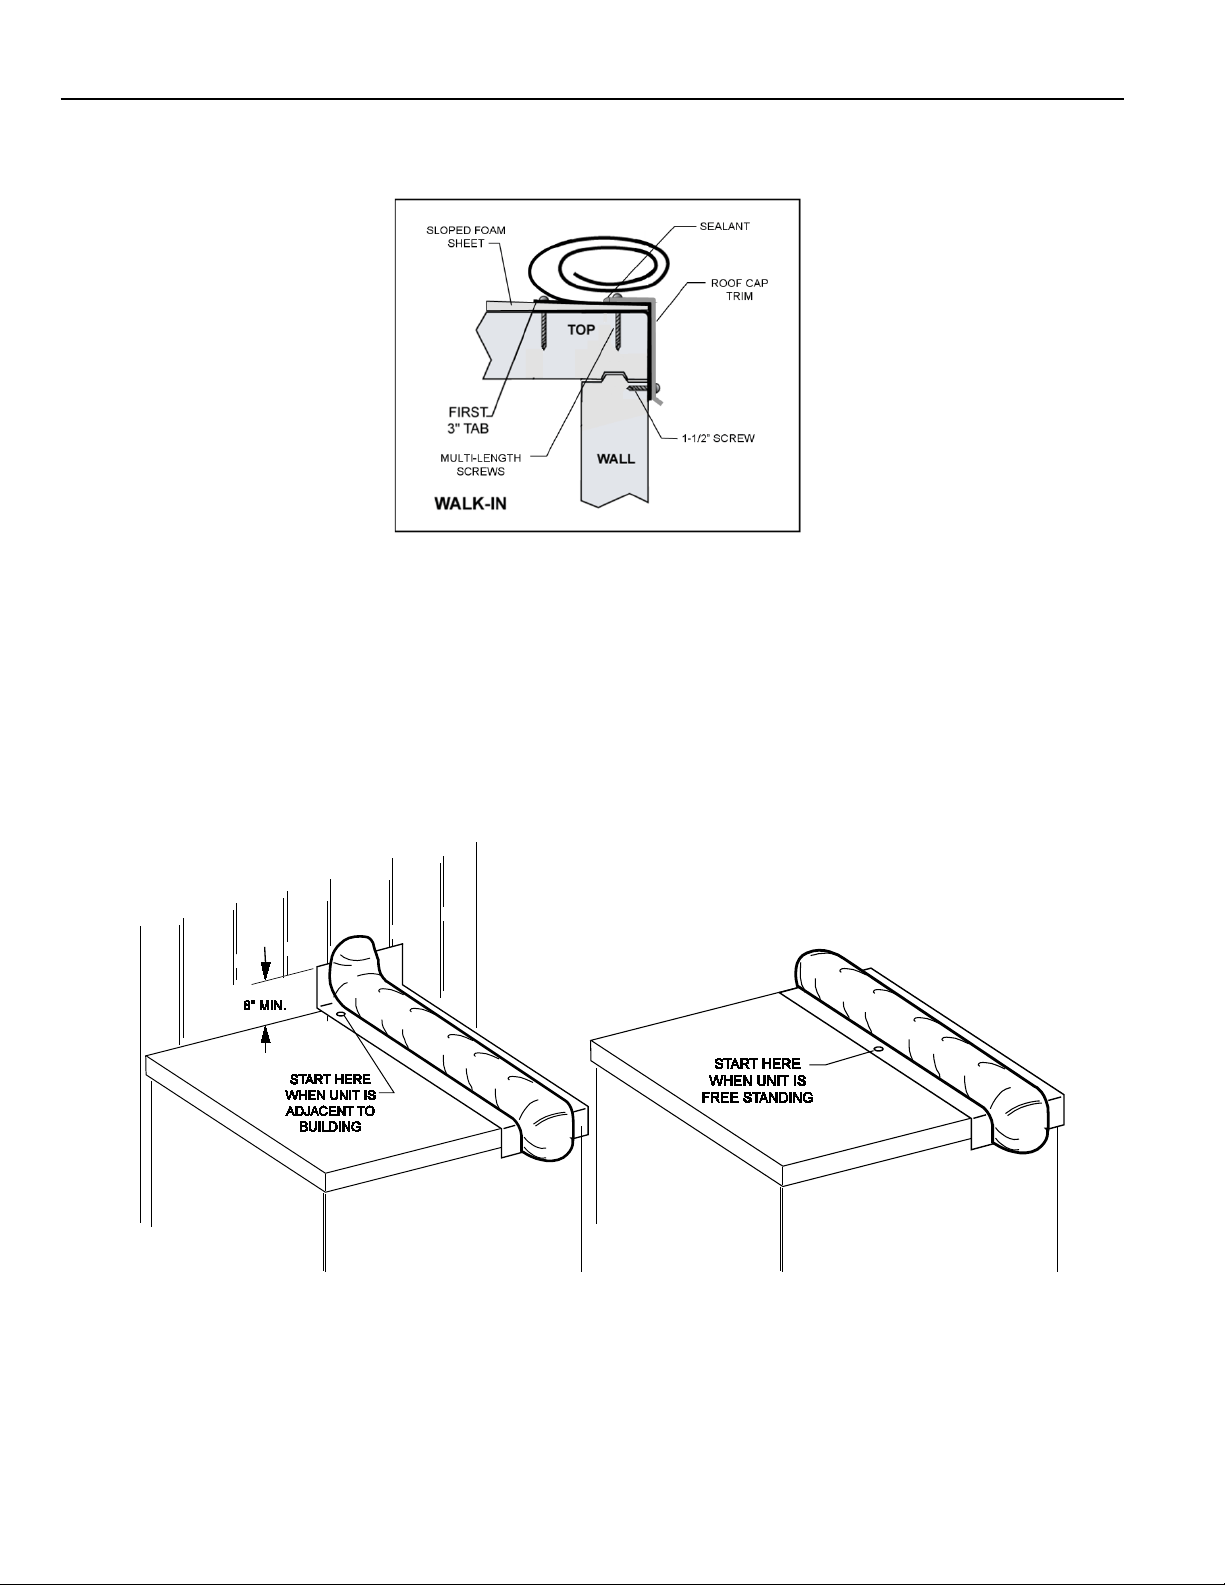
• Start in the middle of the tab and work toward the edges placing the screws and plates 6” on center. Pull membrane toward
edges to remove slack. The 1-1/2” screws should penetrate the top metal skin of the walk-in top panel.
• Start at the base of the wall by fastening a plate into the top of the walk-in cooler and into the wall of the adjacent building.
Make sure no more than 5” of material is up the wall for proper termination. Work away from wall fastening 6” on center.
The 1-1/2” screws should penetrate the top metal skin of the walk-in top panel.
Loading ...
Loading ...
Loading ...