Loading ...
Loading ...
Loading ...
25
• Close the door completely and remove the hinge leaf cover screws from all hinge covers.
• Loosen up all 4 hinge leaf attachment screws on each hinge slightly so that they are free to move.
• Install shims around the entire perimeter of the door. The goal is to perfectly center the door in the opening.
• Using a small wrench, or finger pressure, tighten the micro-adjustment screw on each hinge until it is snug. Upper
screws should be adjusted clockwise, lower screws counter-clockwise.
• Retighten all hinge leaf attachment screws for all hinges. Be sure not to over torque the screws
• Remove all of the shims, and check for door swing clearances and operation
• If the misalignment has been corrected, replace the hinge leaf covers and screws. If further adjustment is necessary,
repeat the above steps using different combinations of shims until the adjustment is completed.
Thermometer Testing
• To test for thermometer accuracy, use a mixture of crushed ice and water to form a slush. Place the thermometer bulb in
the mixture and check the reading. Thermometer should read approximately 32
o
F. If not, recalibrate per instructions.
Thermometer testing is a required part of installation to insure against calibration drift that may have occurred during
shipment. Once thermometer calibration is confirmed, the thermometer bulb should be mounted away from the door
opening.
Thermometer Recalibration
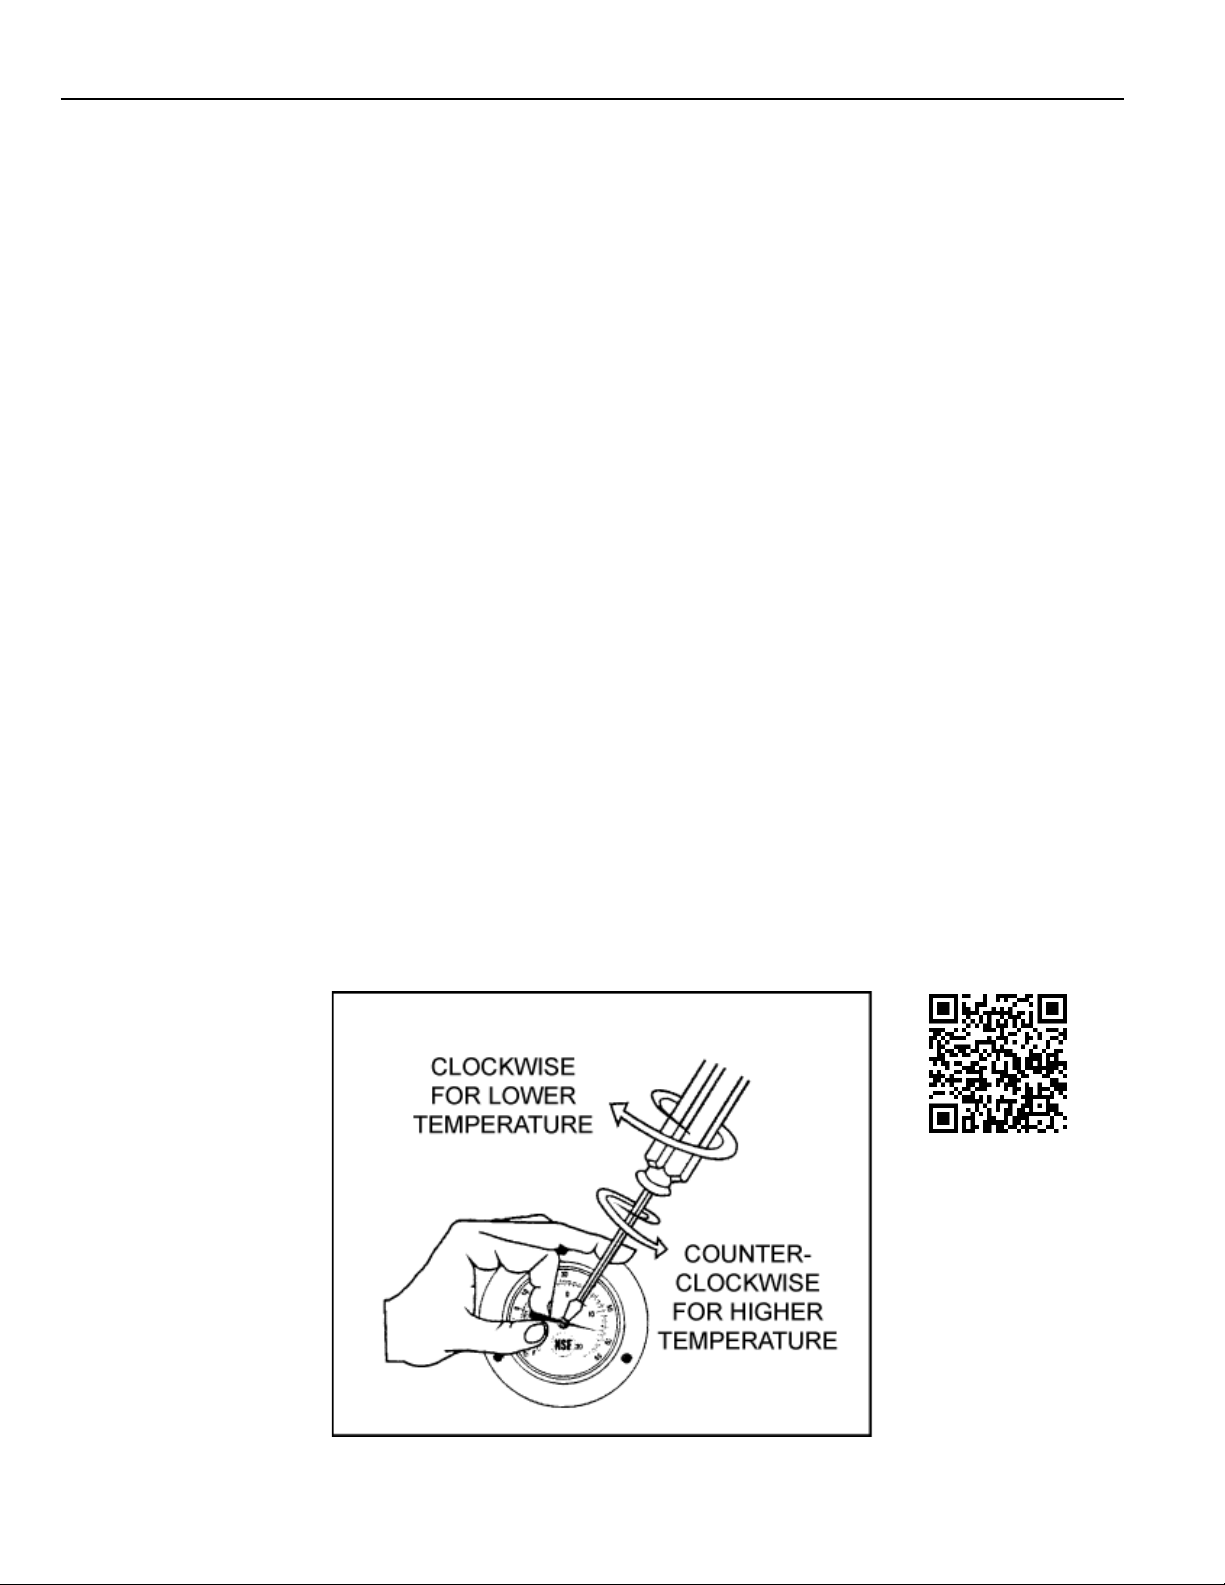
• Remove the face cover of the analog dial thermometer. The cover will either screw off or pry off. Take care not to damage
the cover during removal.
• For lowering the reading, carefully hold the pointer. Insert screwdriver in pointer slot and slowly turn clockwise a small
amount. Adjust to proper setting.
• For higher temperature reading, carefully hold the pointer. Insert the screwdriver in pointer slot and slowly turn counter
clockwise a small amount. Adjust to proper setting.
• Carefully reinstall the face of the thermometer.
• Scan the QR Code below for the Thermometer Calibration Service Video.
Loading ...
Loading ...
Loading ...