Loading ...
Loading ...
Loading ...
En
17
Basic Operation
Playing tracks and outputting the sound
The following is the procedure for outputting the channel 1 sound as an
example.
! Set the volume of the components (power amplifier, powered speak-
ers, etc.) connected to the [MASTER 1] and [MASTER 2] terminals to
an appropriate level. Note that loud sound is output if the volume is
set to high.
6
5
4
8
7
a
b
c
9
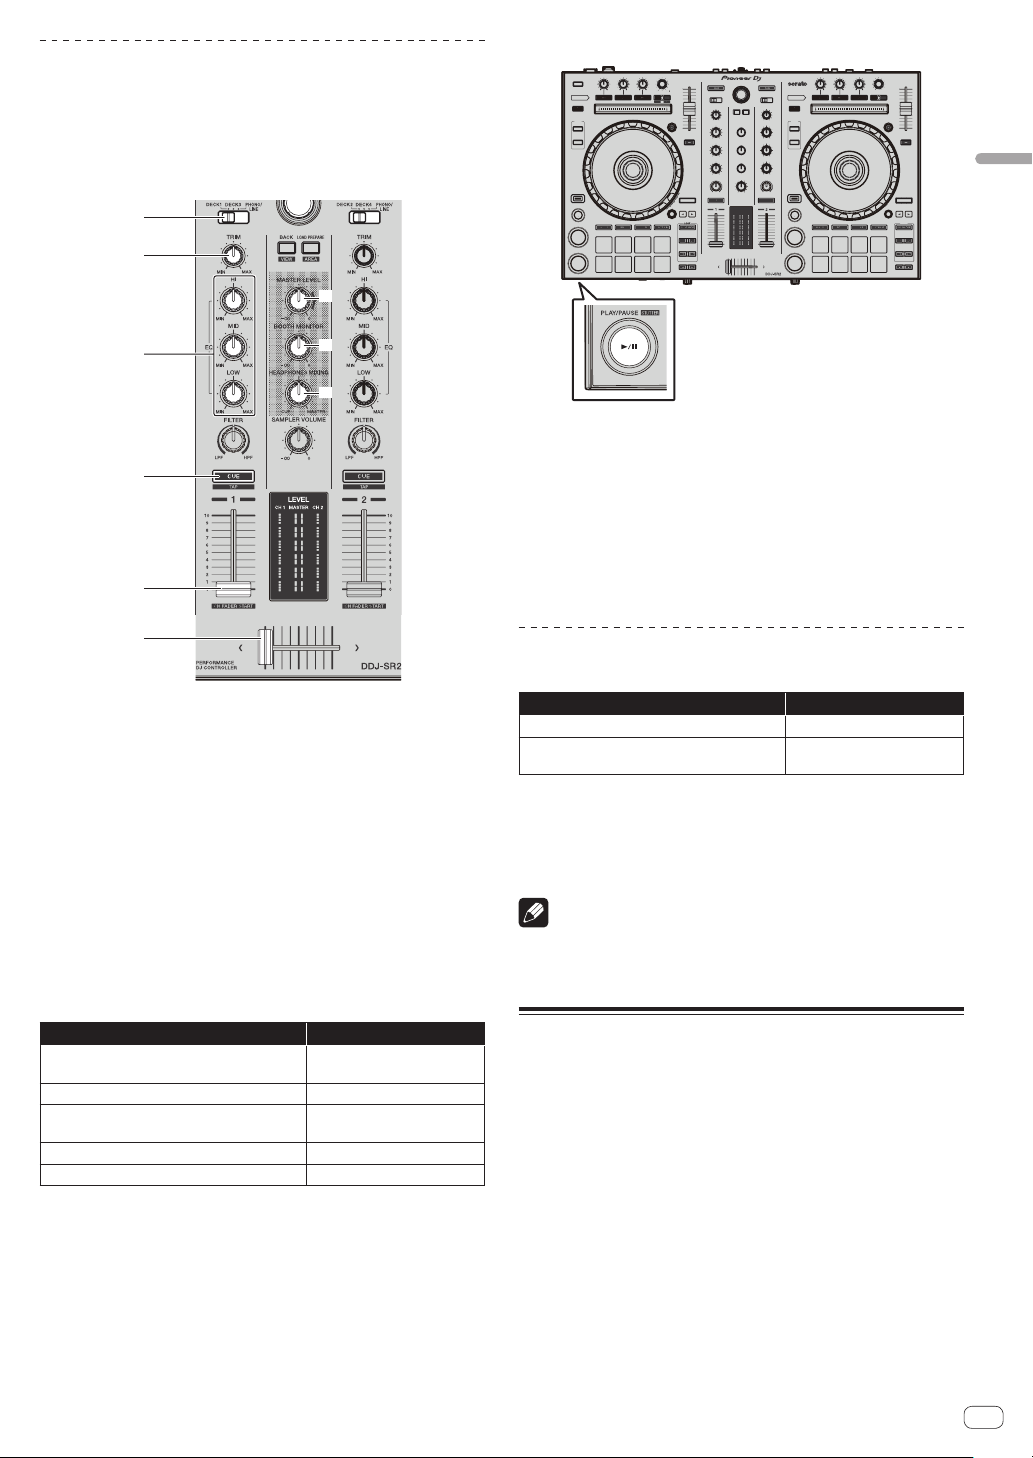
4 INPUT SELECT switch
5 TRIM control
6 EQ (HI, MID, LOW) controls
7 Headphones CUE button
8 Channel fader
9 Crossfader
a MASTER LEVEL control
b BOOTH MONITOR control
c HEADPHONES MIXING control
1 Set the controls, etc. as follows.
Name of part Operation
MASTER LEVEL control
Rotate it clockwise until it
stops.
INPUT SELECT switch Set to the [DECK] position.
TRIM control
Rotate it clockwise until it
stops.
EQ (HI, MID, LOW) controls Set to the center position.
Channel fader Move it forward.
2 Press the [f] button to play the track.
3 Turn the [TRIM] control.
Adjust the [TRIM] control to confirm that the channel level indicator
lights up in orange at the highest volume.
4 Move the channel fader forward.
5 Rotate the [MASTER LEVEL] control to adjust the
sound level of the speakers.
Adjust the level of sound output from the [MASTER 1] and [MASTER 2]
terminals to an appropriate level.
Monitoring sound with headphones
Set the controls, etc. as follows.
Name of part Operation
HEADPHONES MIXING control Set to the center position.
HEADPHONES LEVEL control
Rotate it clockwise until it
stops.
1 Press the headphones [CUE] button for the channel 1.
2 Rotate the [HEADPHONES LEVEL] control.
Adjust the level of sound output from the headphones to an appropriate
level.
Note
This unit and the Serato DJ software provide various functions that
enable individualistic DJ performances. For details on those functions,
see the manual provided for the Serato DJ software.
Turning off the system
1 Close [Serato DJ].
A confirmation message for closing the software appears on the screen.
Click [Yes] to close.
2 Press the [STANDBY/ON] switch on the rear panel of
this unit to set this unit to standby mode.
3 Disconnect the USB cable from the computer.
Loading ...
Loading ...
Loading ...