Loading ...
Loading ...
Loading ...
92
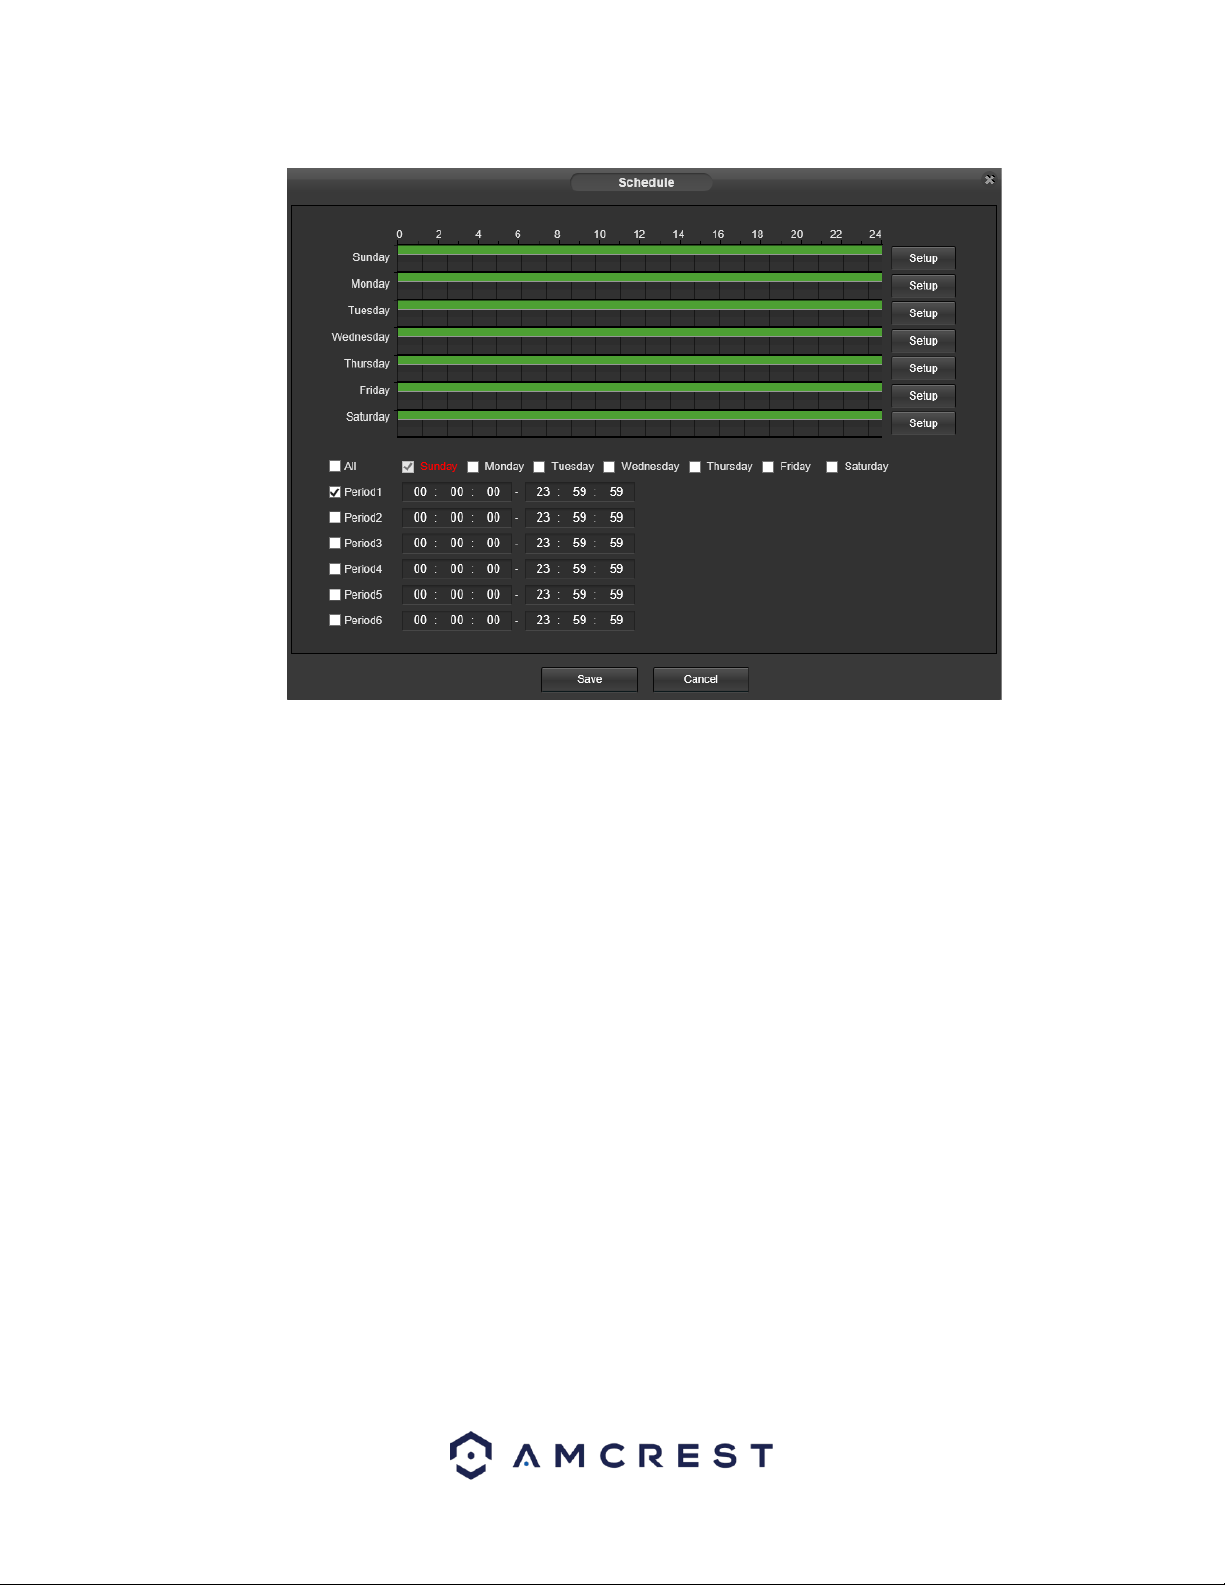
• Schedule: Clicking this button opens a weekly schedule that can be used to set times.
o Click and drag to set video tampering for certain days of the week. Also, periods of video tampering can be set for each day
and enabled using the period settings on the bottom half of the screen. There are a total of 6 periods that can be set.
• Record: This checkbox allows the user to enable the camera to record video when a video tampering alarm is triggered.
• Record Delay: This field specifies in seconds how long the delay between alarm activation and recording should be.
• Relay Out: This checkbox allows the user to enable the camera to trigger a connected alarm (connected to the alarm port on
the back of the camera) when a video tamper alarm is triggered.
• Alarm Delay: This field specifies in seconds how long the delay between alarm activation and Relay alarm activation should
be.
Send Email: This checkbox allows the user to enable the camera to send an email when a video tampering alarm is triggered.
• Snapshot: This checkbox allows the user to enable the camera to take a snapshot when a video tampering alarm is triggered.
To reset to default settings, click the Reset Defaults button. To refresh the page, click the Refresh button. To save the
settings, click the Save button.
5.4.3.3 Abnormality
This menu allows the user to adjust abnormality event settings. This menu has 3 tabs: SD Card, Network, and Illegal Access.
5.4.3.3.1 SD Card
This tab allows the user to set the camera’s response to an SD card related abnormality. Below is a screenshot of the SD card
tab screen:
Loading ...
Loading ...
Loading ...