Loading ...
Loading ...
Loading ...
6
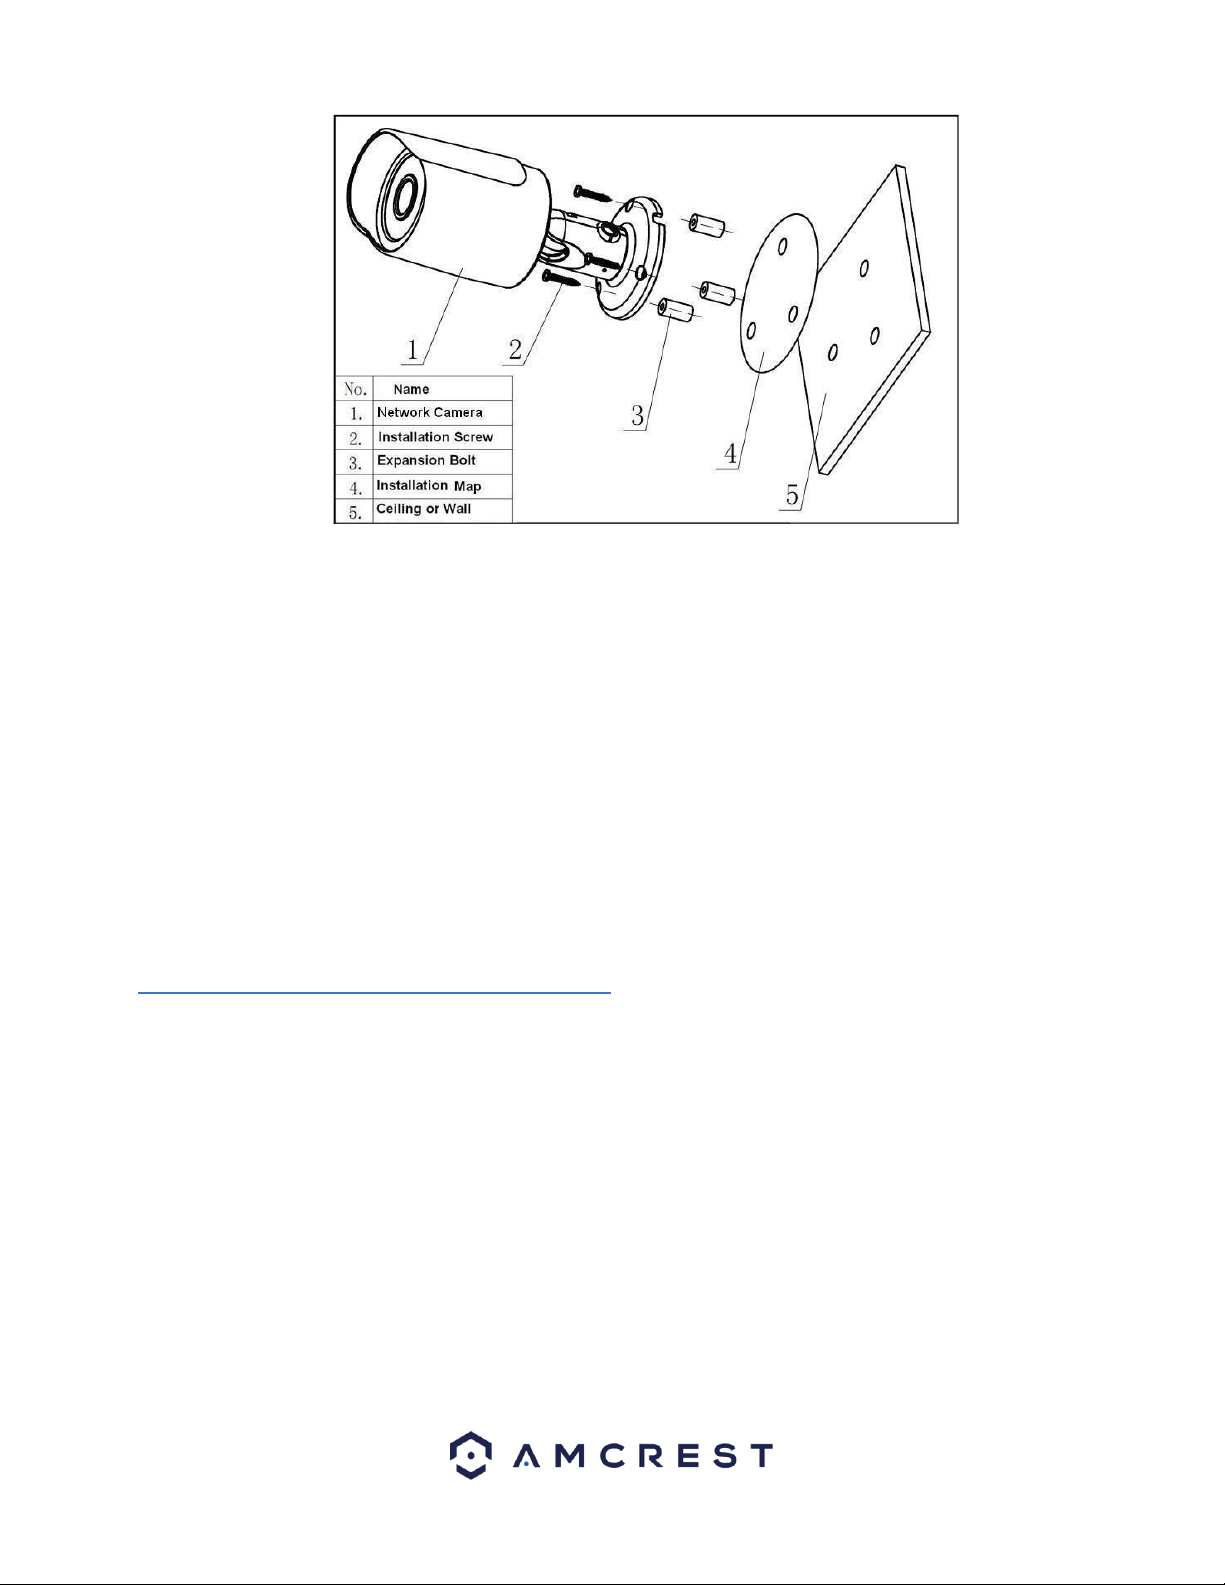
1. Stick the installation sticker on the designated surface where the device will be installed (wall or ceiling).
2. Drill 3 holes through the holes on the installation sticker.
3. Open the accessories bag and take out the expansion bolt and insert it into the holes.
4. Open accessories bag and take out the screws. Tighten the 3 screws to fix the device on the installation surface (wall or
ceiling).
5. Loosen the sunshade screw to move it around to the desired position, then tighten the screw to lock it into place.
6. Plug in the camera to power it, using either an Ethernet or power cable.
7. Using a Philip’s head screwdriver, (not included) loosen the adjusting screw near the base of the camera. This allows the
camera to be rotated, as well as pivoted within the ball joint.
8. Adjust the device to the desired position.
9. Using a Philip’s head screwdriver, (not included) tighten the adjusting screw near the base of the camera to lock the camera
in position.
Note: The process for mounting the eyeball camera is similar, but some of the steps may vary
3.2 MicroSD Card Installation Guide
To Install a microSD card into your camera, please refer to the step by step guide below:
Note: You will need a basic Phillips head screwdriver to complete the installation.
1. Locate and remove the protective plate located on the bottom portion of the camera. This plate can be found right above
the serial number sticker of the unit.
2. Remove the protective plate with a Phillips head screwdriver and locate the microSD card slot for the camera. It is located
right above the factory reset switch.
3. Insert the microSD card into the slot, gold pins down and press into place to lock the micro SD card in the slot.
Loading ...
Loading ...
Loading ...