Loading ...
Loading ...
Loading ...
67
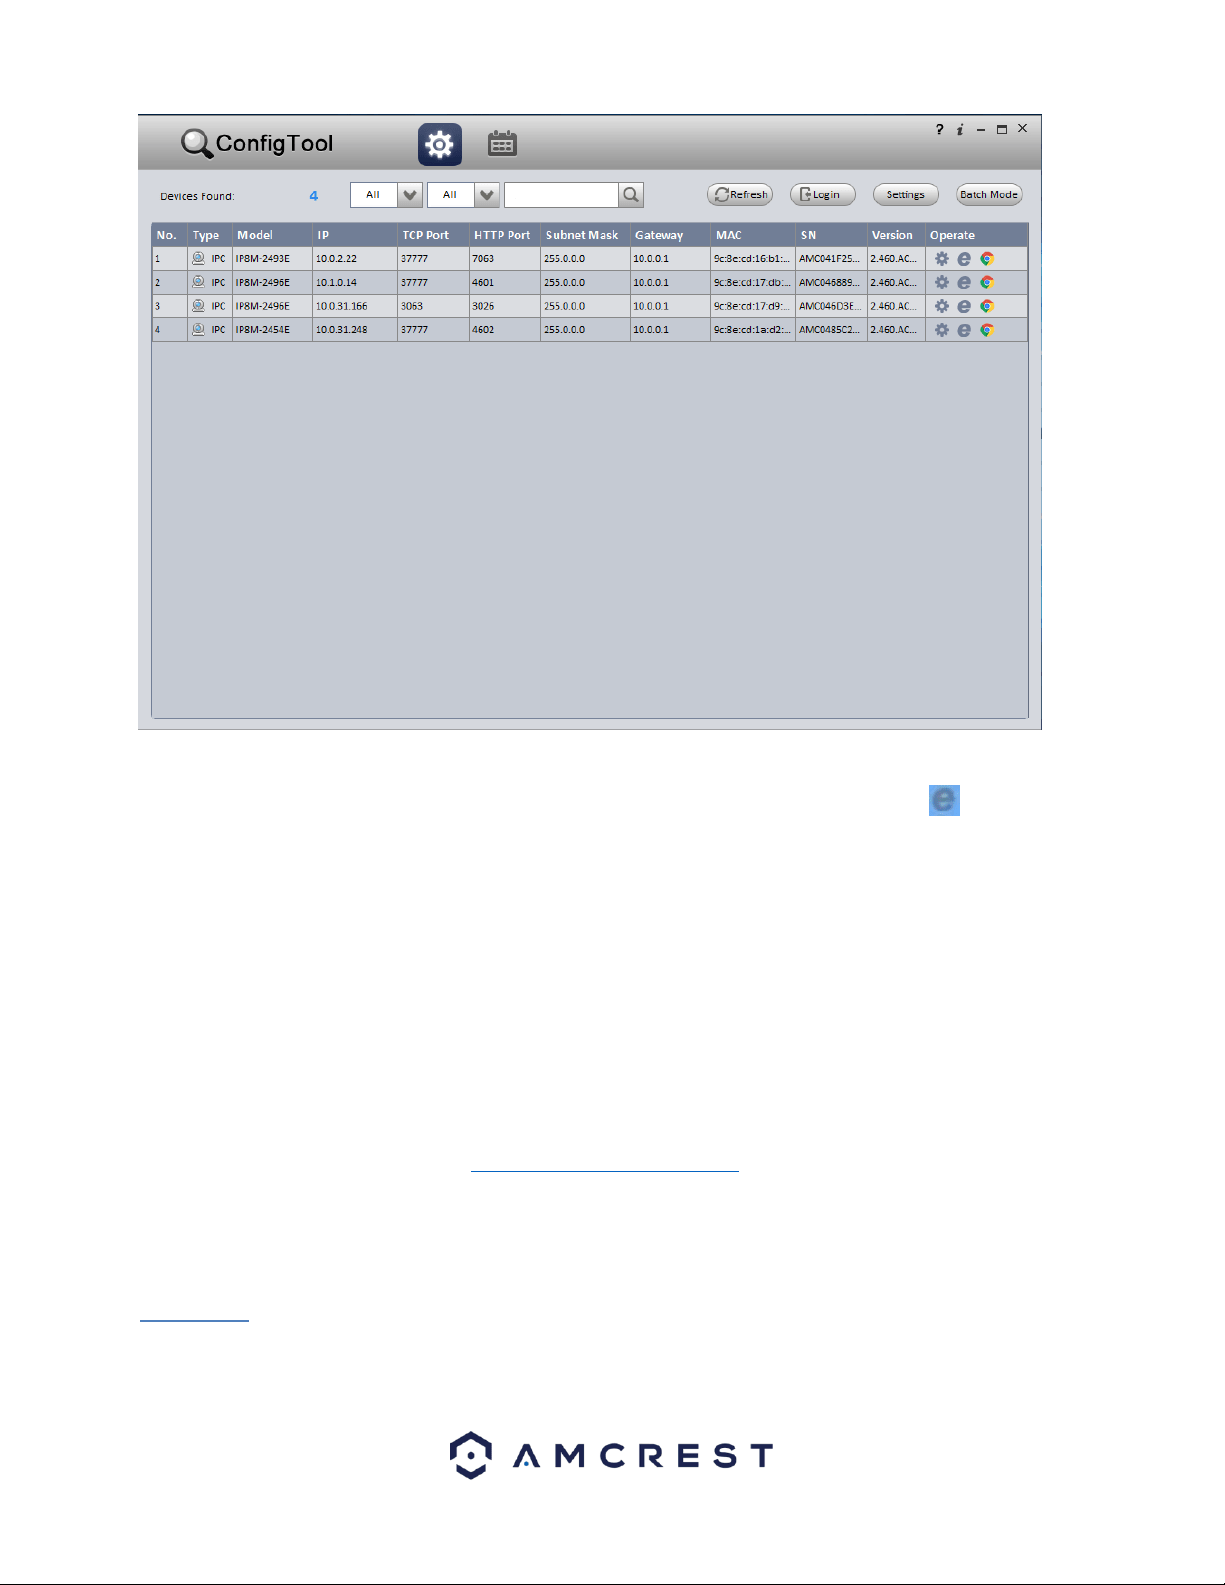
After launching the IP Config tool, click the Refresh button to bring up the cameras on the network.
Double click the camera’s line item to login and connect to the camera. Once logged in, click the
icon to open the camera’s interface in a web browser.
Log in to the camera using your login credentials (default username and password are both
“admin”). If this is your first-time logging into the camera, you will be prompted to change your
password. Please select a password that is at least 8 characters long, and one that uses a
combination of uppercase letters, lowercase letters, and numbers.
When opening the camera’s interface, the browser may prompt you to install a plugin. The plugins
are necessary for using the camera’s interface. Click install to download the plugin, and then click on
the plugin installation file to install the plugin. If the browser prompts you to allow the plugin to
work on the computer, hit Allow to ensure the plugin can run successfully.
The camera is now successfully set up for live viewing!
For additional assistance, please contact us at www.amcrest.com or give us a call at 1-888-212-7538.
Step by step video tutorials available at http://www.amcrest.com/videos
The main interface of the camera contains 6 major tabs on the top of the screen. By default, the interface opens on the Live
tab.
5.1. Live
This section of the manual details the camera’s interface, as well as all the operations the camera can perform.
The live view tab allows the user to see a live video feed from the camera. The live view tab has four main sections:
Loading ...
Loading ...
Loading ...