Loading ...
Loading ...
Loading ...
79
BeforeUse
BasicGuide
AdvancedGuide
CameraBasics
AutoMode
OtherShooting
Modes
PMode
PlaybackMode
SettingMenu
Wi-FiFunctions
Accessories
Appendix
Index
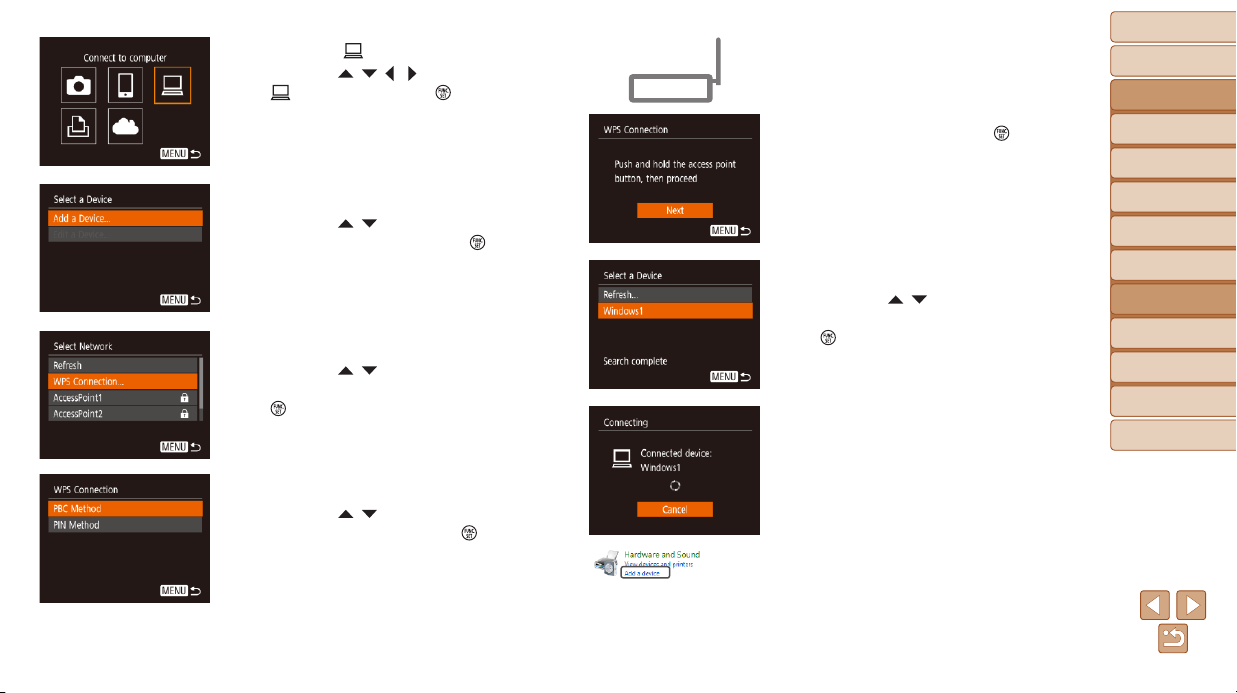
7 Establishtheconnection.
On the access point, hold down the WPS
connection button for a few seconds.
On the camera, press the [ ] button to
go to the next step.
The camera connects to the access point
and lists devices connected to it on the
[Select a Device] screen.
8 Choosethetargetdevice.
Press the [ ][ ] buttons to choose the
target device name, and then press the
[
] button.
9 Installadriver(rstWindows
connectiononly).
When this screen is displayed on the
camera, click the Start menu on the
computer, click [Control Panel], and then
click [Add a device].
3 Choose[ ].
Press the [ ][ ][ ][ ] buttons to choose
[
], and then press the [ ] button.
4 Choose[AddaDevice].
Press the [ ][ ] buttons to choose [Add
a Device], and then press the [
] button.
5 Choose[WPSConnection].
Press the [ ][ ] buttons to choose
[WPS Connection], and then press the
[
] button.
6 Choose[PBCMethod].
Press the [ ][ ] buttons to choose [PBC
Method], and then press the [
] button.
Loading ...
Loading ...
Loading ...