Loading ...
Loading ...
Loading ...

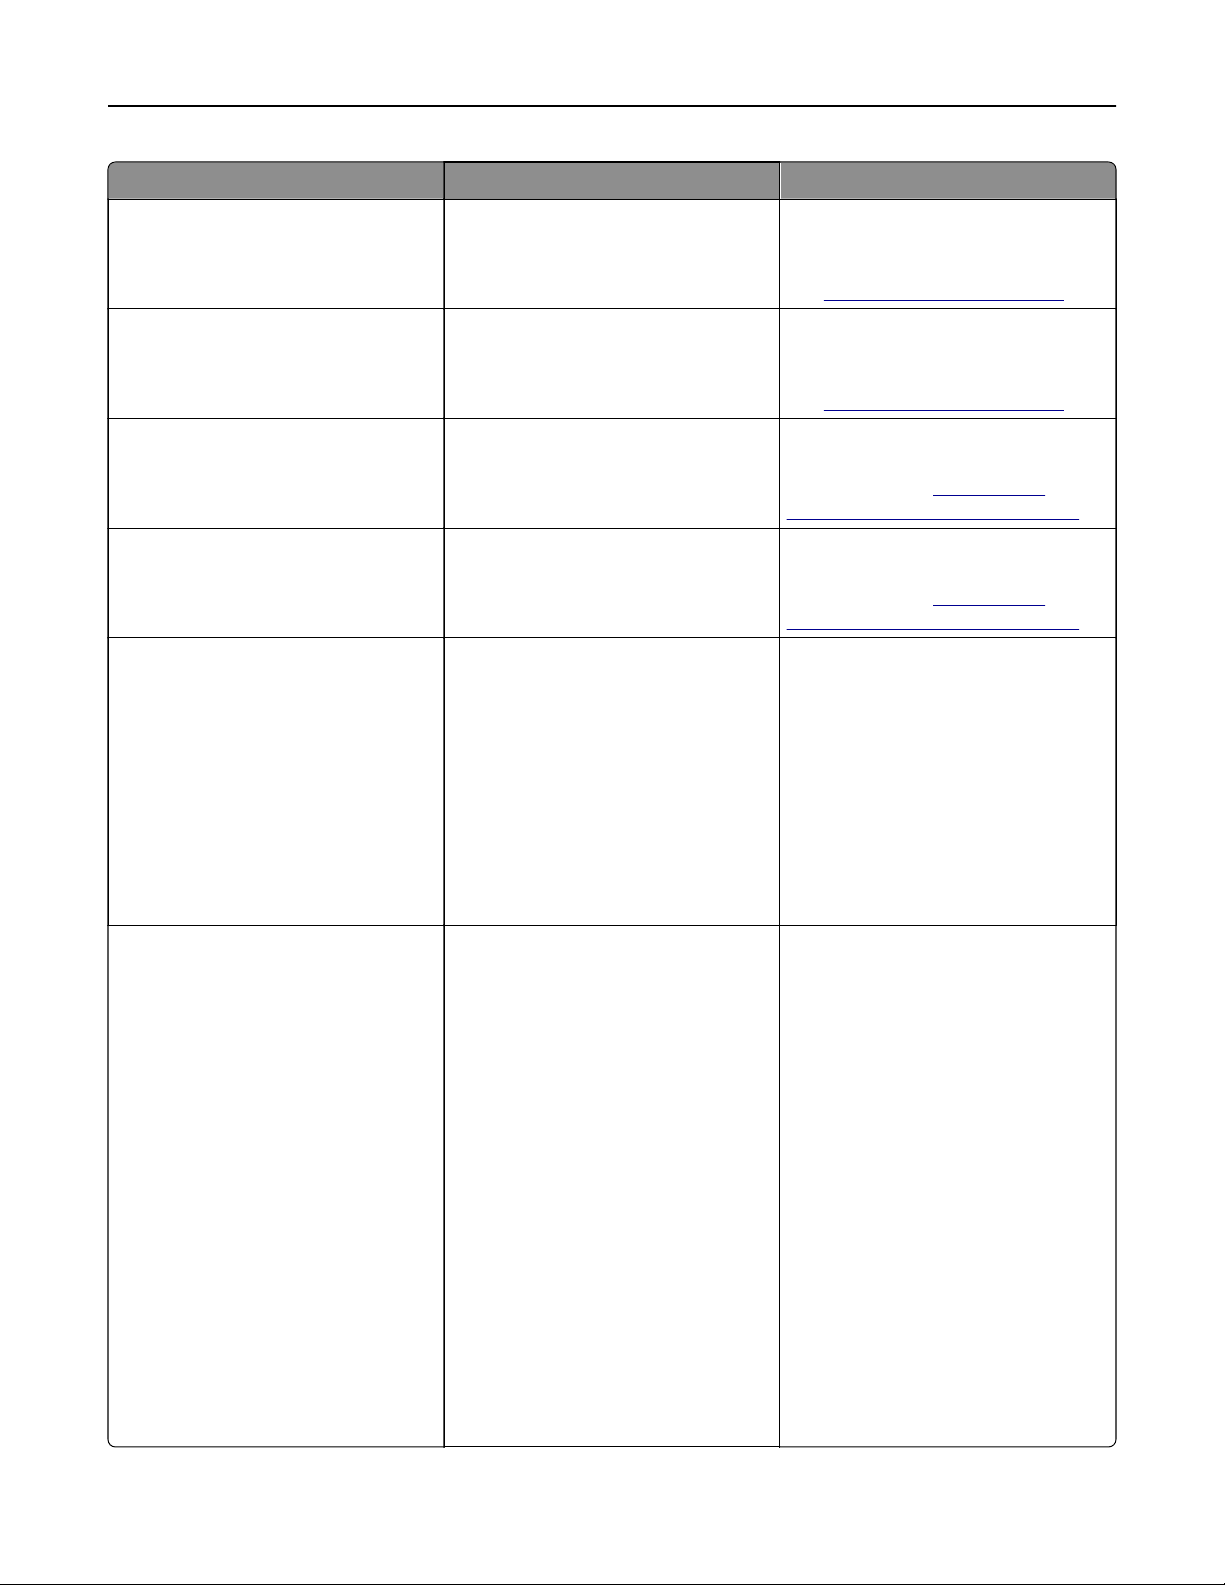
Error codes Error message Solution
12.11, 12.21 Change [source] to [type]
[size].
Remove paper from the indicated
tray, and then load the correct paper
type and size. For more information,
see
“Loading trays” on page 46.
12.12, 12.22 Change [source] to [type]
[size] [orientation].
Remove paper from the indicated
tray, and then load the correct paper
type and size. For more information,
see
“Loading trays” on page 46.
12.91 Change multipurpose feeder
to [type] [size].
Remove paper, and then load the
correct paper type and size. For more
information, see
“Loading the
multipurpose feeder” on page 48.
12.92 Change multipurpose feeder
to [type] [size]
[orientation].
Remove paper, and then load the
correct paper type and size. For more
information, see
“Loading the
multipurpose feeder” on page 48.
29.08 Remove packaging, imaging
unit.
1 Open door A.
2 Remove the imaging unit.
3 Remove the toner cartridge from
the imaging unit.
4 Remove the packing material.
5 Insert the toner cartridge into the
imaging unit until it clicks into
place.
6 Insert the imaging unit, and then
close the door.
31.40z Reinstall missing or
unresponsive black
cartridge.
1 Open door A.
2 Remove the imaging unit.
3 Remove the cartridge from the
imaging unit.
Warning—Potential
Damage: Do not expose the
imaging unit to direct light for
more than 10 minutes. Extended
exposure to light may cause
print quality problems.
Warning—Potential
Damage: Do not touch the
photoconductor drum. Doing so
may aect the quality of future
print jobs.
4 Insert the cartridge into the
imaging unit.
5 Insert the imaging unit.
6 Close the door.
Troubleshoot a problem 183
Loading ...
Loading ...
Loading ...
