Loading ...
Loading ...
Loading ...
Altitude Measurement
The watch takes altitude readings and
displays results based on air pressure
measurements taken by a built-in pressure
sensor.
Important!
●
The altitude readings displayed by the
watch are relative values that are
calculated based on barometric
pressure measured by the watch’s
pressure sensor. This means that
barometric pressure changes due to
weather can cause altitude readings
taken at the same location to be
different. Also note that the value
displayed by the watch may be
different from the actual elevation and/
or sea level elevation indicated for the
area where you are located. When
using the watch’s altimeter while
mountain climbing, it is recommended
that you regularly calibrate its readings
in accordance with local altitude
(elevation) indications.
l
Calibrating Altitude Readings
●
The altitude correction value you
specify and/or barometric pressure
changes may cause a negative value
to be displayed.
●
Check the information at the link below
to find out about how to minimize
differences between readings
produced by the watch, and values
provided by local altitude (elevation)
indications.
l
Altitude Reading Precautions
Checking the Current
Altitude
1. Enter the Altimeter Mode.
l
Navigating Between Modes
l
Changing Displayed Information
Entering the Altitude Mode will start
altitude measurement and display the
altitude at your current location.
●
The watch takes altitude readings every
second for about the first three minutes.
After that, it takes readings according to
the watch’s auto measurement interval
setting.
●
Check the information at the link below
to find out how to configure the auto
measurement interval.
l
Setting Up the Auto Measurement
Interval
●
To retrigger measurement, press (C).
●
Press (E) to return to the Timekeeping
Mode.
Note
●
Measurement range: -10,000 m to
10,000 m (-32,800 to 32, 800 feet)
(Measurement unit: 1 meter (5 feet))
Note that calibrating altitude readings
will cause a change in the
measurement range.
●
[----] will appear for the measured value
if it is outside the allowable range.
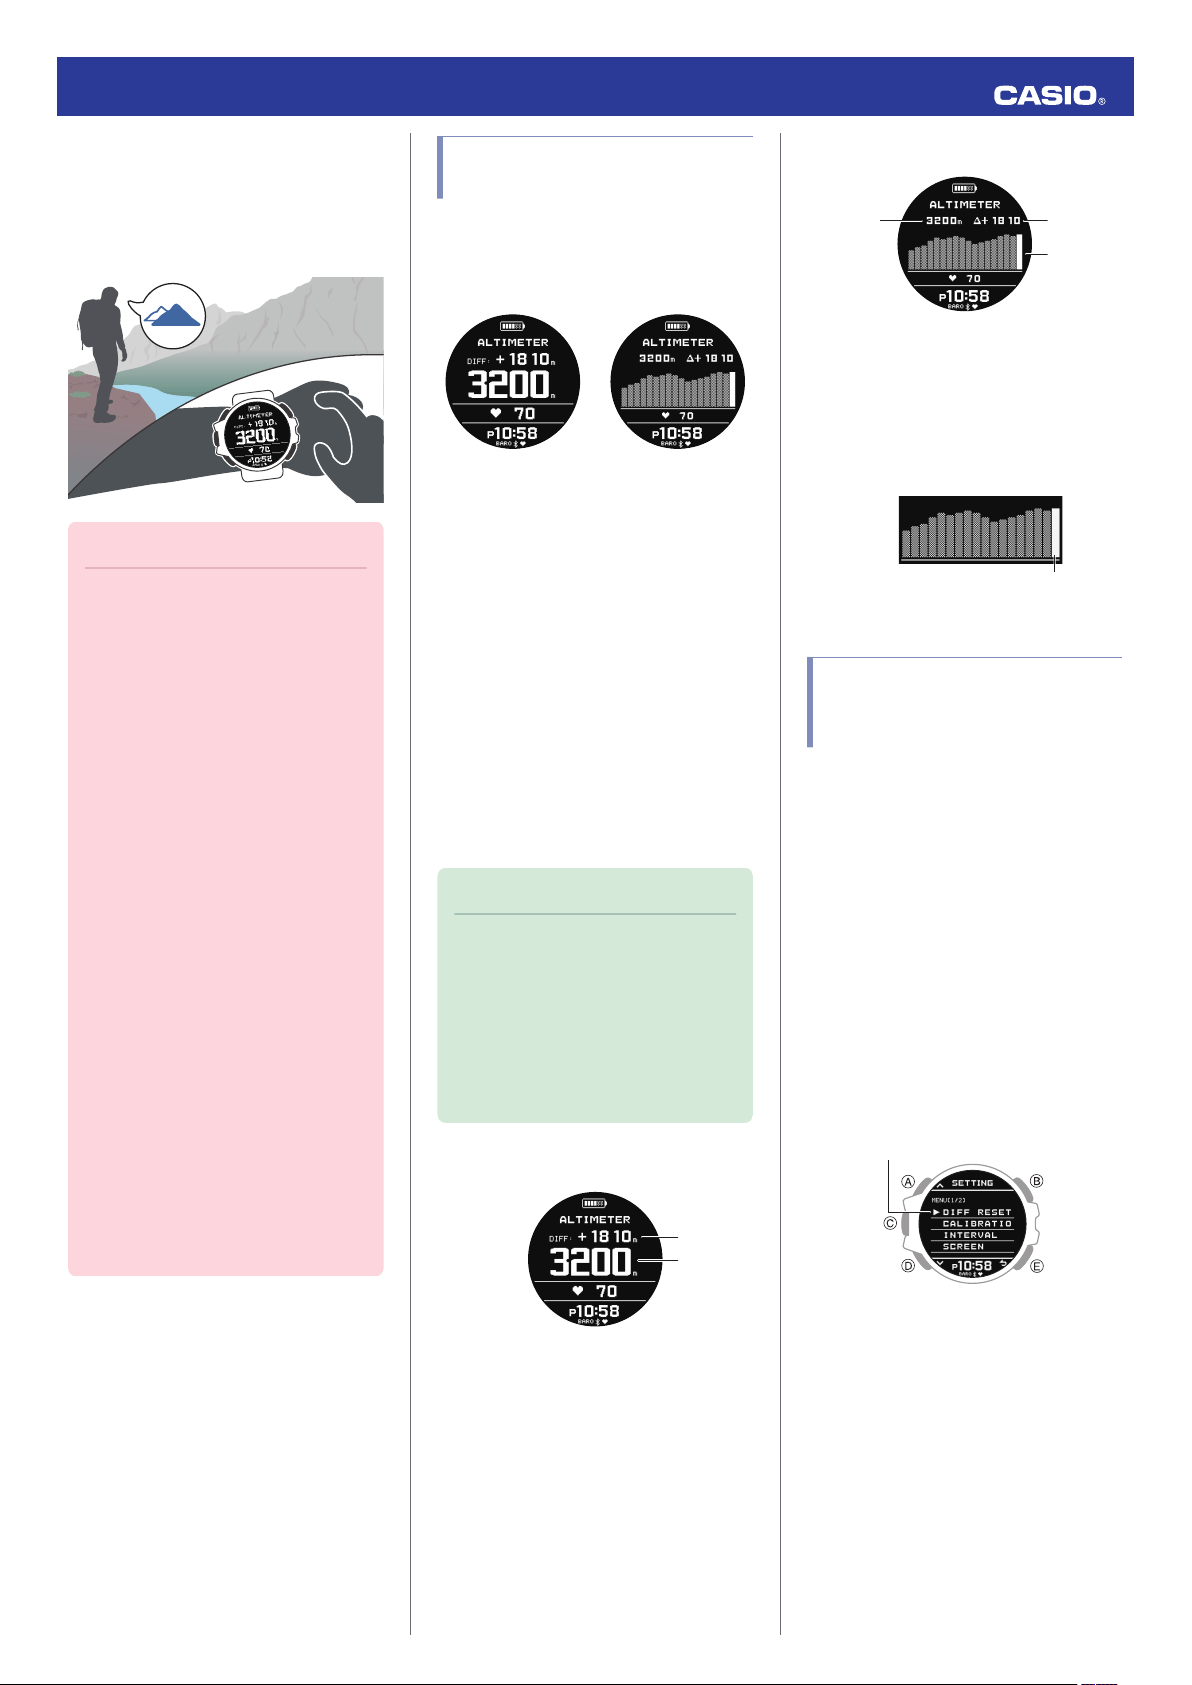
Value Screen
②
①
Graph Screen
①②
③
A Current location altitude
B Differential between reference altitude
and current altitude
C Altitude graph
Current reading
Setting a Reference Altitude
and Taking Relative Altitude
Readings
You can use the procedure below to display
the differential between a reference altitude
and another altitude. This makes it easy to
measure the altitude differential between two
points while climbing or trekking.
1. Use the contour lines on your map to
determine the altitude differential between
your current location and your destination.
2. Take an altitude reading of your current
location.
l
Checking the Current Altitude
3. Hold down (A) for at least two seconds.
This displays the Altimeter Mode setting
screen.
Pointer
4. Use (A) and (D) to move the pointer to
[DIFF RESET].
5. Use (C) to set your current location’s
altitude as the reference altitude.
This makes the altitude differential ±0 m
(±0 feet).
Operation Guide 3475
36
Loading ...
Loading ...
Loading ...