Loading ...
Loading ...
Before Getting
Started...
This section provides an overview of the watch
and introduces convenient ways it can be
used.
●
What you can do with this watch
●
Acquisition of accurate time and location
information by receiving GPS signals and
connecting with a phone
●
Measurement and recording of running and
other data
ー
Auto run detection
ー
Auto lap
ー
Auto pause
ー
Training log data recording
●
Heart rate measurement
●
Measurement of calories burned
●
Step count
●
Measurement of direction, altitude,
barometric pressure, and temperature
●
Transfer of data to your phone for viewing
with the app
Important!
●
This watch is not a special-purpose
measuring instrument. Measurement
function readings are intended for
general reference only.
●
Whenever using the Digital Compass
of this watch for serious trekking,
mountain climbing, or other activities,
be sure to always take along another
compass to confirm readings. If the
readings produced by the Digital
Compass of this watch are different
from those of the other compass,
perform 3-point calibration or figure 8
calibration of the watch compass to
correct direction measurement.
ー
Compass readings and calibration
will not be possible if the watch is in
the vicinity of a permanent magnet
(magnetic accessory, etc.), metal
objects, high-voltage wires, aerial
wires, or electrical household
appliances (TV, computer,
cellphone, etc.)
l
Digital Compass
●
The watch’s Altimeter Mode calculates
and displays relative altitude based on
barometric pressure readings
produced by its pressure sensor.
Because of this, altitude values
displayed by the watch may be
different from your actual elevation
and/or sea level elevation indicated for
the area where you are located.
Regular calibration in accordance with
the local altitude (elevation)
indications is recommended.
l
Altitude Measurement
Note
●
The illustrations included in this
operation guide have been created to
facilitate explanation. An illustration
may differ somewhat from the item it
represents.
●
For more accurate display values,
create your profile before using heart
rate measurement or the Training
Function.
l
Creating Your Profile
●
Depending on the version of your
watch’s software, its operations and
display contents may differ from those
described in this Operation Guide.
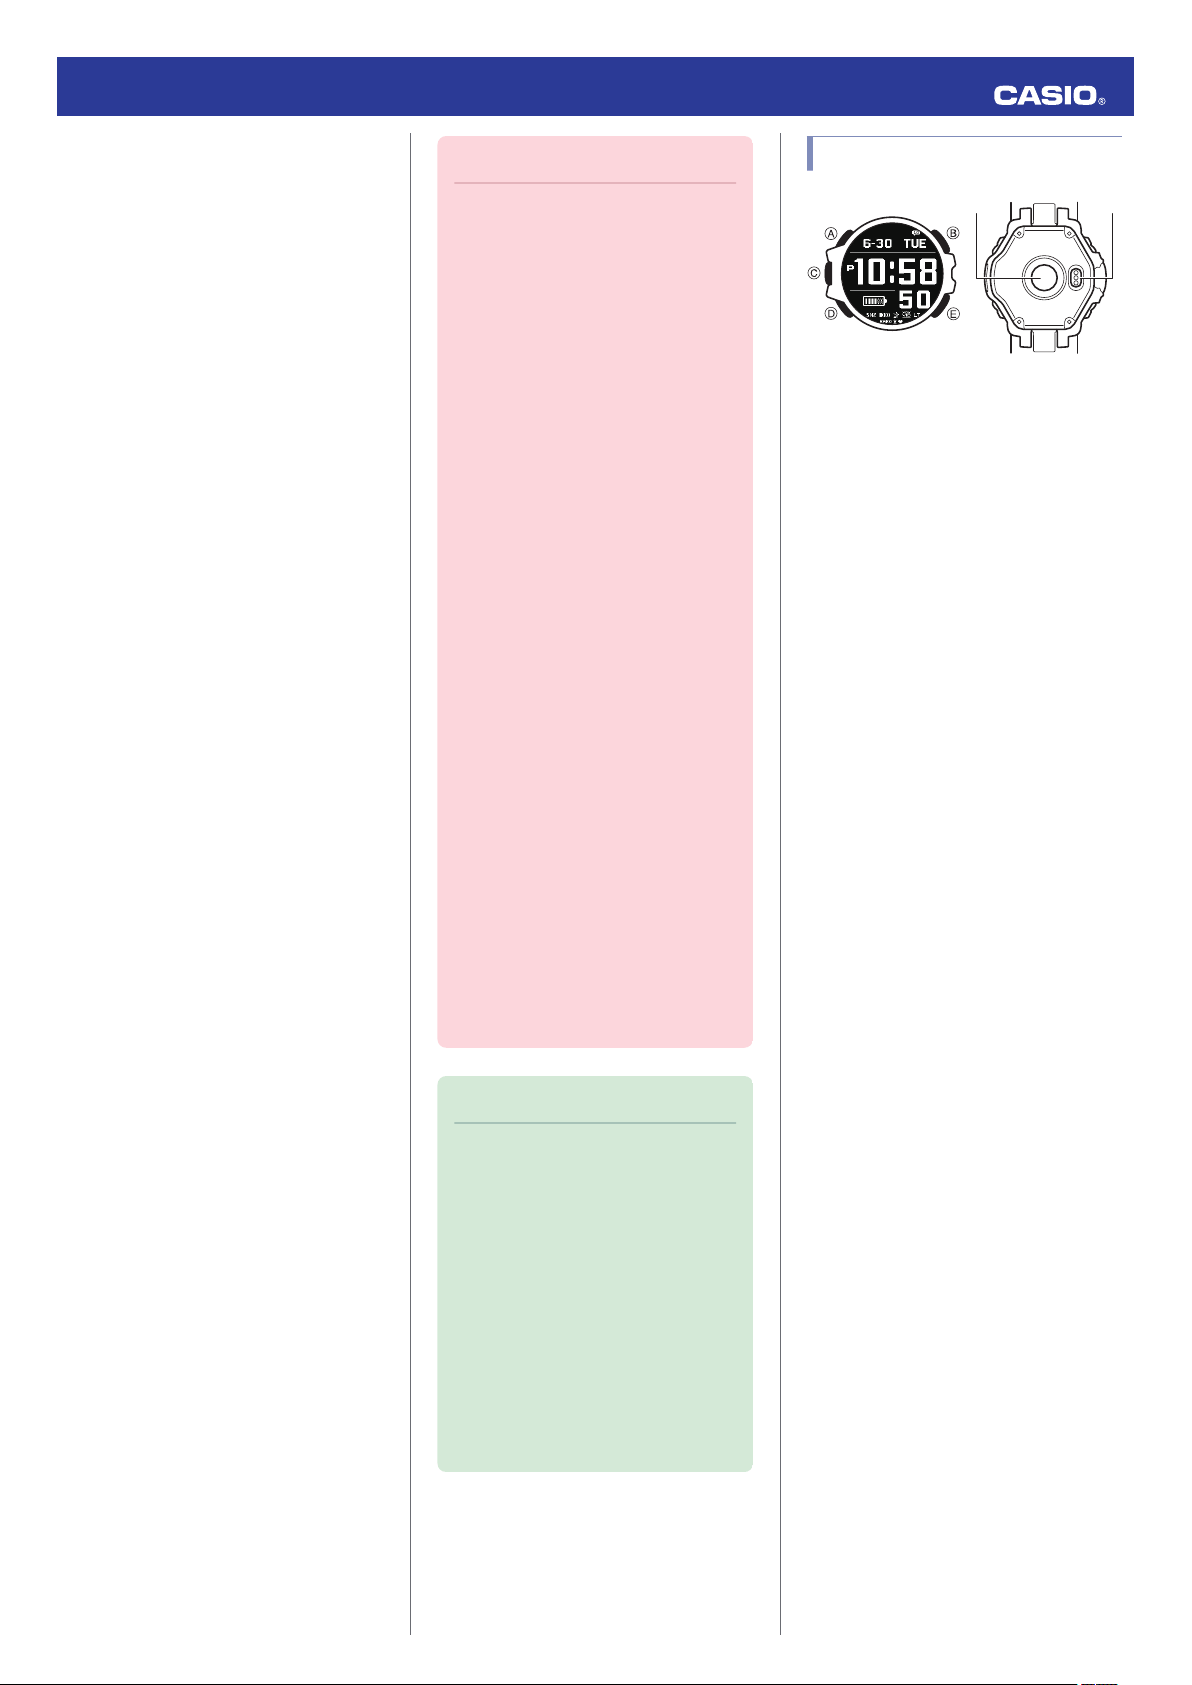
General Guide
①②
A button
Pressing this button in any mode cycles
between displays.
While a setting screen is displayed, pressing
this button scrolls available menu items
upwards.
B button
Press to turn on illumination.
C button
In the Timekeeping Mode, pressing this button
enters the Training Mode.
Pressing this button while any mode’s setting
screen is displayed applies all of the screen’s
pending settings or changes.
D button
Hold down this button for at least one second
to return to the Timekeeping Mode. Pressing
this button while a run timing operation is in
progress returns to the run timing screen.
Pressing this button while a setting screen is
displayed scrolls available menu items
downwards.
E button
In other modes, pressing this button returns to
the Timekeeping Mode.
While configuring settings, pressing this
button goes back to the previous screen.
A
Optical sensor (heart rate detection)
Detects your pulse for heart rate
measurement.
B
Charging terminal
Plug in the charger cable here to connect to a
device with a USB terminal for charging.
l
Charging with the Charger Cable
Operation Guide 3475
3
Loading ...
Loading ...
Loading ...