Loading ...
Loading ...
Loading ...
Note
●
Pressing (C) (step 3 of this procedure)
before the [GPS CAPTURE] message
appears causes run timing to start
using the watch’s accelerometer. Note
that your route is not recorded during
run timing using the accelerometer.
If you want your route to be recorded,
make sure that the [GPS CAPTURE]
message is displayed before you start
run timing.
●
It can take from about 30 seconds to
two minutes after you press (C) in step
2 for run timing using GPS to become
enabled. Under some signal reception
conditions, it may take as long as five
minutes.
Enabling run timing using GPS will
automatically cause the Training Mode
screen to appear.
Training Mode
3. Press (C).
Start run timing.
Note
●
The screen shown in step 2 of the
above procedure will not appear if the
Airplane Mode is enabled or if the GPS
setting is off.
●
You can find out the current GPS status
by checking whether or not the
mark on the display is flashing.
Not flashing: GPS enabled
Flashing: GPS disabled (Watch is
searching for GPS signals.)
●
After [GPS CAPTURE] appears and
is on the display, it means that the
GPS signal was lost and the watch is
searching for a signal.
●
If, while run time is being performed,
starts flashing on the display or
appears on the display, it means that
the watch is performing measurement
using its accelerometer and that your
route is not being recorded.
●
Entering the settings of the Compass,
Altimeter, Barometer, or Temperature
Mode during training will cause run
timing using GPS to stop momentarily.
The watch will start searching for GPS
signals again when you exit the setting.
If you want to use GPS for your run
timing, wait until [GPS CAPTURE]
appears on the display before you
start.
●
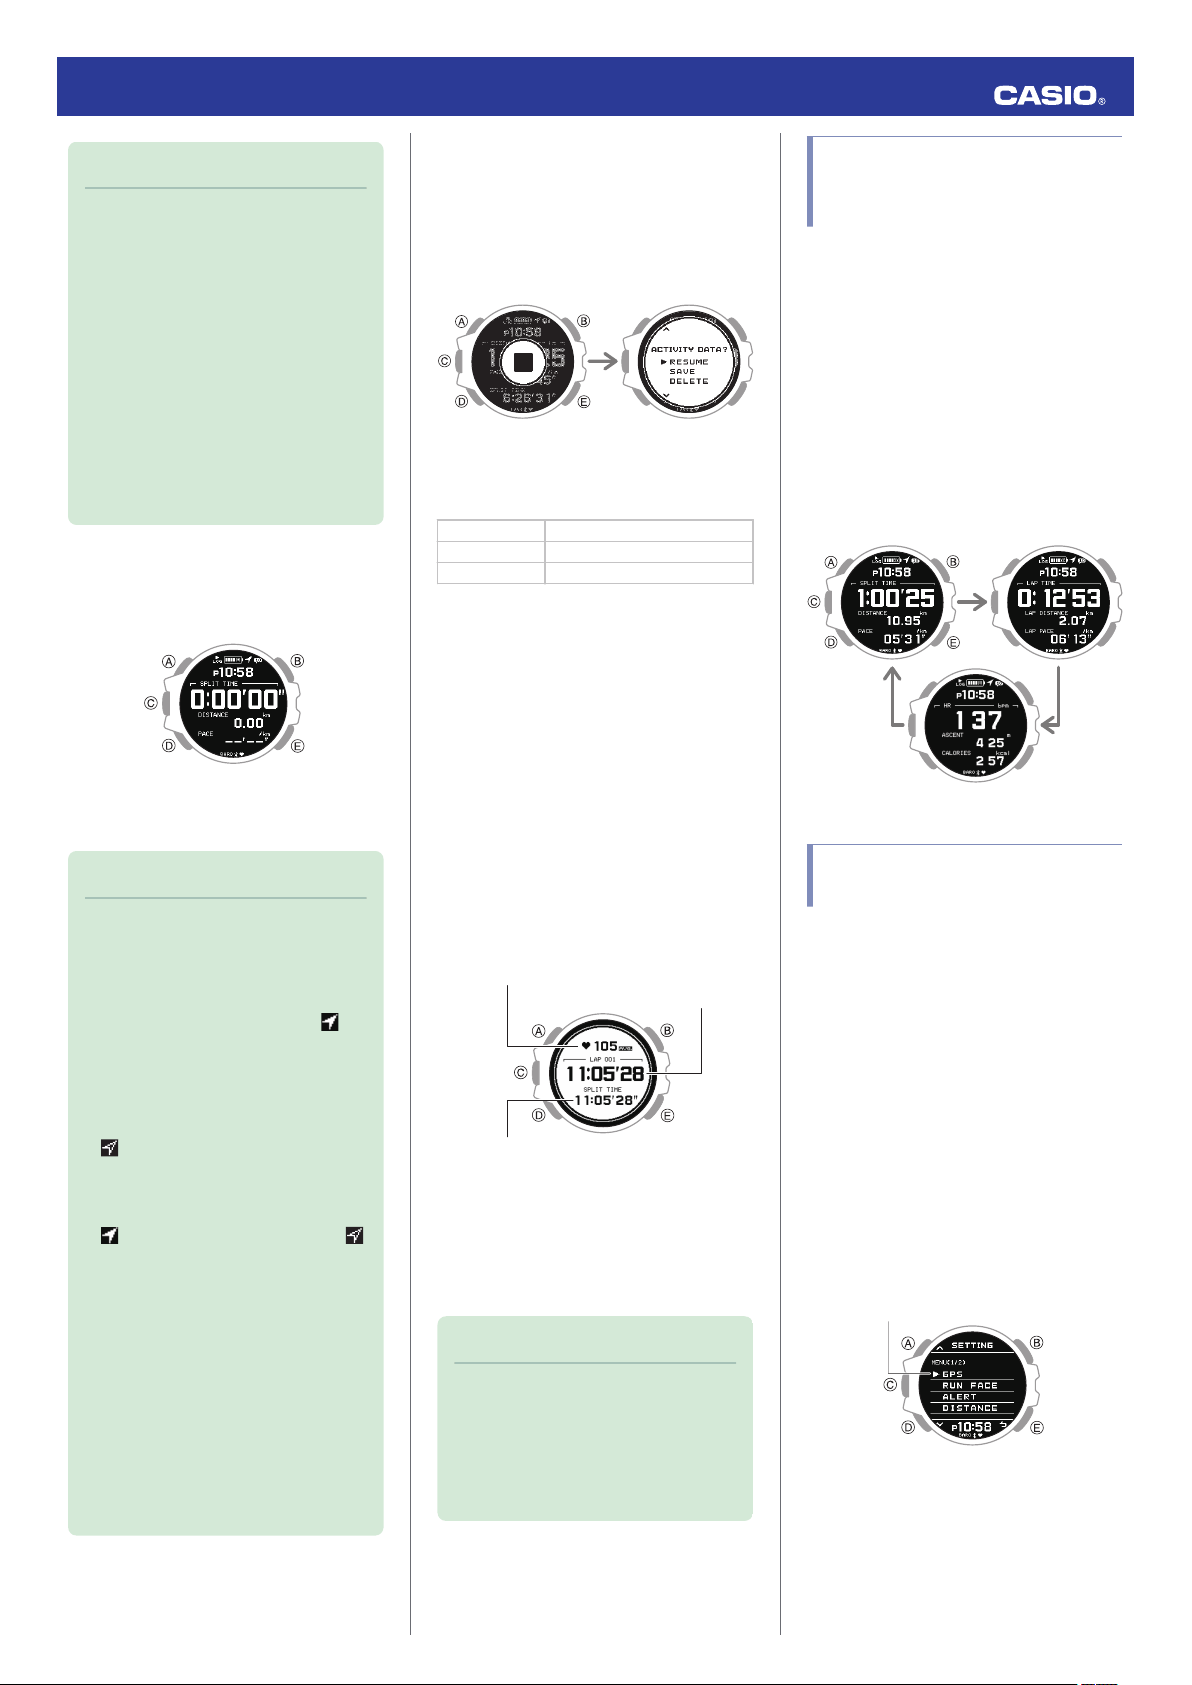
Pausing Run Timing
1. While the run timing screen is displayed,
press (C).
This pauses run timing and displays the
pause menu screen.
Pause Pause menu
2. Use (A) and (D) to select what you want to
do with the run timing data you have just
measured.
[RESUME] Resumes timing.
[SAVE] Saves data.
[DELETE] Deletes data.
3. Press (C).
●
If you select the data save option, the
run timing result screen will appear.
Pressing any button returns to the
Timekeeping Mode.
●
If you select the data delete option, the
watch returns to the Timekeeping
Mode.
●
Measuring Lap Times
1.
Start run timing.
l
Starting Run Timing
2. Press (E).
Each press of (E) displays the elapsed
time of the current section (lap time) to
appear.
Split time, lap distance
Lap time
Heart rate (average, maximum)
3. Press (A) or (D) to return to the run timing
screen.
●
If you do not perform any button
operation, the watch will return to the
run timing screen automatically after
about 10 seconds.
Note
●
You can change the lap time display
using G-SHOCK MOVE. Each of the
screens displays the items below.
ー
Heart rate [AVG] (average), lap time,
[SPLIT TIME] (split time)
ー
Heart rate [MAX] (maximum), lap
time, [DISTANCE] (lap distance)
Changing Display
Information During Run
Timing
One of three screens can be displayed during
run timing (Training Mode), and you can
specify the items you want to appear on each
screen.
This means you can configure a screen with
the items you want to monitor and display that
screen while you train.
l
Specifying the Screen to be Displayed
During Running (RUN FACE)
You can navigate between display screens by
pressing (A).
Example:
Changing the GPS Receive
Interval
Use the procedure below to specify the
interval for receiving GPS signals to acquire
location information while running.
1. Enter the Timekeeping Mode.
l
Navigating Between Modes
2. Press (C).
This displays the GPS signal receive start
screen.
3. Press (A) or (D).
This displays the Training Mode screen.
4. Hold down (A) for at least two seconds.
This displays the Training Mode setting
screen.
Pointer
Operation Guide 3475
24
Loading ...
Loading ...
Loading ...